Add Images to the Gallery
Mura provides two methods for adding images to a gallery. Images can be uploaded either one at a time, or you can select multiple images to be queued for uploading which provides for a faster, more traditional file upload experience.
Adding One Image at a Time
Follow these steps to add a single image to the Photo Gallery:
- In Site Manager, mouse over the plus sign next to Photo Gallery and select Add Content.

- This should launch the Select Content Type dialog window with two options: Add Gallery Item and Quick Upload.
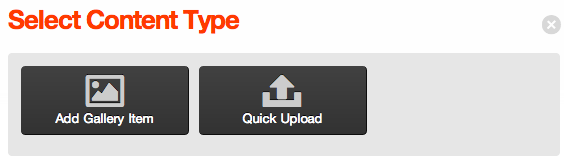
- Click Add Gallery Item.
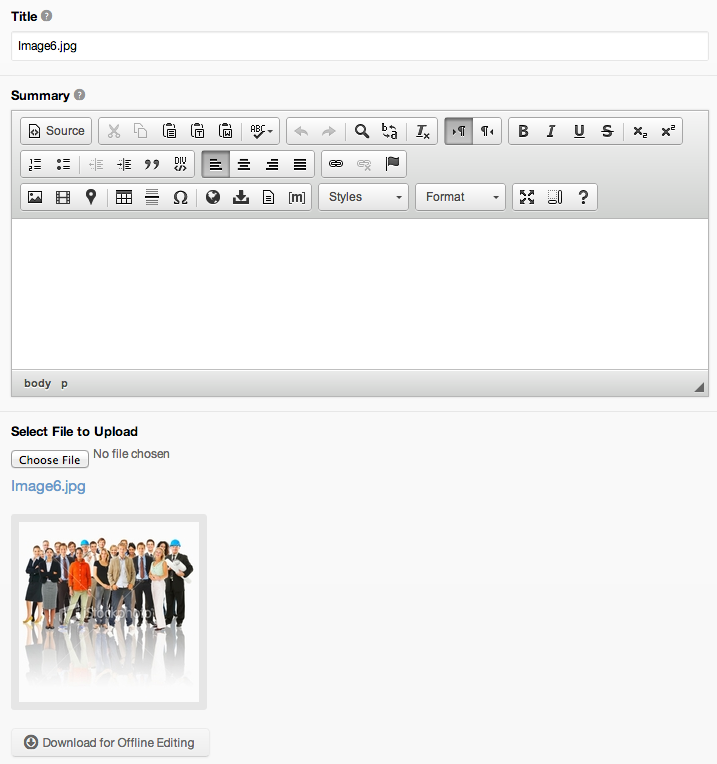
- The Edit Content screen should display.
- Complete the fields as follows:
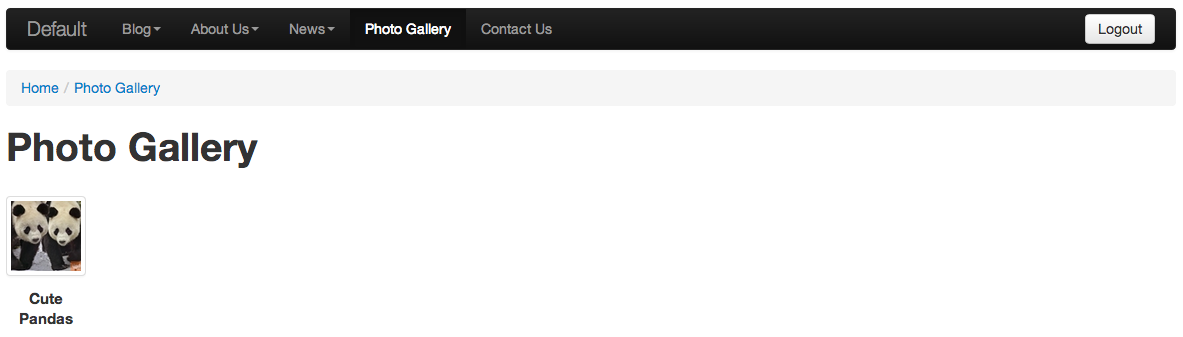
- Title: This is the title of the image that will display above the image on the image details page. For example, "Cute Pandas."
- Select Associated Image to Upload: This is the image file that you would like to add to the Gallery. For example, /1-mura-admin/sample-content/photo-gallery/Image1.jpg
- Click Publish
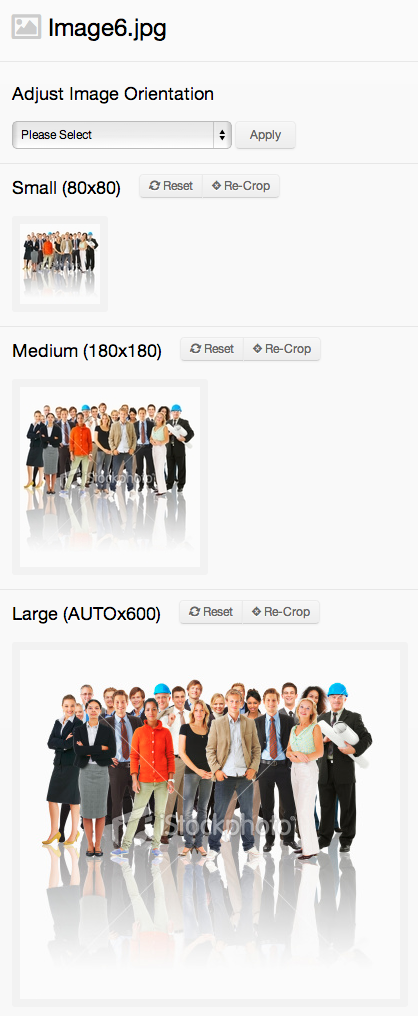
- The Image Details screen should now appear.

- If, for some reason, you are not satisfied with the way that the photo was automatically cropped, you can generate a new thumbnail for any of the default thumbnails. To generate a new thumbnail, follow these steps:
- Click Re-Crop on the desired thumbnail (e.g., Medium).
- A dialog window should open with the original image.
- Click and drag across the desired section of the image you wish to use ad the new thumbnail, then click Apply Cropping.
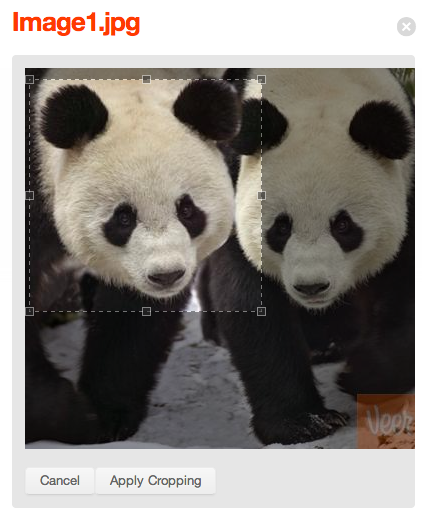
- The new thumbnail should now appear on the Image Details screen.
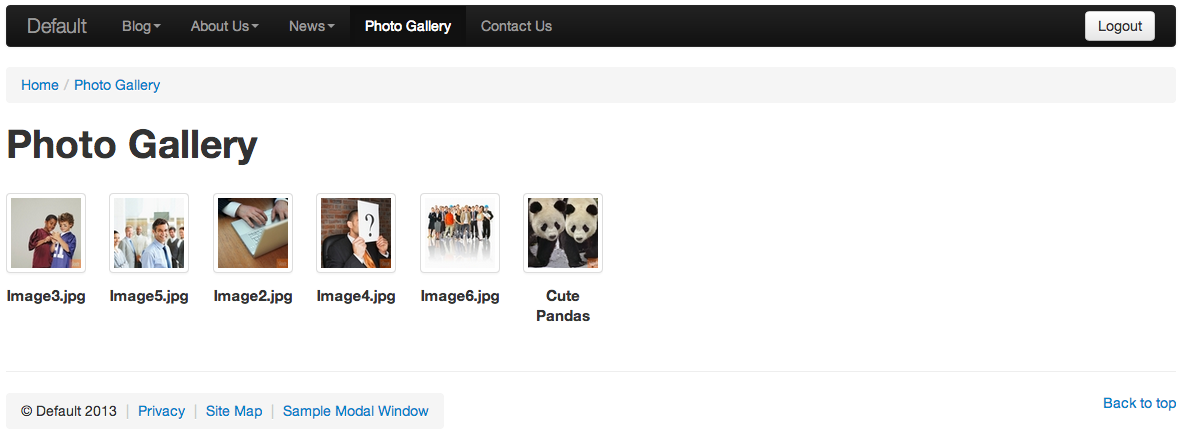
- Preview the Photo Gallery. Your Photo Gallery should looks similar to the following:
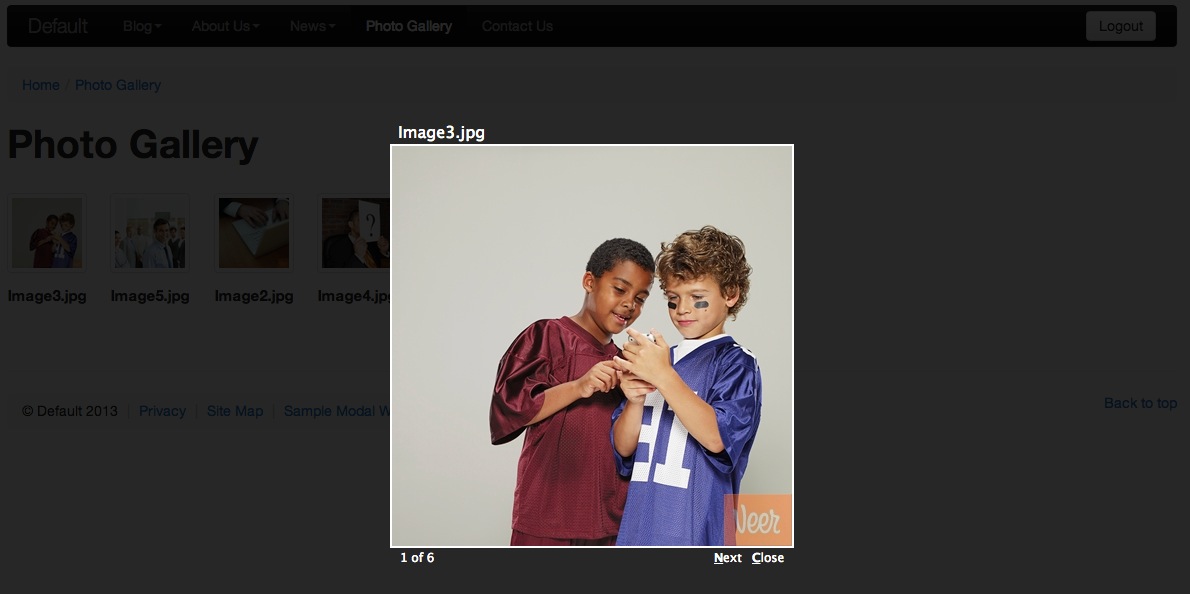
- Clicking the thumbnail image should launch a modal window to display the Large image.
Adding Multiple Images
Follow these steps to add multiple images to the Photo Gallery:
- In Site Manager, mouse over the plus sign next to Photo Gallery and select Add Content.
- This should launch the Select Content Type dialog window with two options: Add Gallery Item and Quick Upload.
- Click Quick Upload.
- The Quick Upload screen should display.
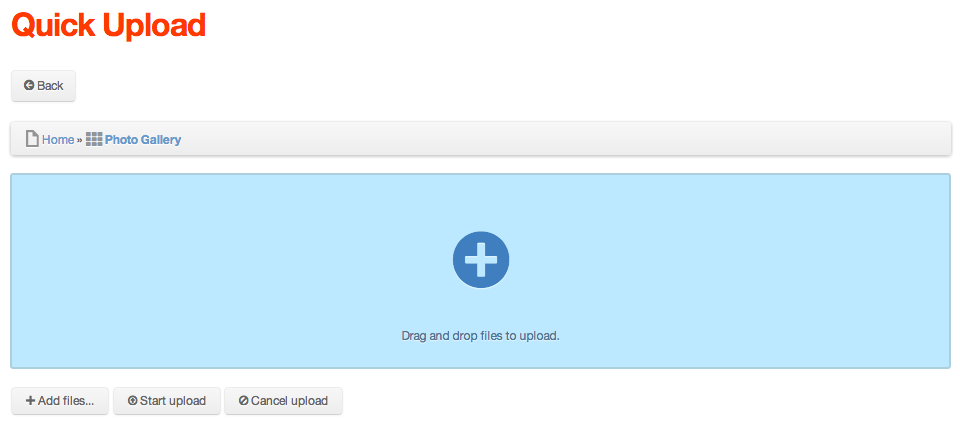
- There are two methods to adding multiple images:
- The first method is to click the Add files... button.
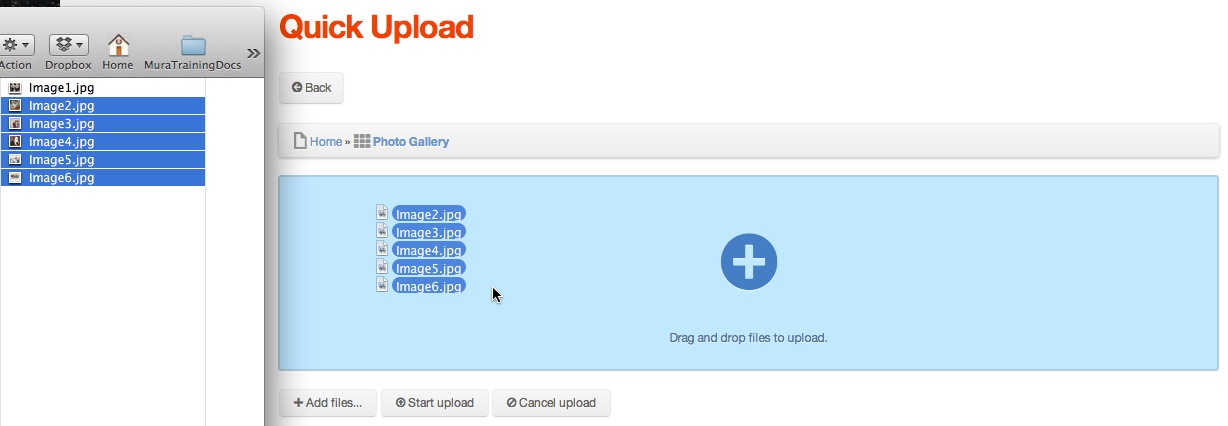
- Navigate to where your images are located (e.g., /1-mura-admin/sample-content/photo-gallery/), then click one or CTRL+Click (CMD+Click on a Mac) to select multiple images.
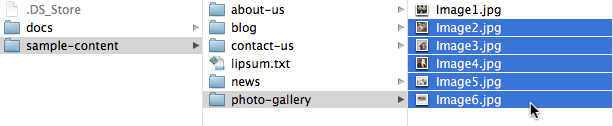
- Click Open.
- Navigate to where your images are located (e.g., /1-mura-admin/sample-content/photo-gallery/), then click one or CTRL+Click (CMD+Click on a Mac) to select multiple images.
- The second method is navigate to where your images are located, then drag and drop your images onto the browser.
- The first method is to click the Add files... button.
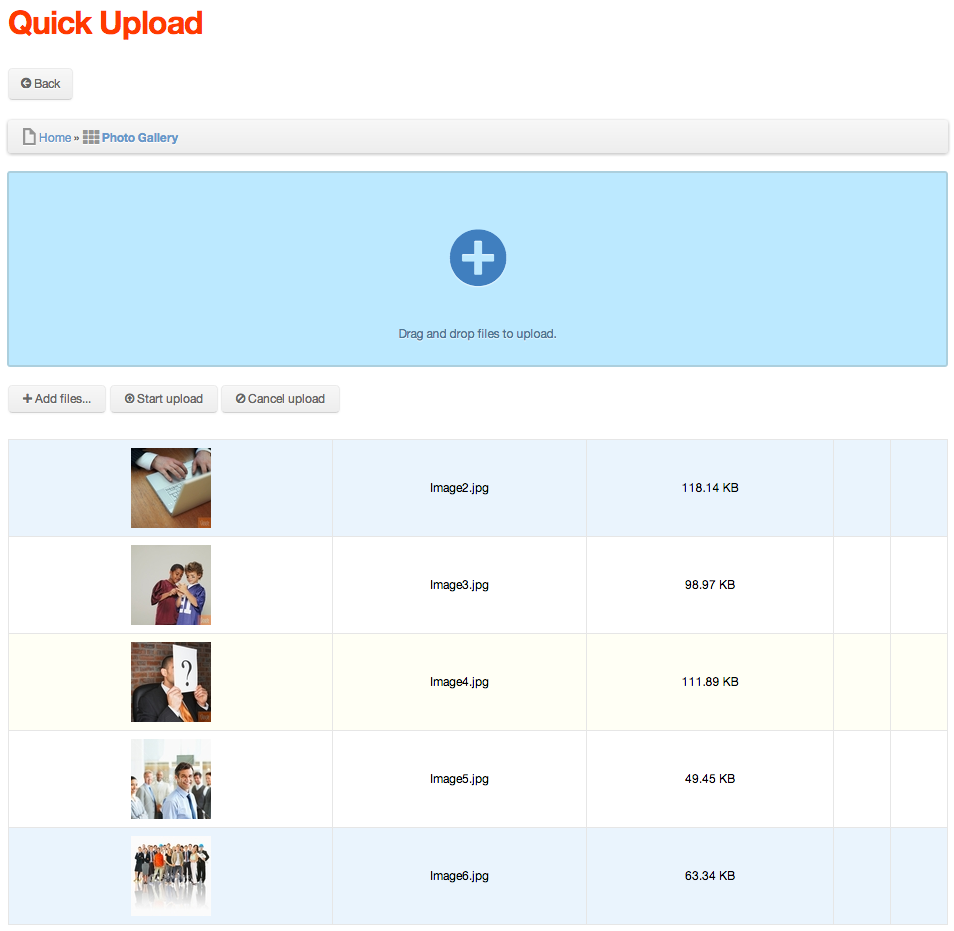
- Click Start upload to begin uploading the images.

- When finished uploading, you can click on any image to edit its properties such as Title, etc.
- When finished uploading, you can click on any image to edit its properties such as Title, etc.
- Click on the image to go to the Image Details screen where you can then Re-Crop any of the image thumbnails as desired.
- Preview the Photo Gallery.
- The Photo Gallery page should be updated to display the thumbnails of each image added to the Gallery.
- Clicking on a thumbnail image in the gallery will display the large version of the image in a modal pop-up window. You can then navigate the images by using the Next and Previous links below the modal window.