Vertical Primary Navigation
The default Mura theme, MuraBootstrap, comes with a horizontal primary navigation structure. However, there may be times when you need to have a vertically-oriented one.
Bootstrap comes with several built-in navigation styles from tabs, pills, and lists to the popular navbar that's become so popular on the web today. Let's take a look at the code that's generated by Mura for the primary navigation:
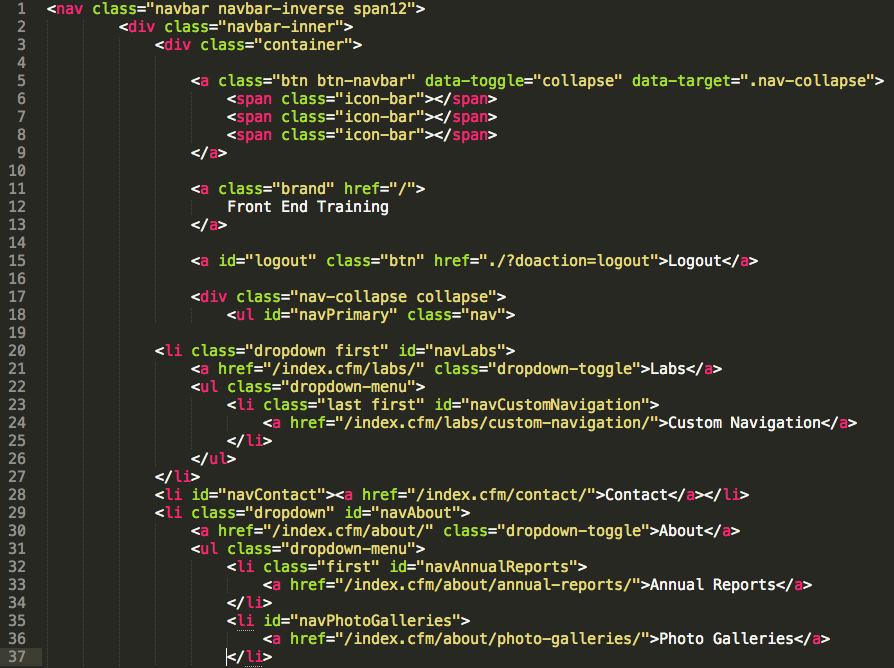
The output is simply some div tags, anchor tags, and unordered lists. As a front-end developer, you already know that the display of this output is controlled by CSS. So whether you're using MuraBootstrap or your own custom CSS, you have complete control over the end result. Mura will generate the output, all you need to do is supply the CSS.
Follow these steps to see the entire primary navigation go from horizontal, to vertical:
-
Create a new file called vertical_nav.cfm and place it in your theme's template/inc/ directory:
/{SiteID}/includes/themes/MuraBootstrap/templates/inc/vertical_nav.cfm -
Open the file that's responsible for the current primary navigation located at:
/{SiteID}/includes/themes/MuraBootstrap/templates/inc/ -
Locate, then copy the following snippet of code:
#$.dspPrimaryNav( viewDepth=1 , id='navPrimary' , class='nav navbar-nav' , displayHome='never' , closeFolders=false , showCurrentChildrenOnly=false , liHasKidsClass='dropdown' , liHasKidsAttributes='' , liCurrentClass='' , liCurrentAttributes='' , liHasKidsNestedClass='dropdown-submenu' , aHasKidsClass='dropdown-toggle' , aHasKidsAttributes='role="button" data-toggle="dropdown" data-target="##"' , aCurrentClass='' , aCurrentAttributes='' , ulNestedClass='dropdown-menu' , ulNestedAttributes='' , aNotCurrentClass='' , siteid=$.event('siteid') )# - Paste the code into your vertical_nav.cfm file.
-
Then wrap the output with the following code:
<cfoutput>
<div class="well">
...
</div>
</cfoutput>
- Save the file.
-
Open the two_column_SL.cfm file, and comment out the following line of code:
<!--- <cfinclude template="inc/navbar.cfm" /> --->
-
In the
<aside class="span3 sidebar">, enter the following code:<cfinclude template="inc/vertical_nav.cfm" />
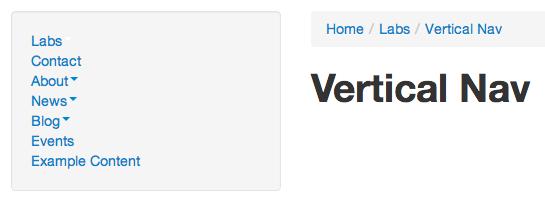
- Create a new Page under the Labs folder called Vertical Nav.
- Go to the Layout & Objects tab
- Select two_column_SL.cfm for the Layout Template
-
Publish and then preview the page.