Custom 404 Page
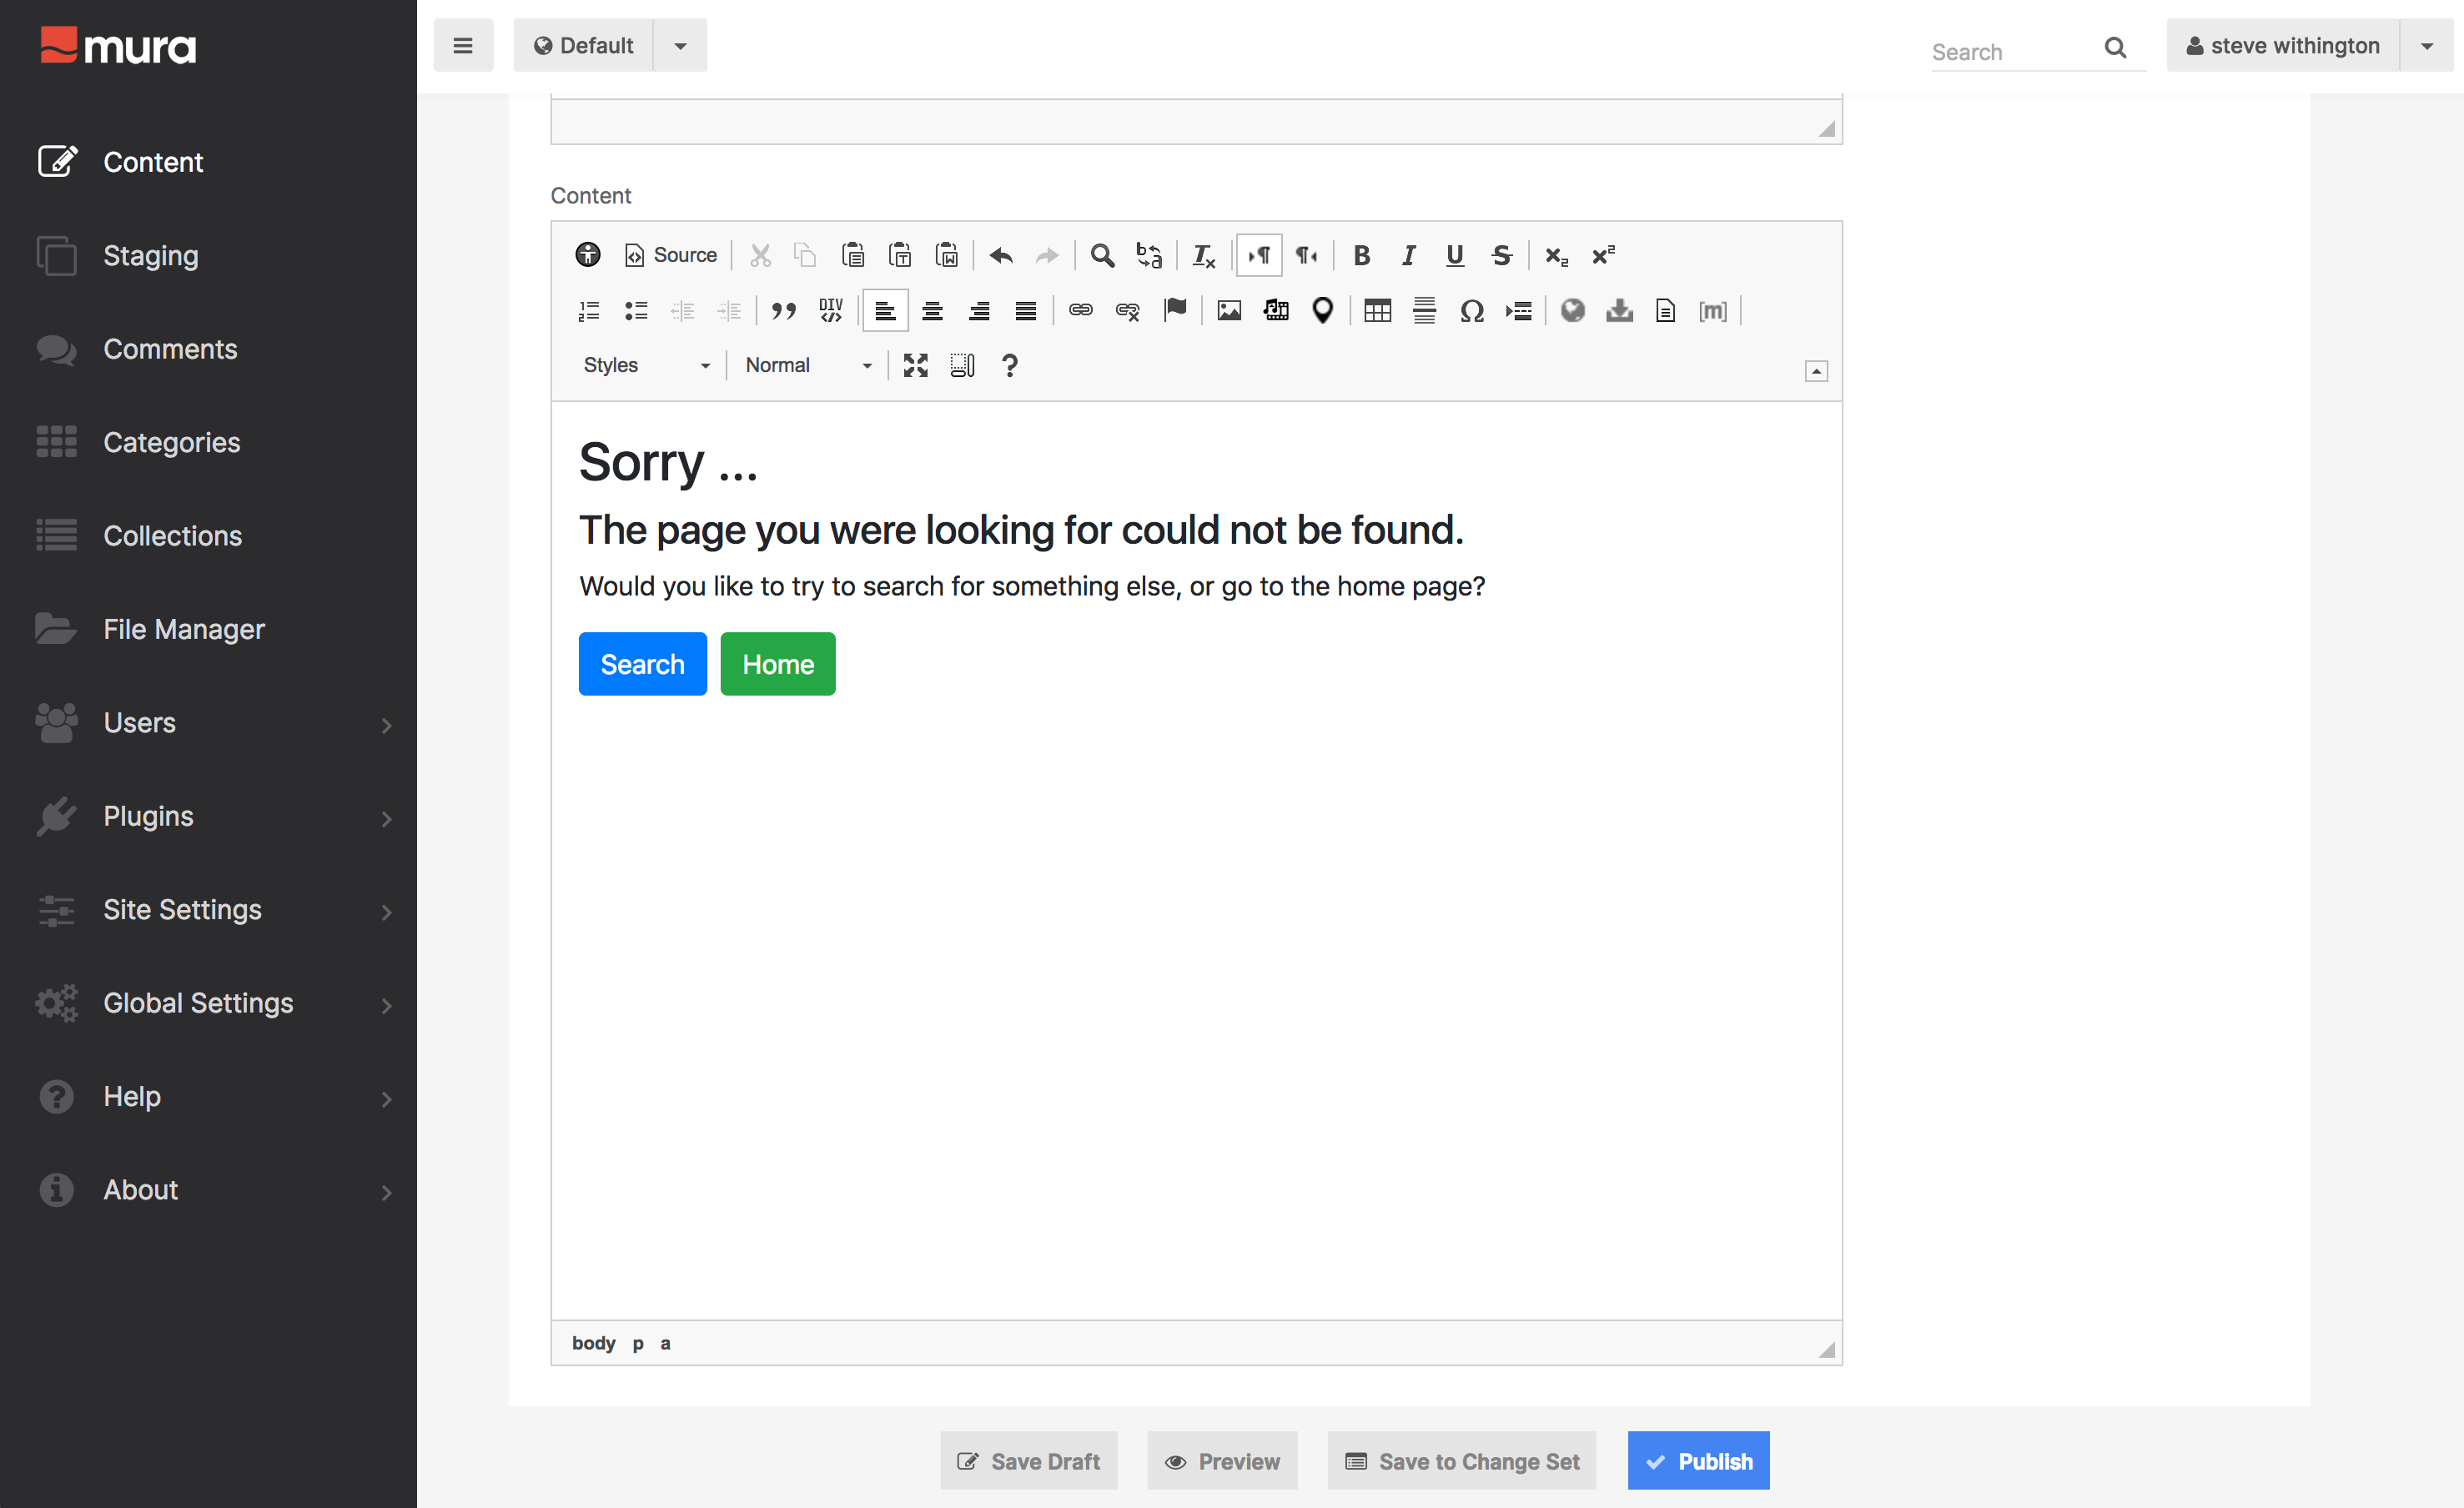
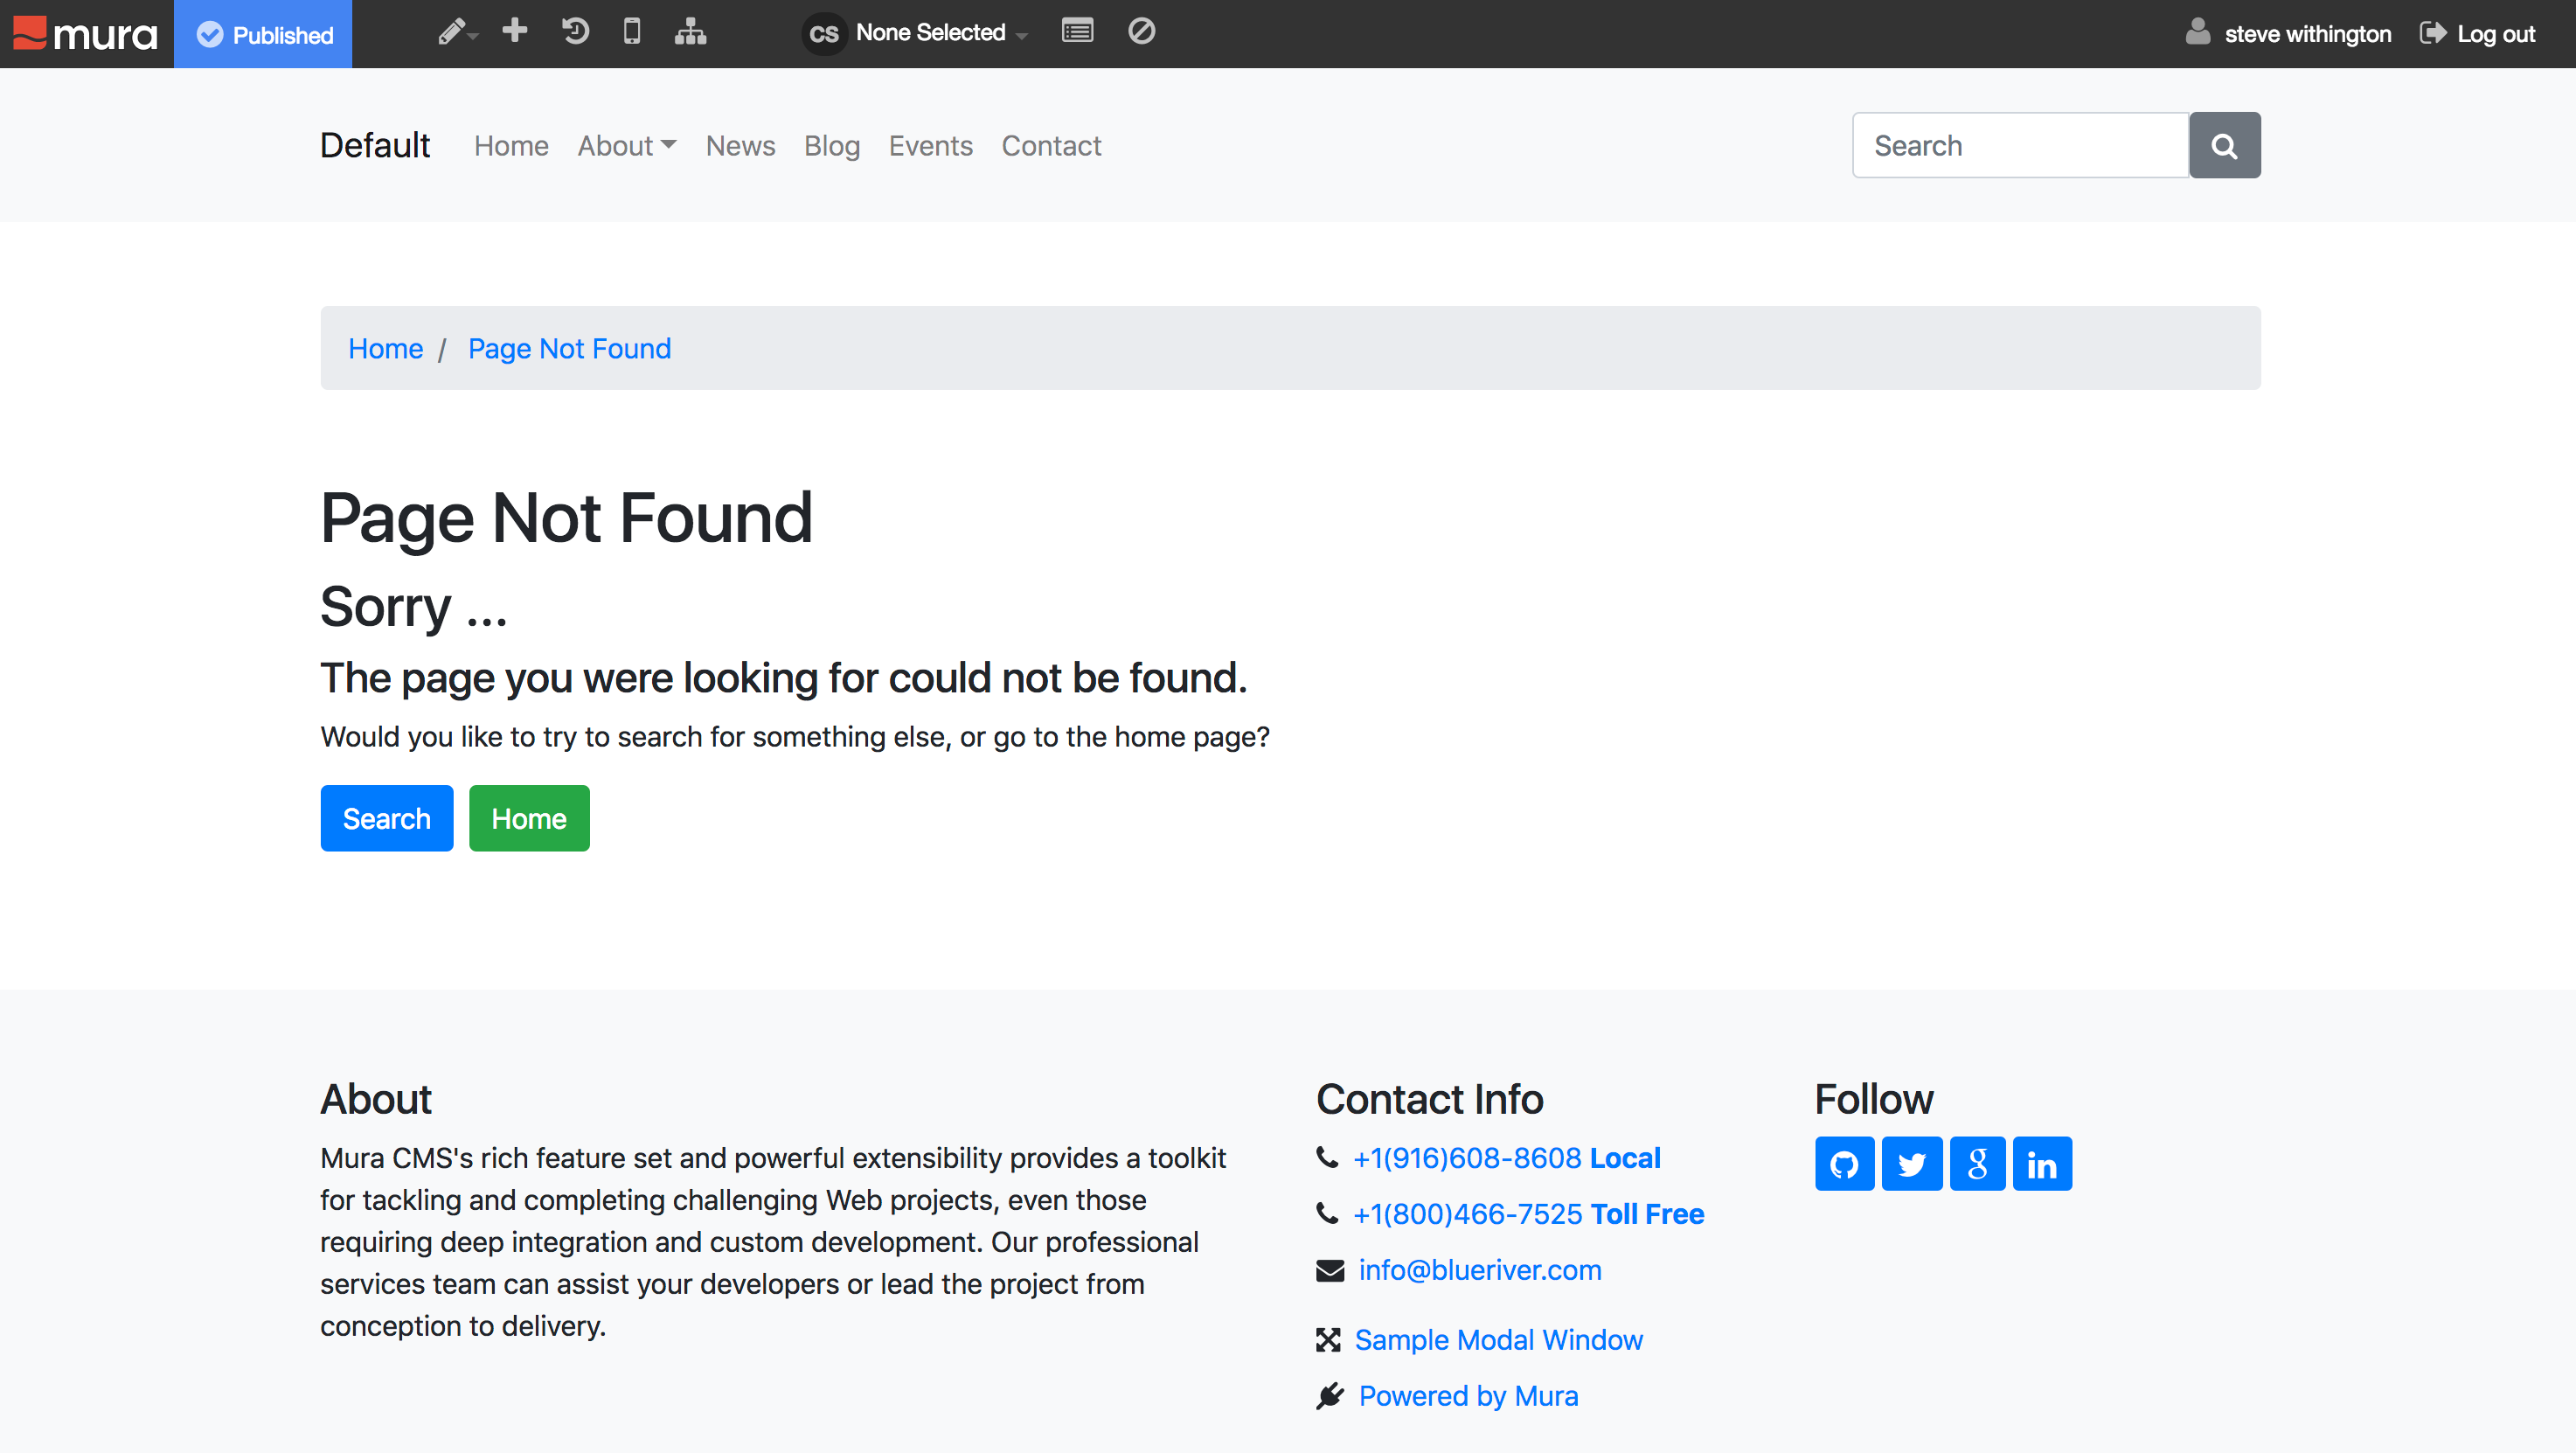
When a visitor stumbles upon content that doesn't exist on your Mura website, they are presented with a "404" page. This simply means the server could not find the requested URL. For example, you may see something similar to the following illustration when visiting a Mura site that's using the default text.
By follow the steps outlined below, you can customize the default "404" page however you wish.
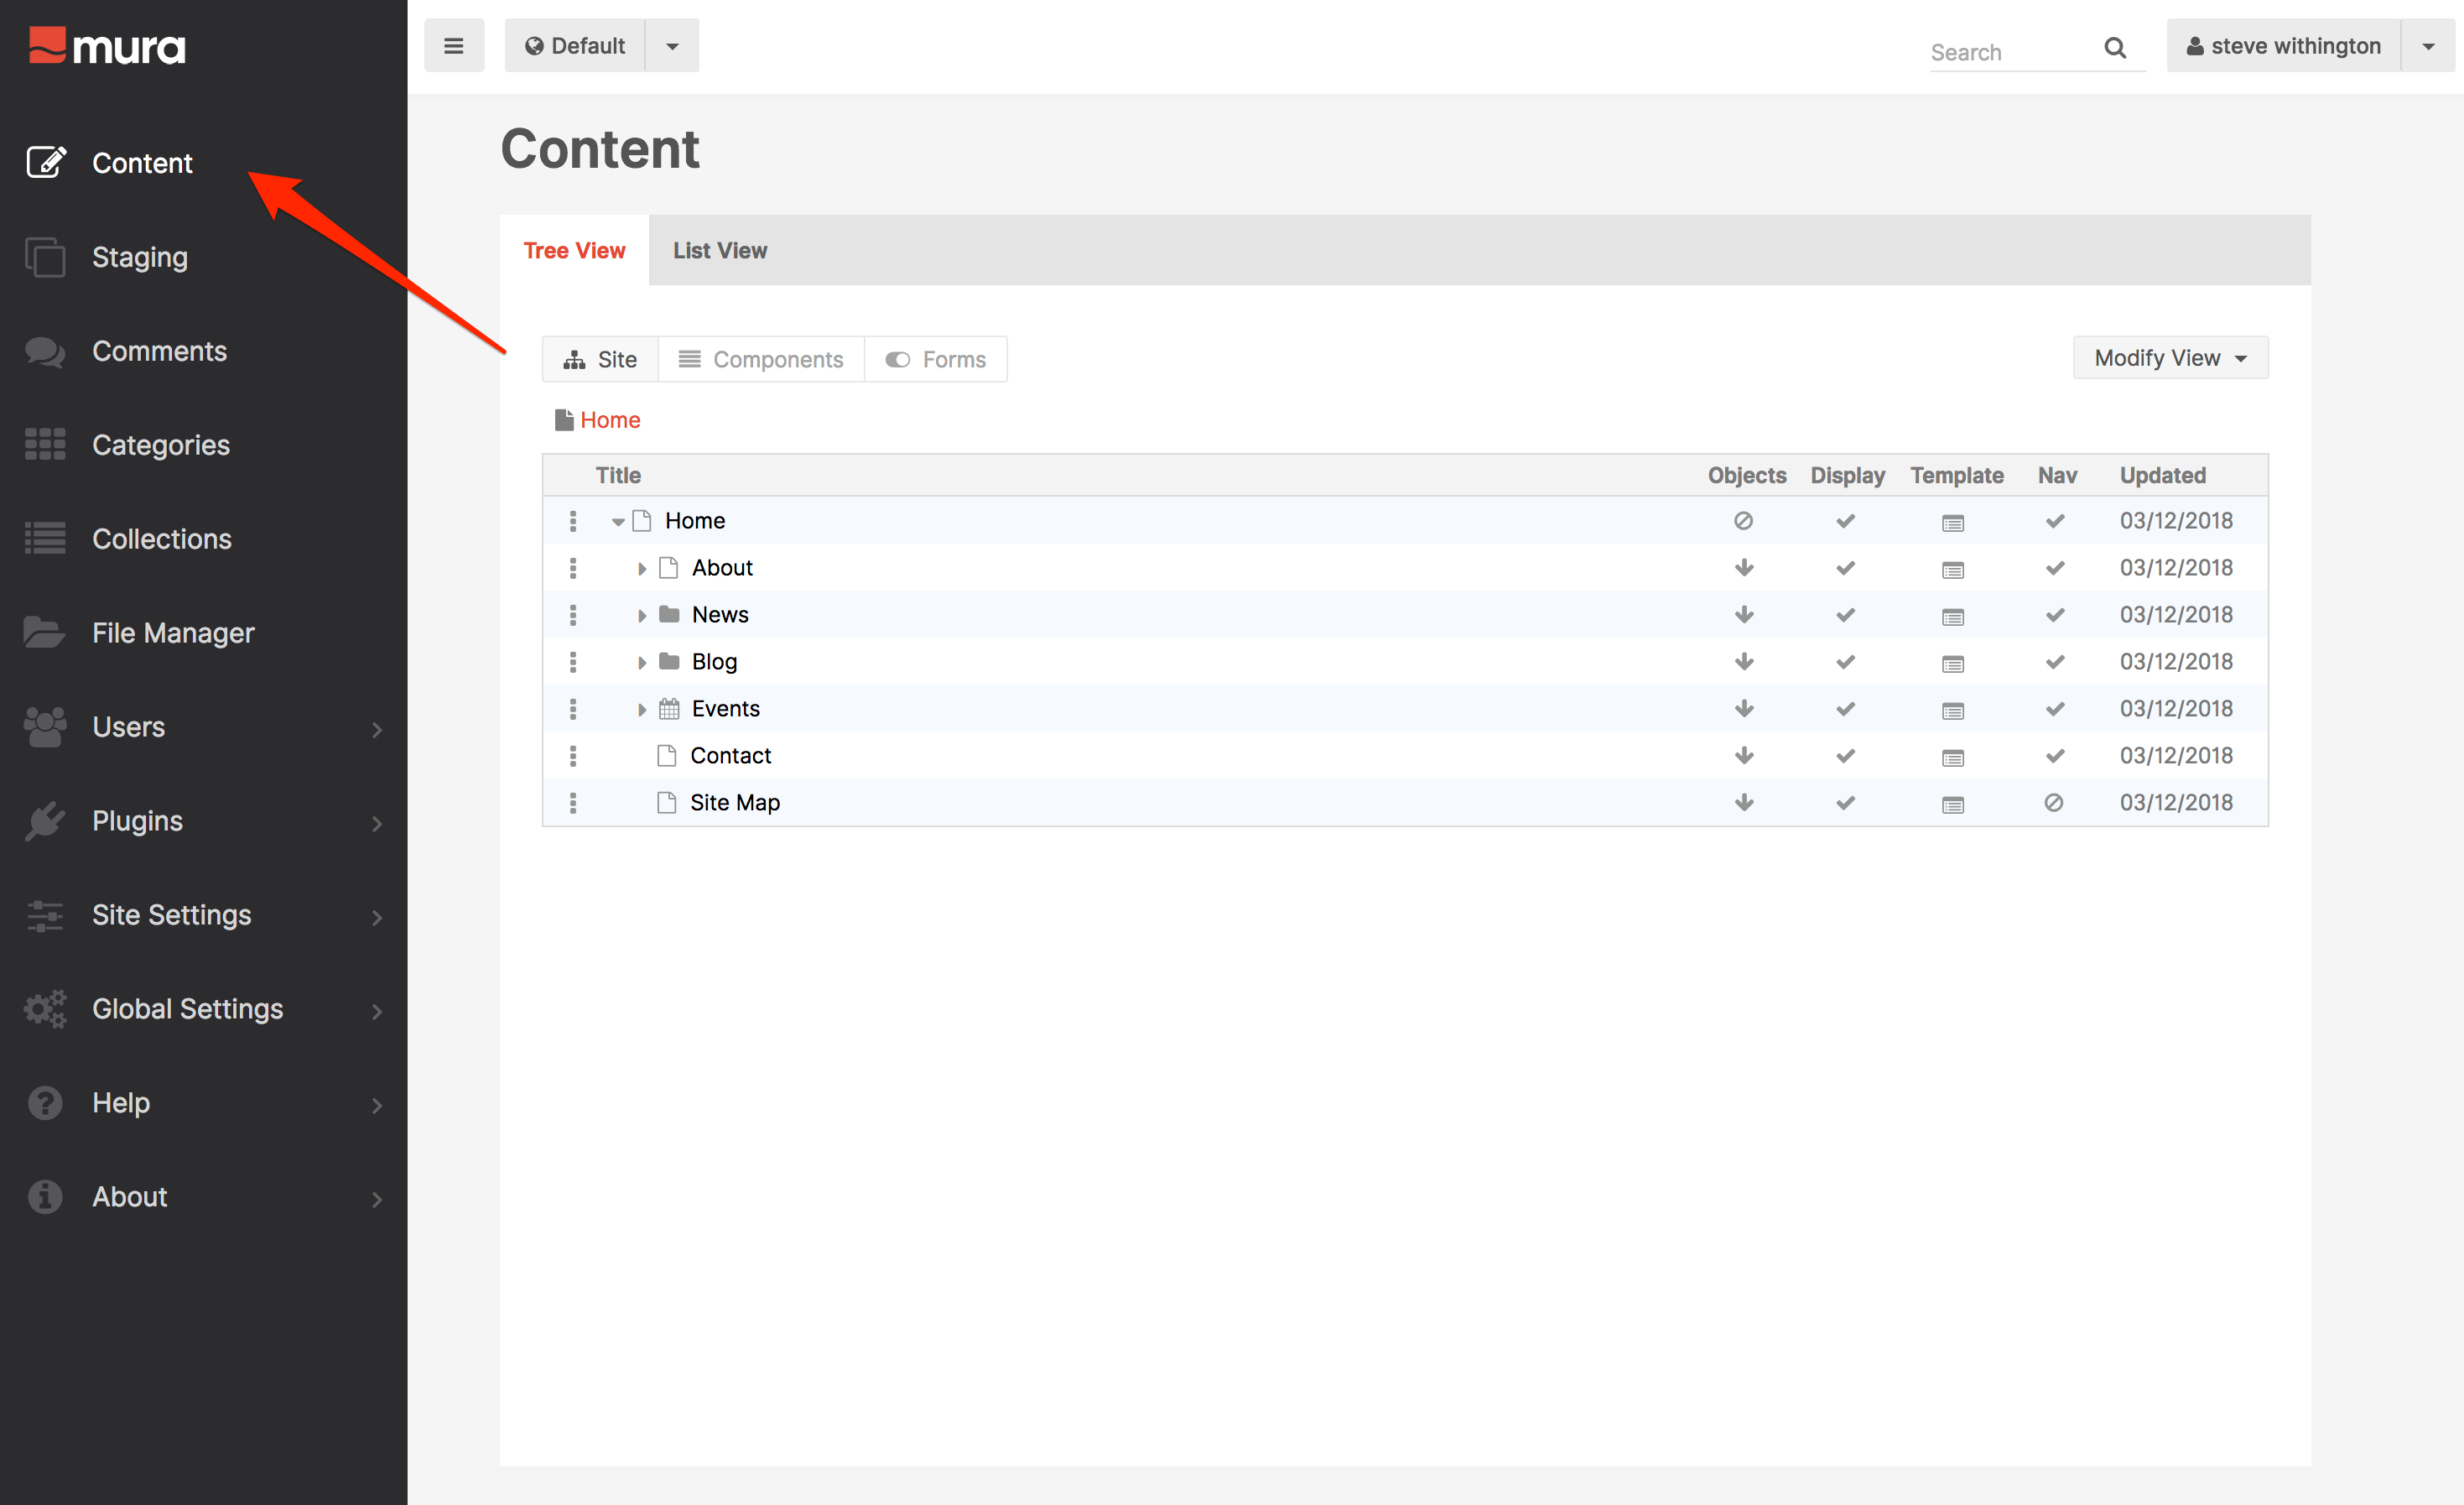
- From the back-end administrator of Mura, select Content from the main navigation.
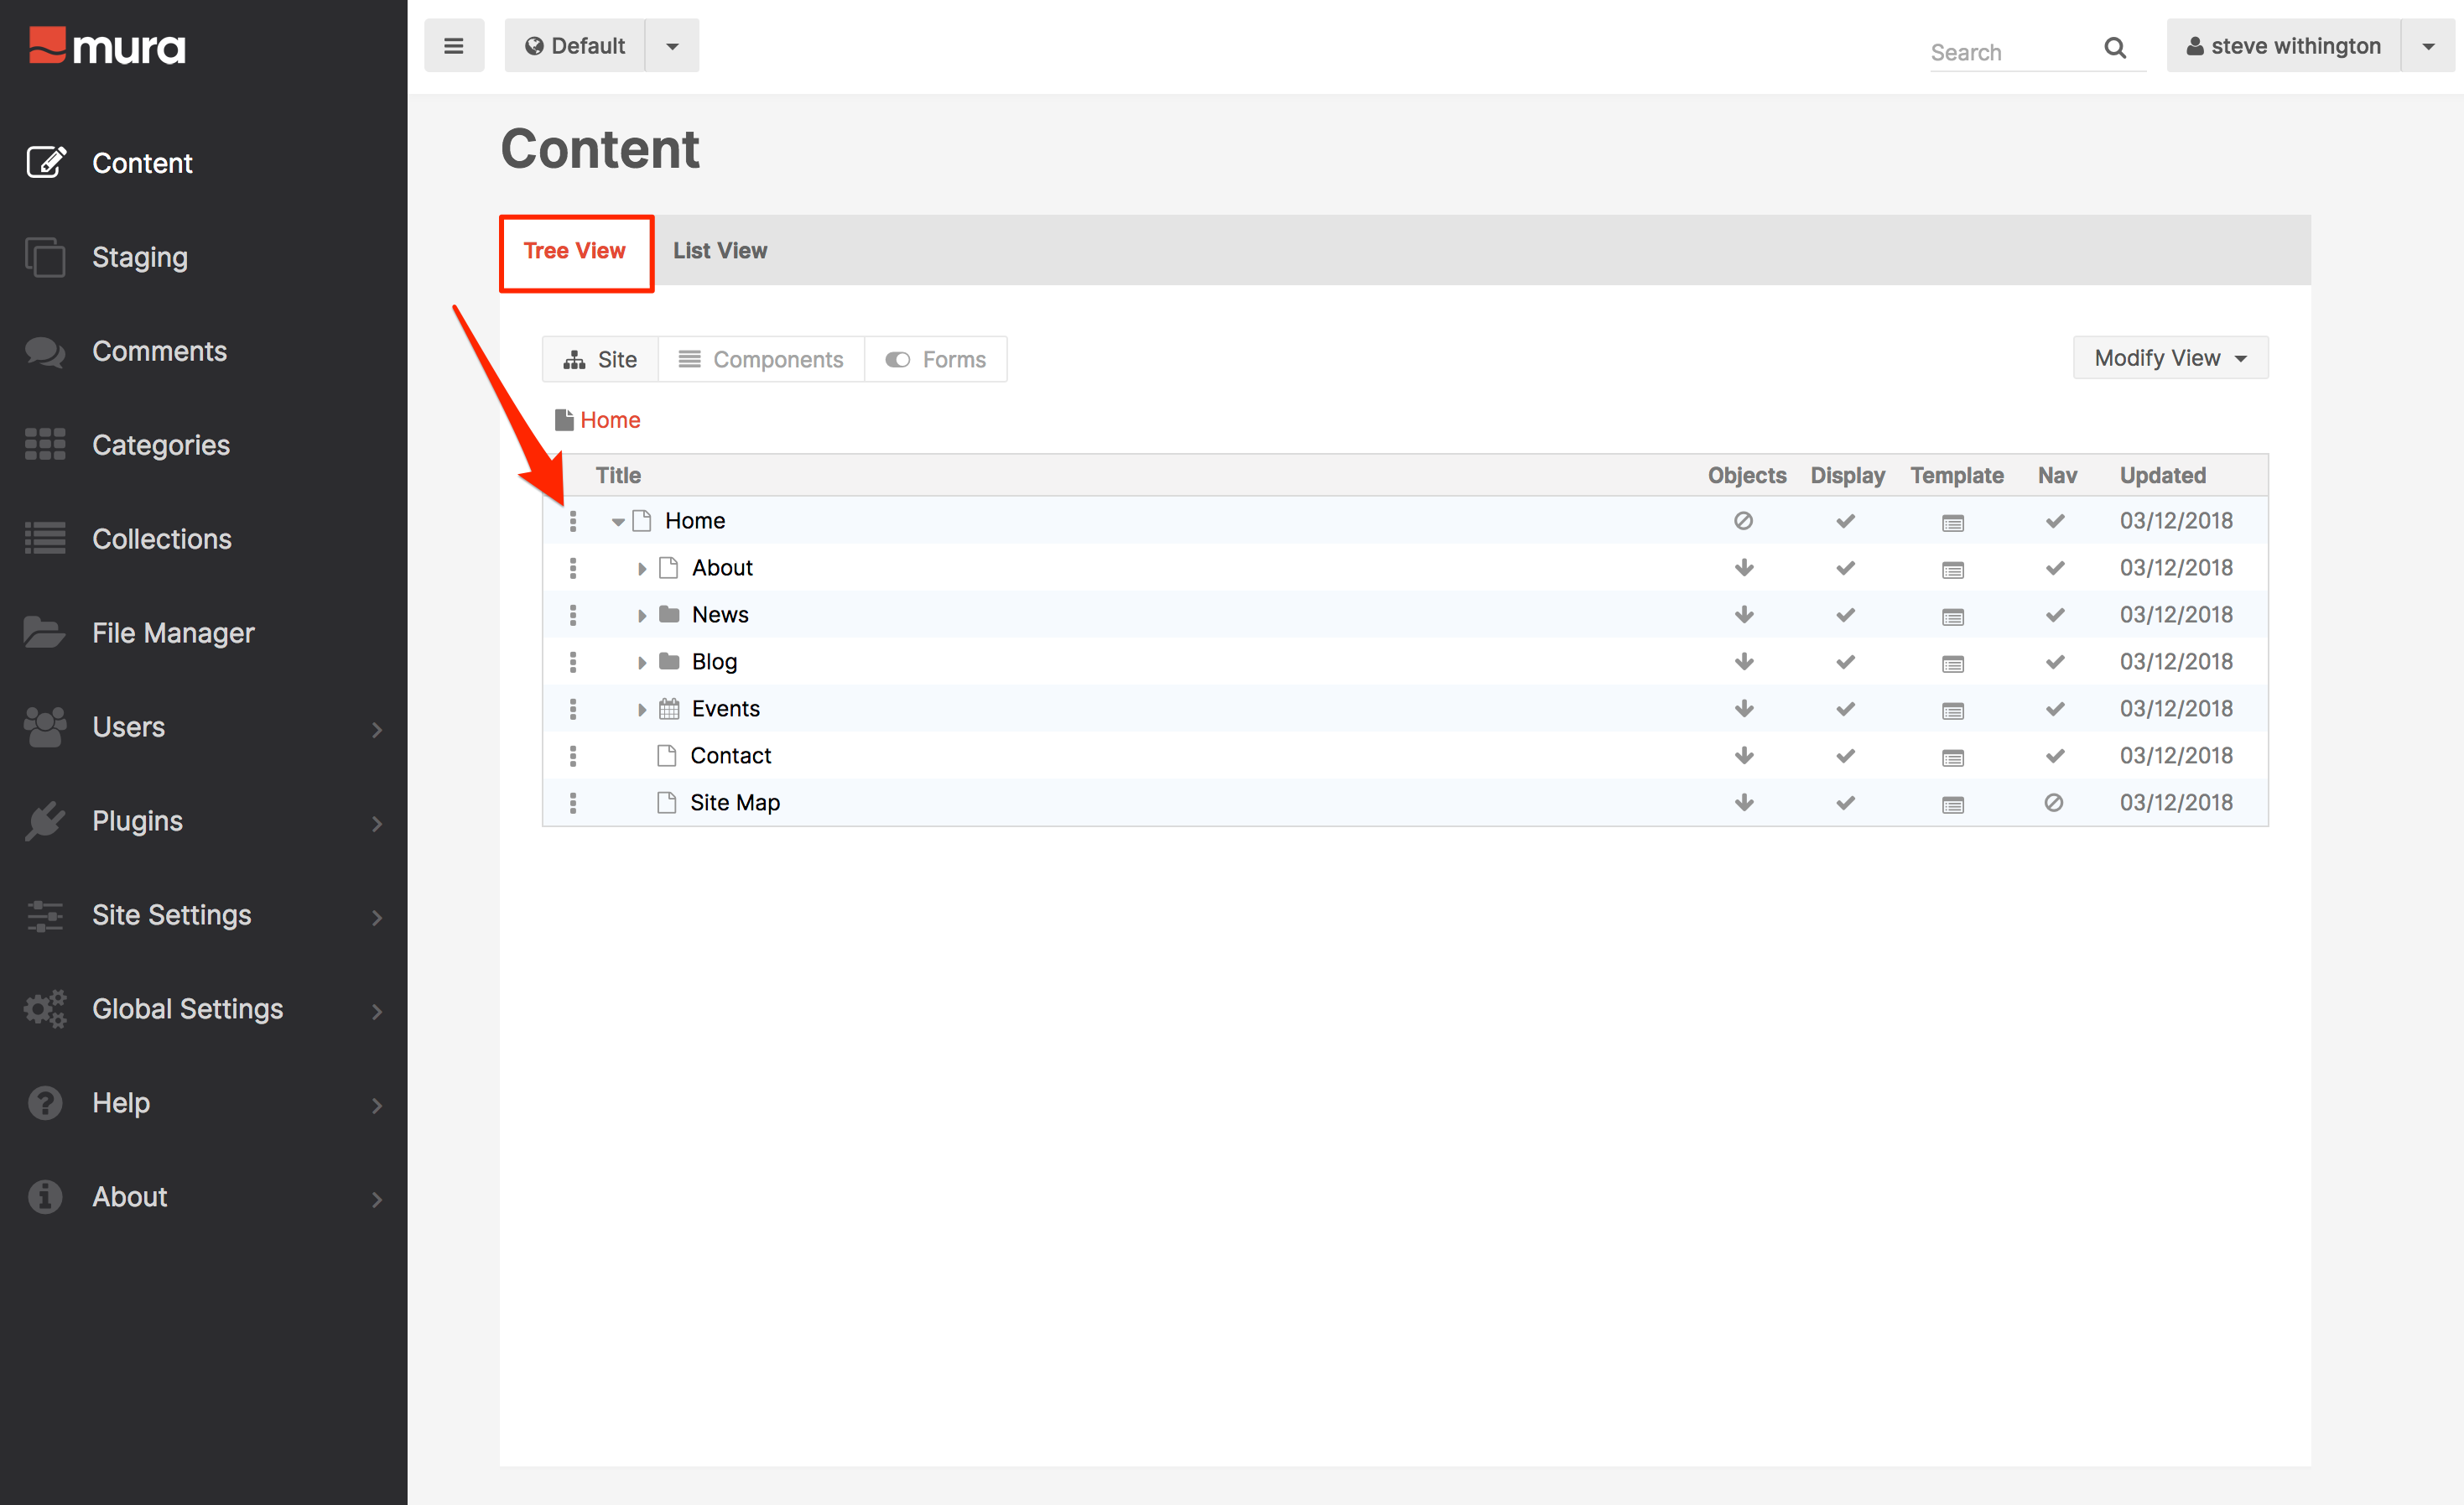
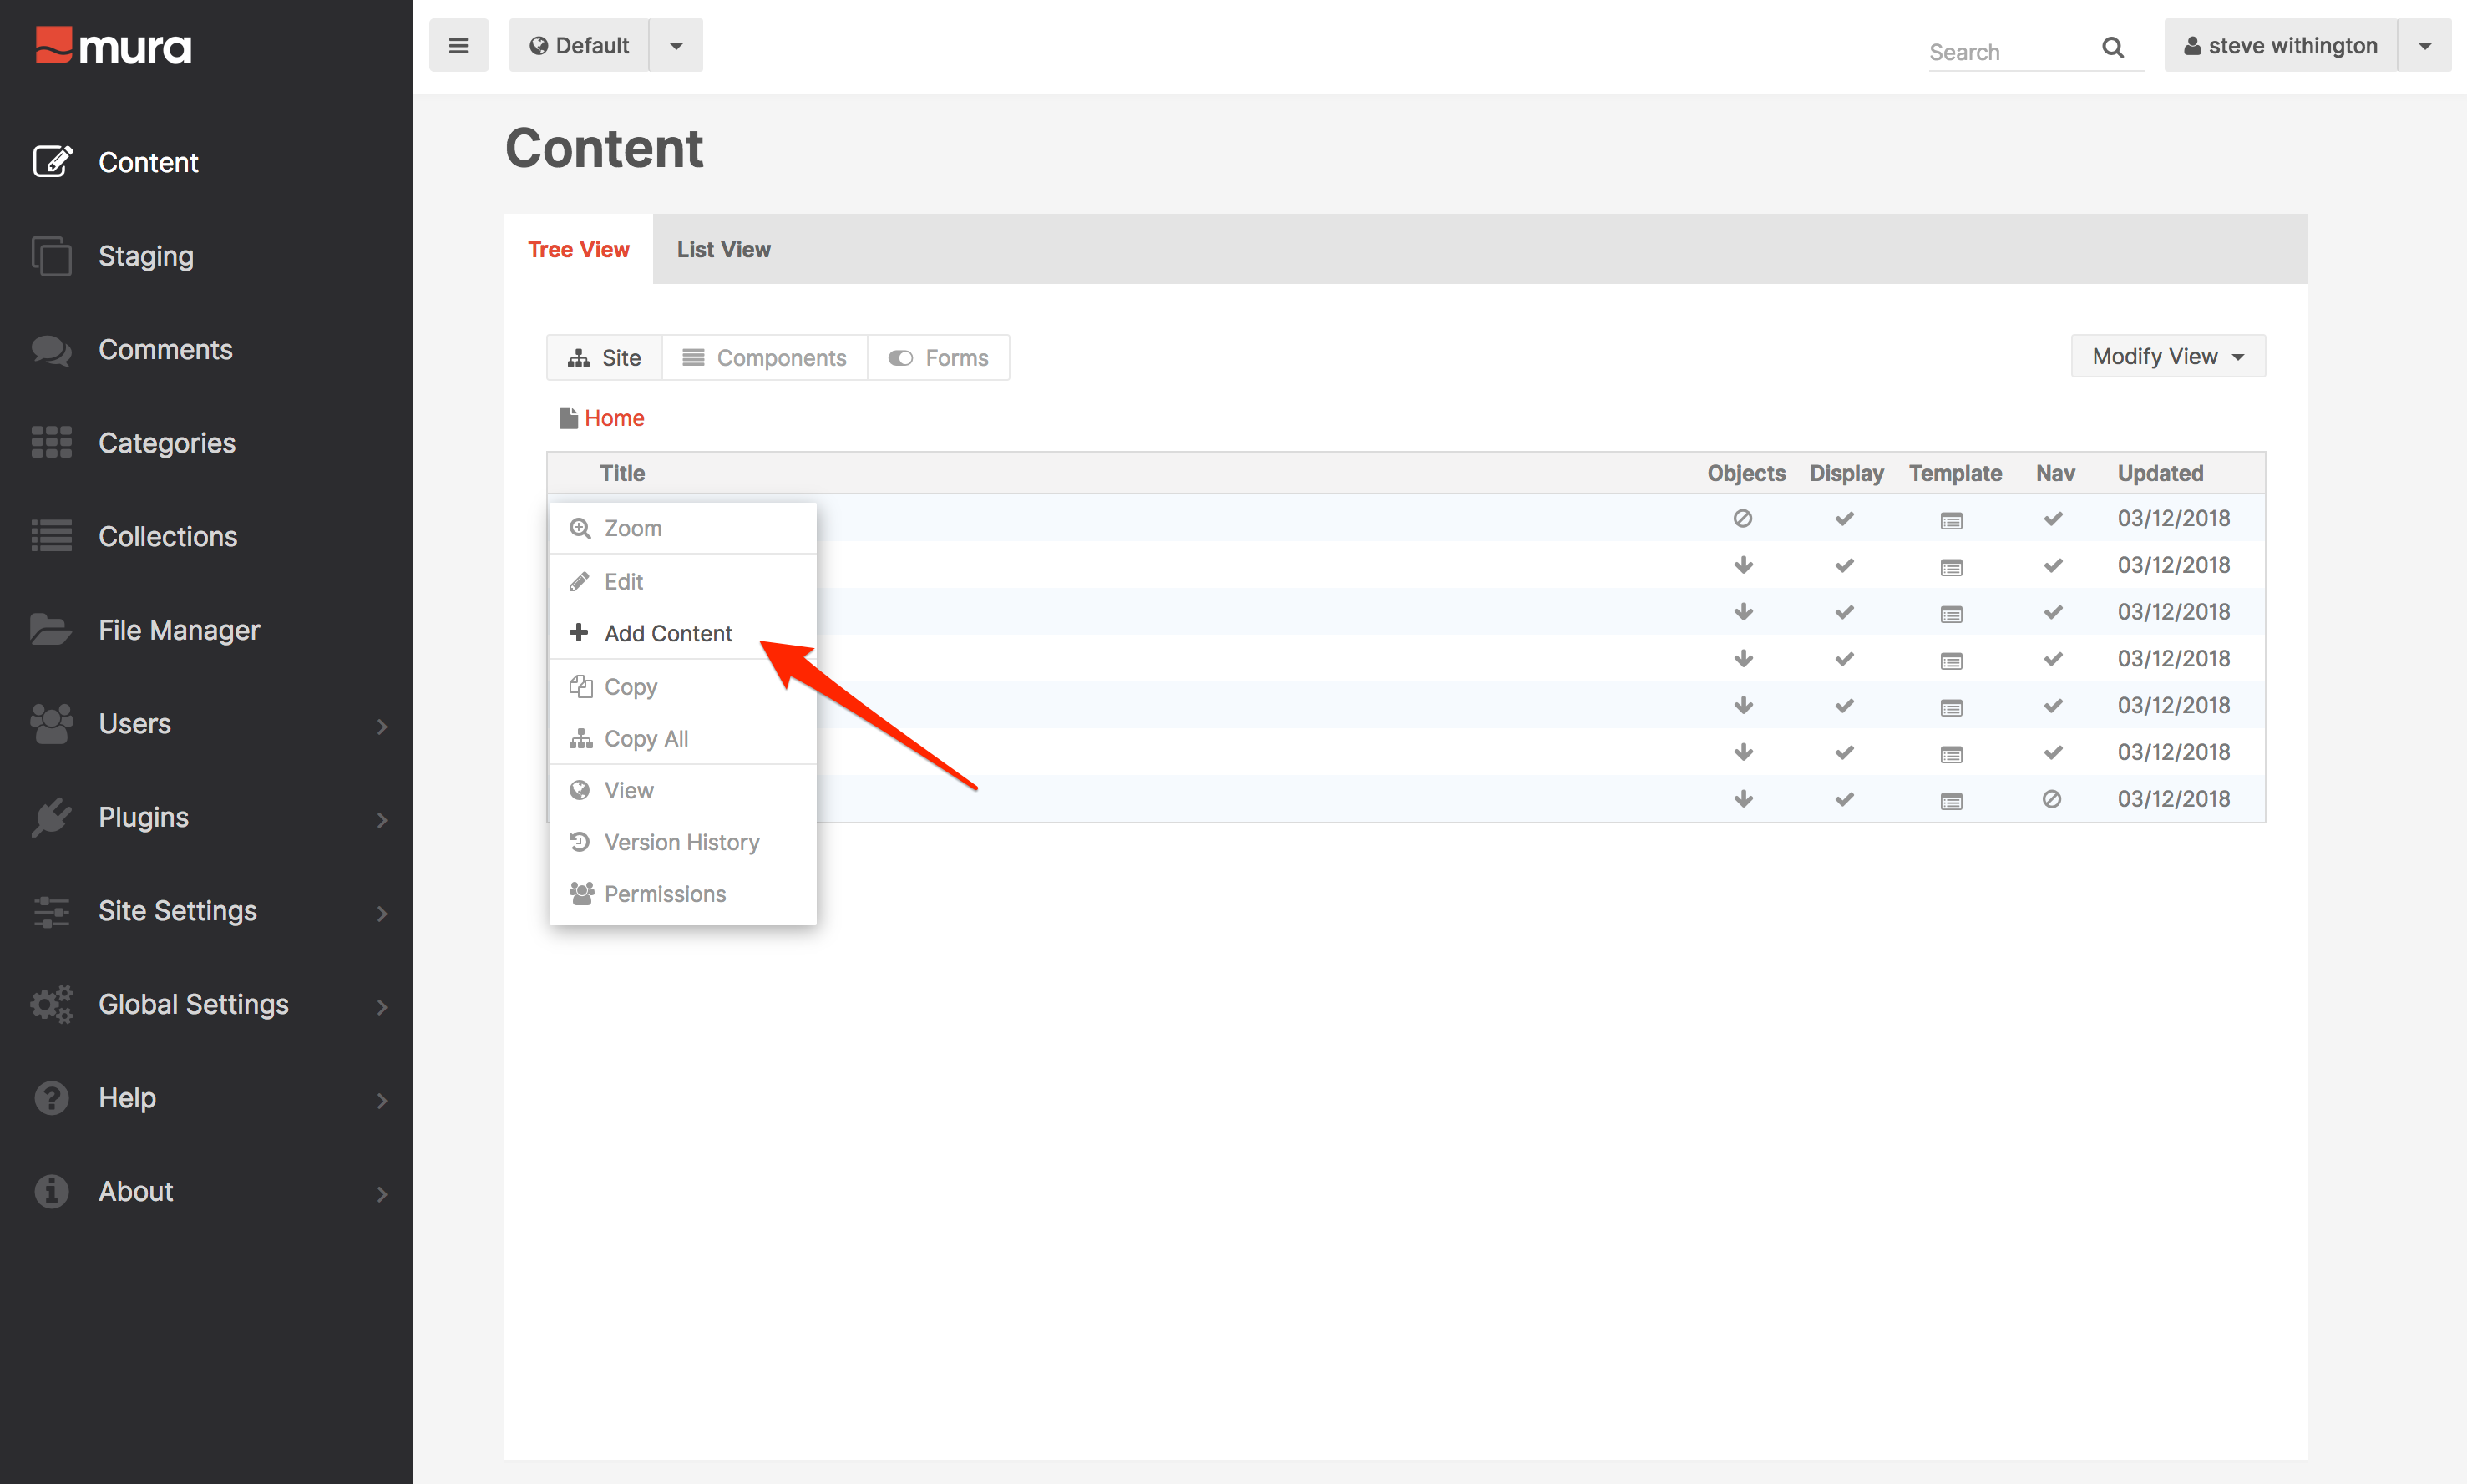
- On the Tree View tab, locate the three-dot menu next to the top-most content item, usually labeled Home.
- Click the three-dot menu of the Home page, and select Add Content.
- From the Select Content Type dialog window, select Page.

- Enter your desired Title. For example, "Page Not Found".
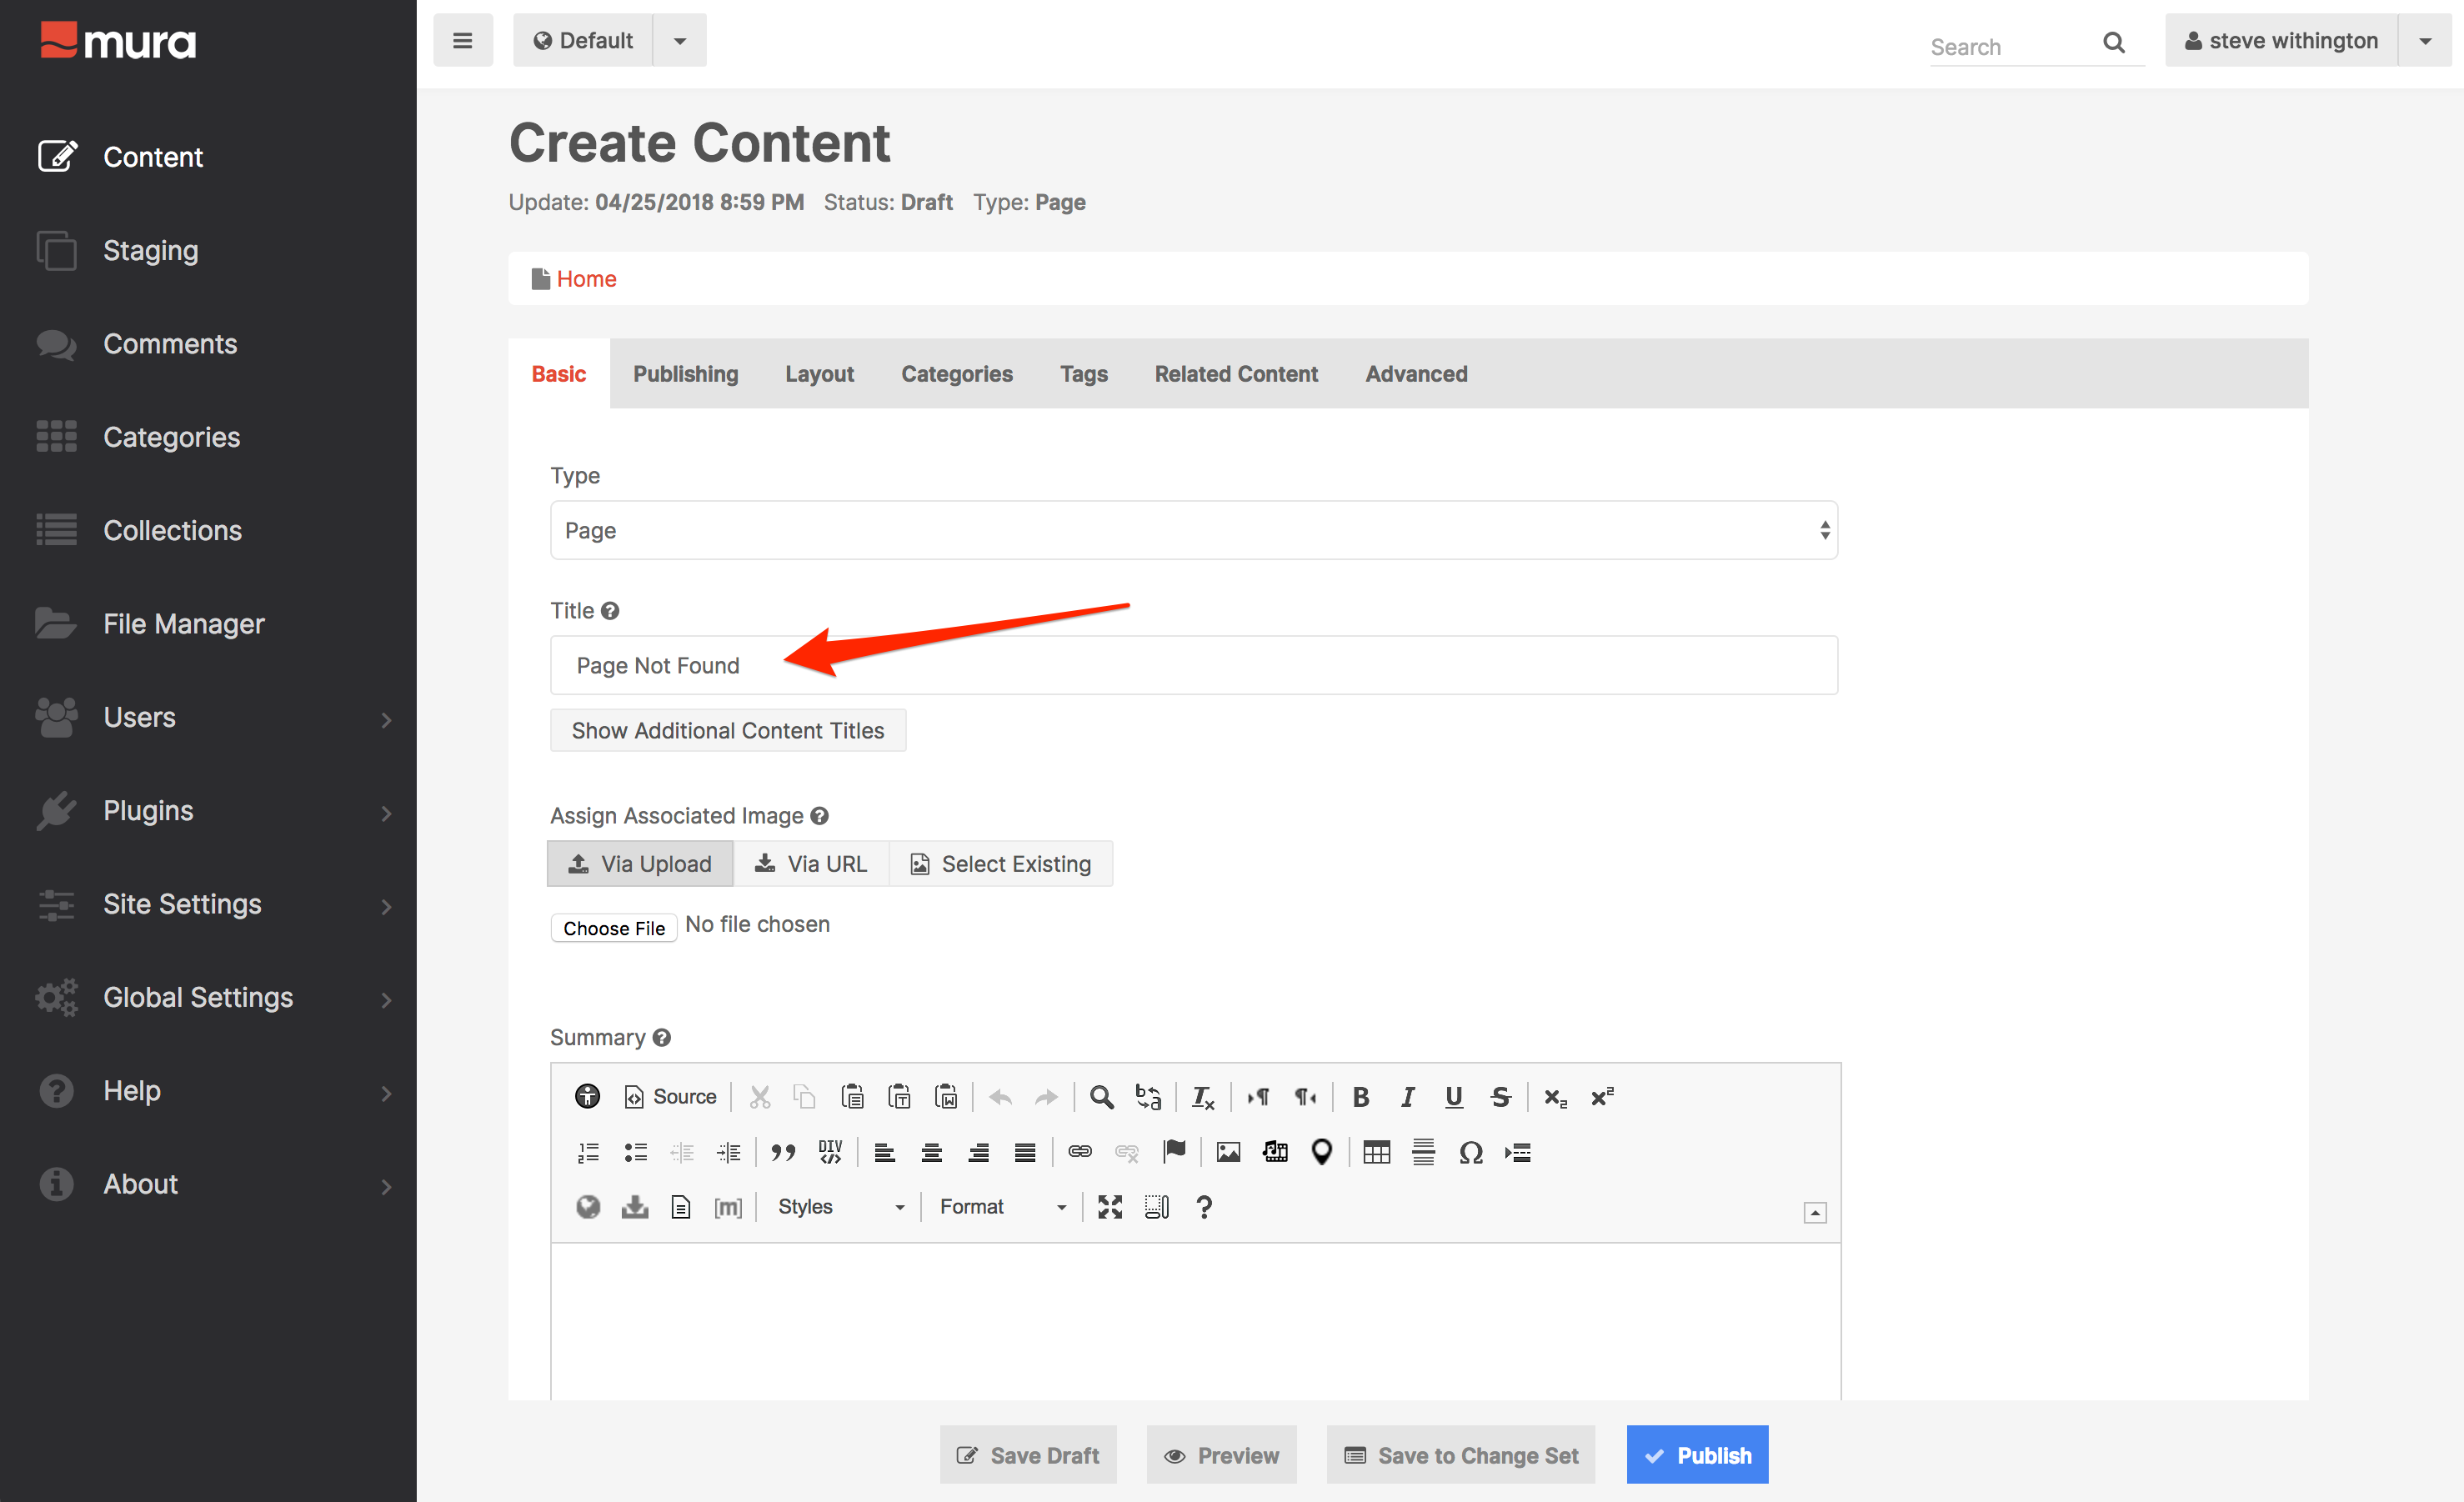
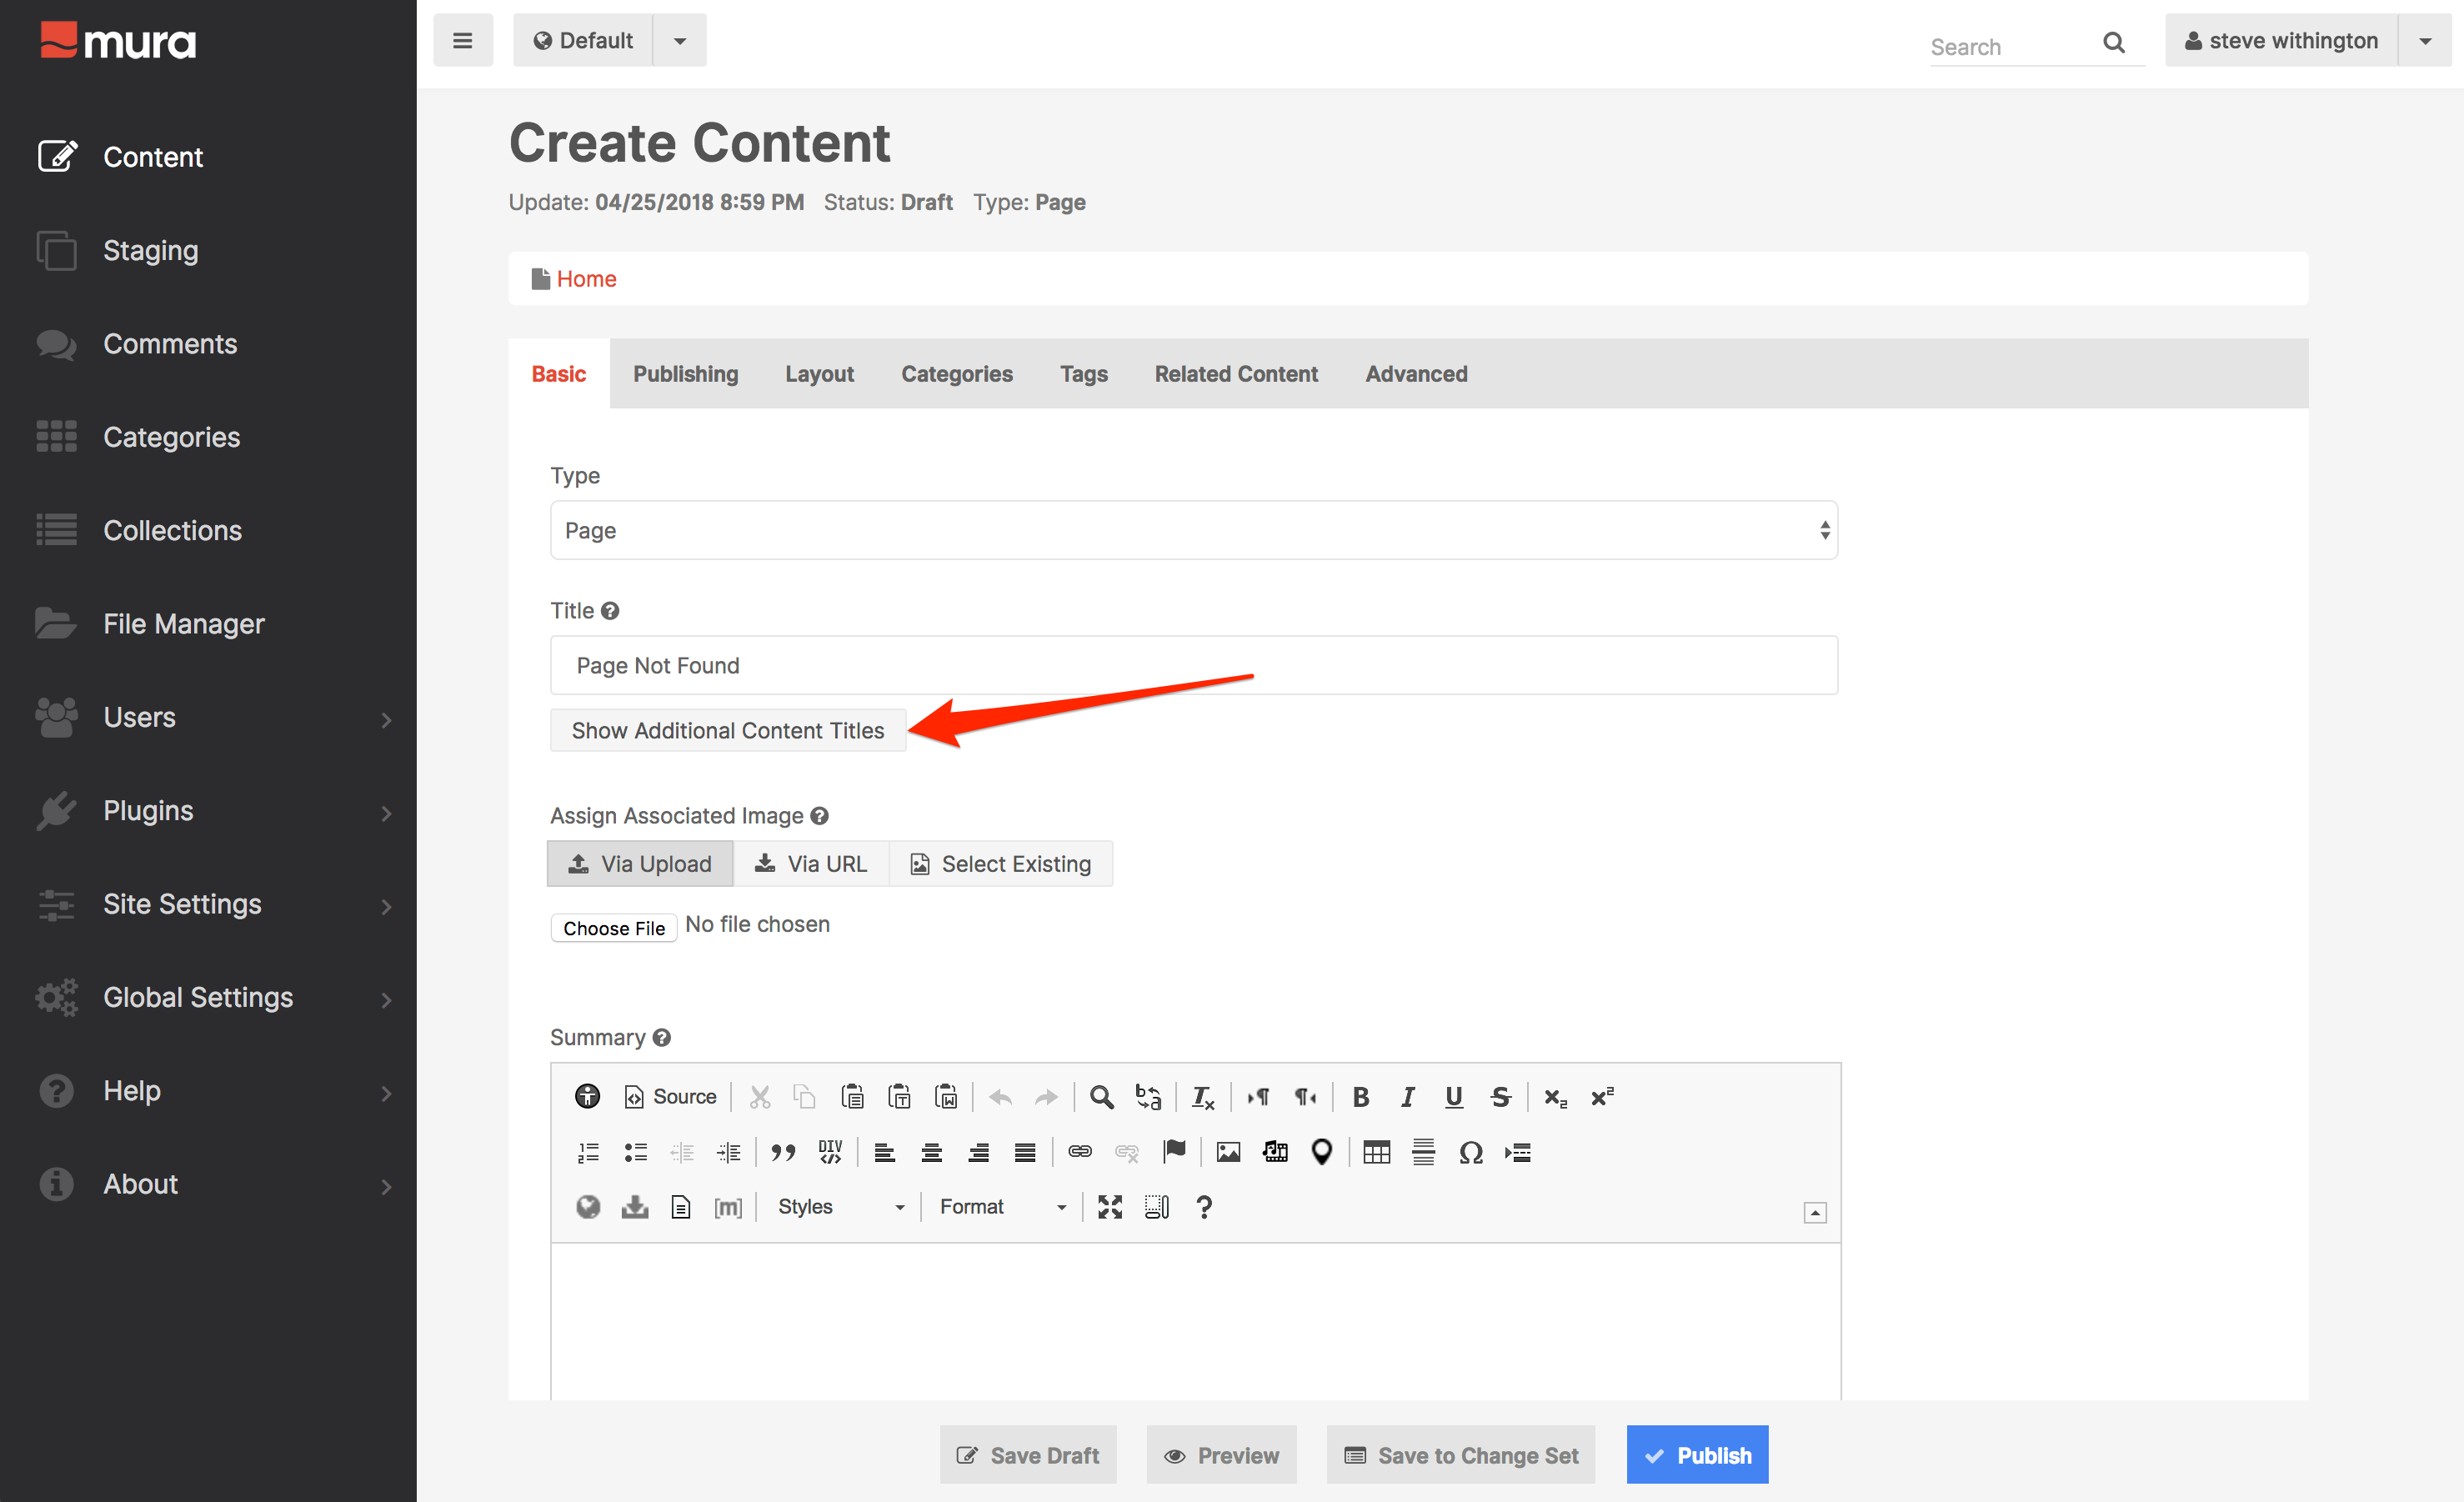
- Click the Show Additional Content Titles button.
-
Locate the URL Title (Optional) field, and enter 404.
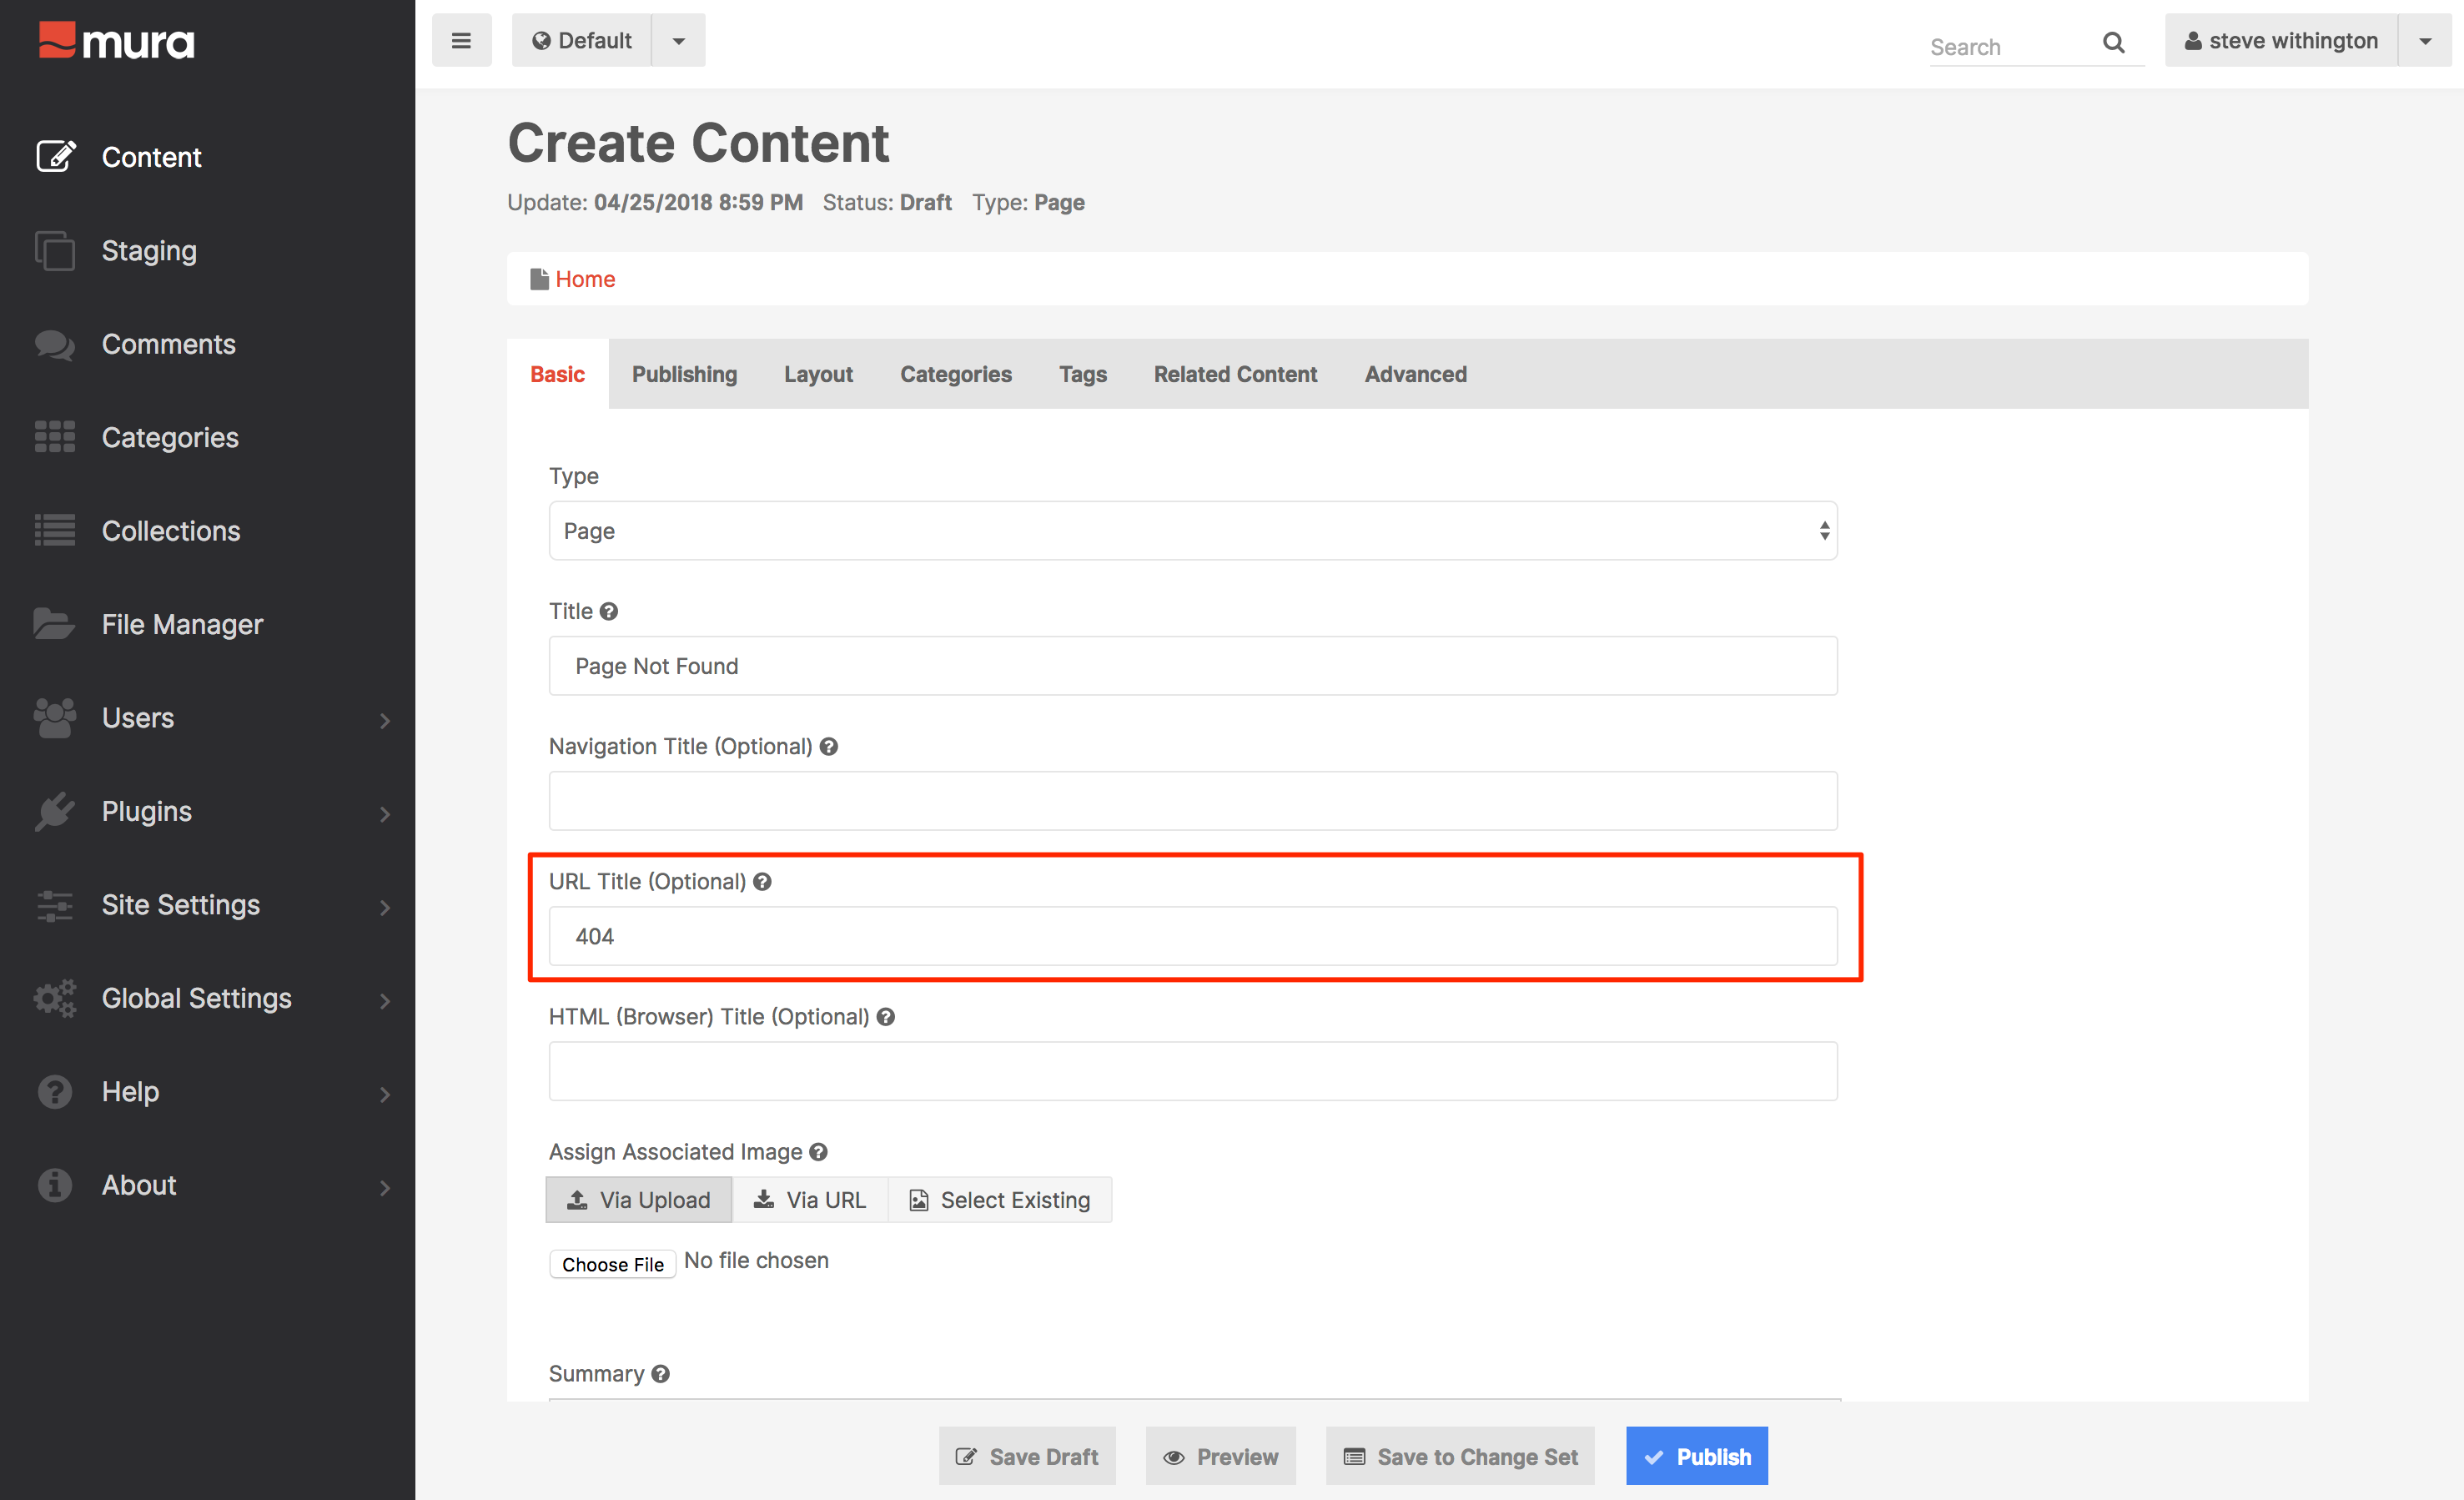
Note: This is the crucial part of this process! If you skip this step, Mura will not use this content item as your custom 404 page.
- In the Content area, enter your desired text and/or images.
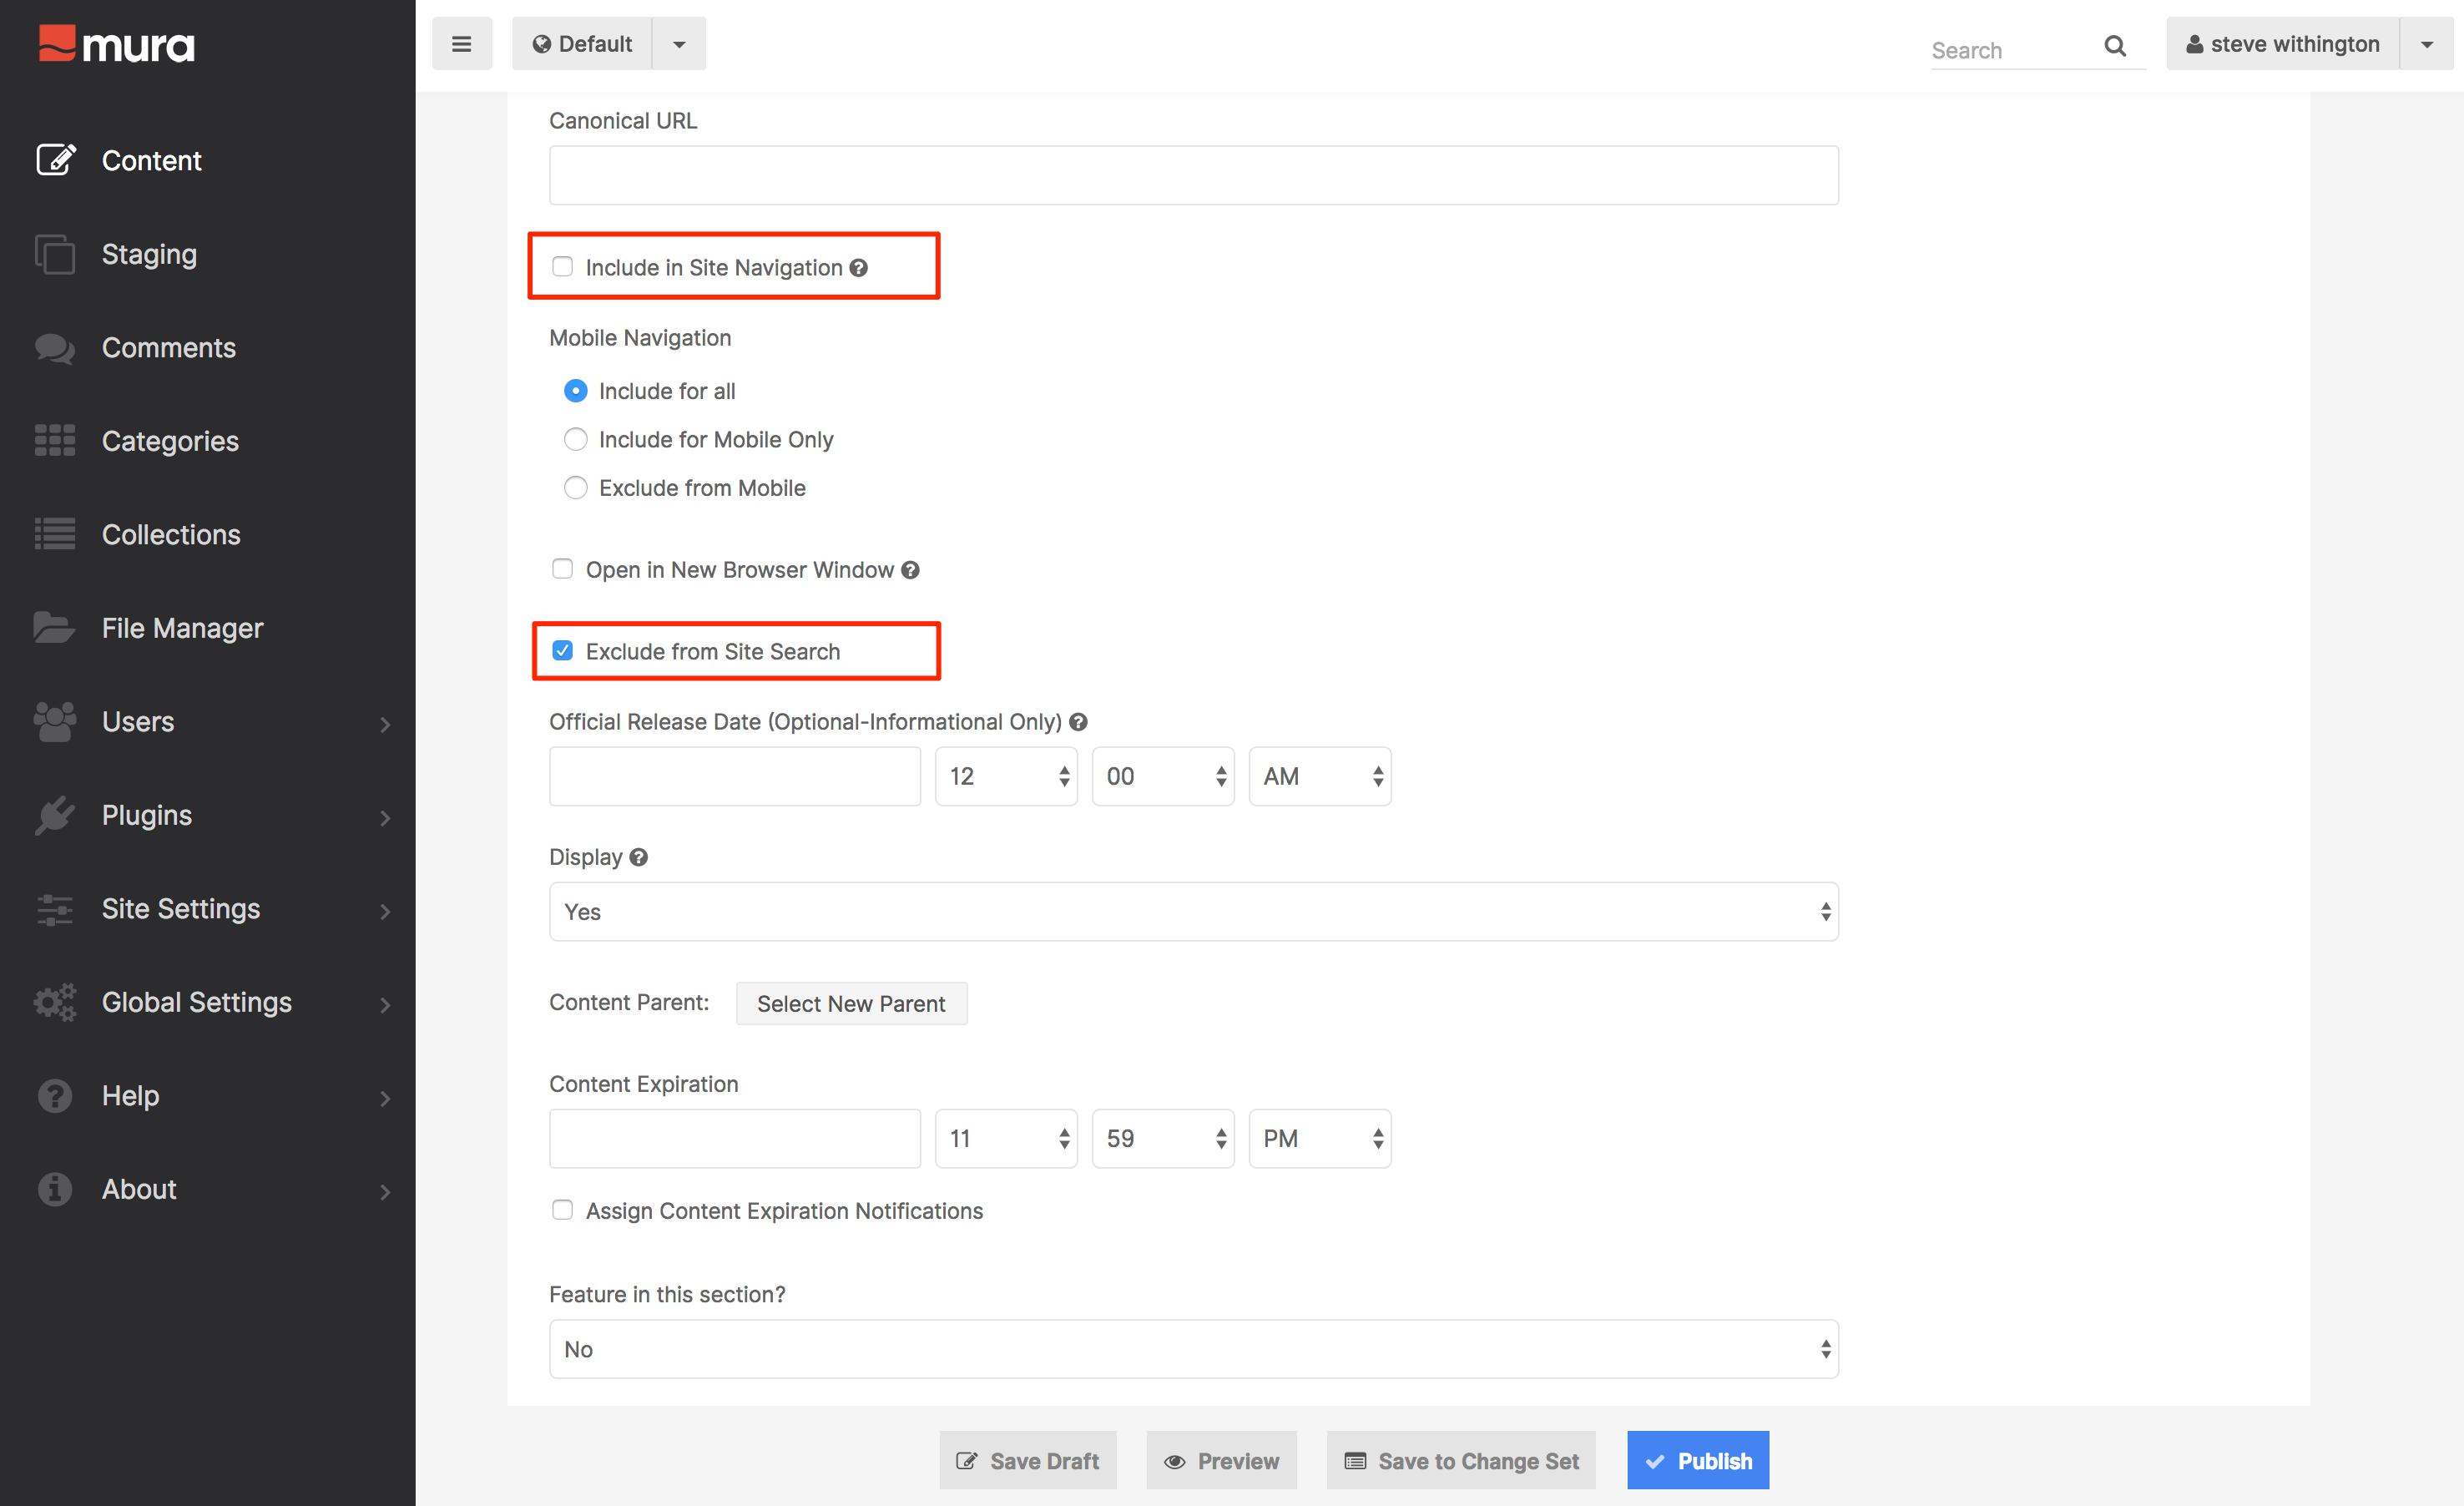
- Select the Publishing tab.
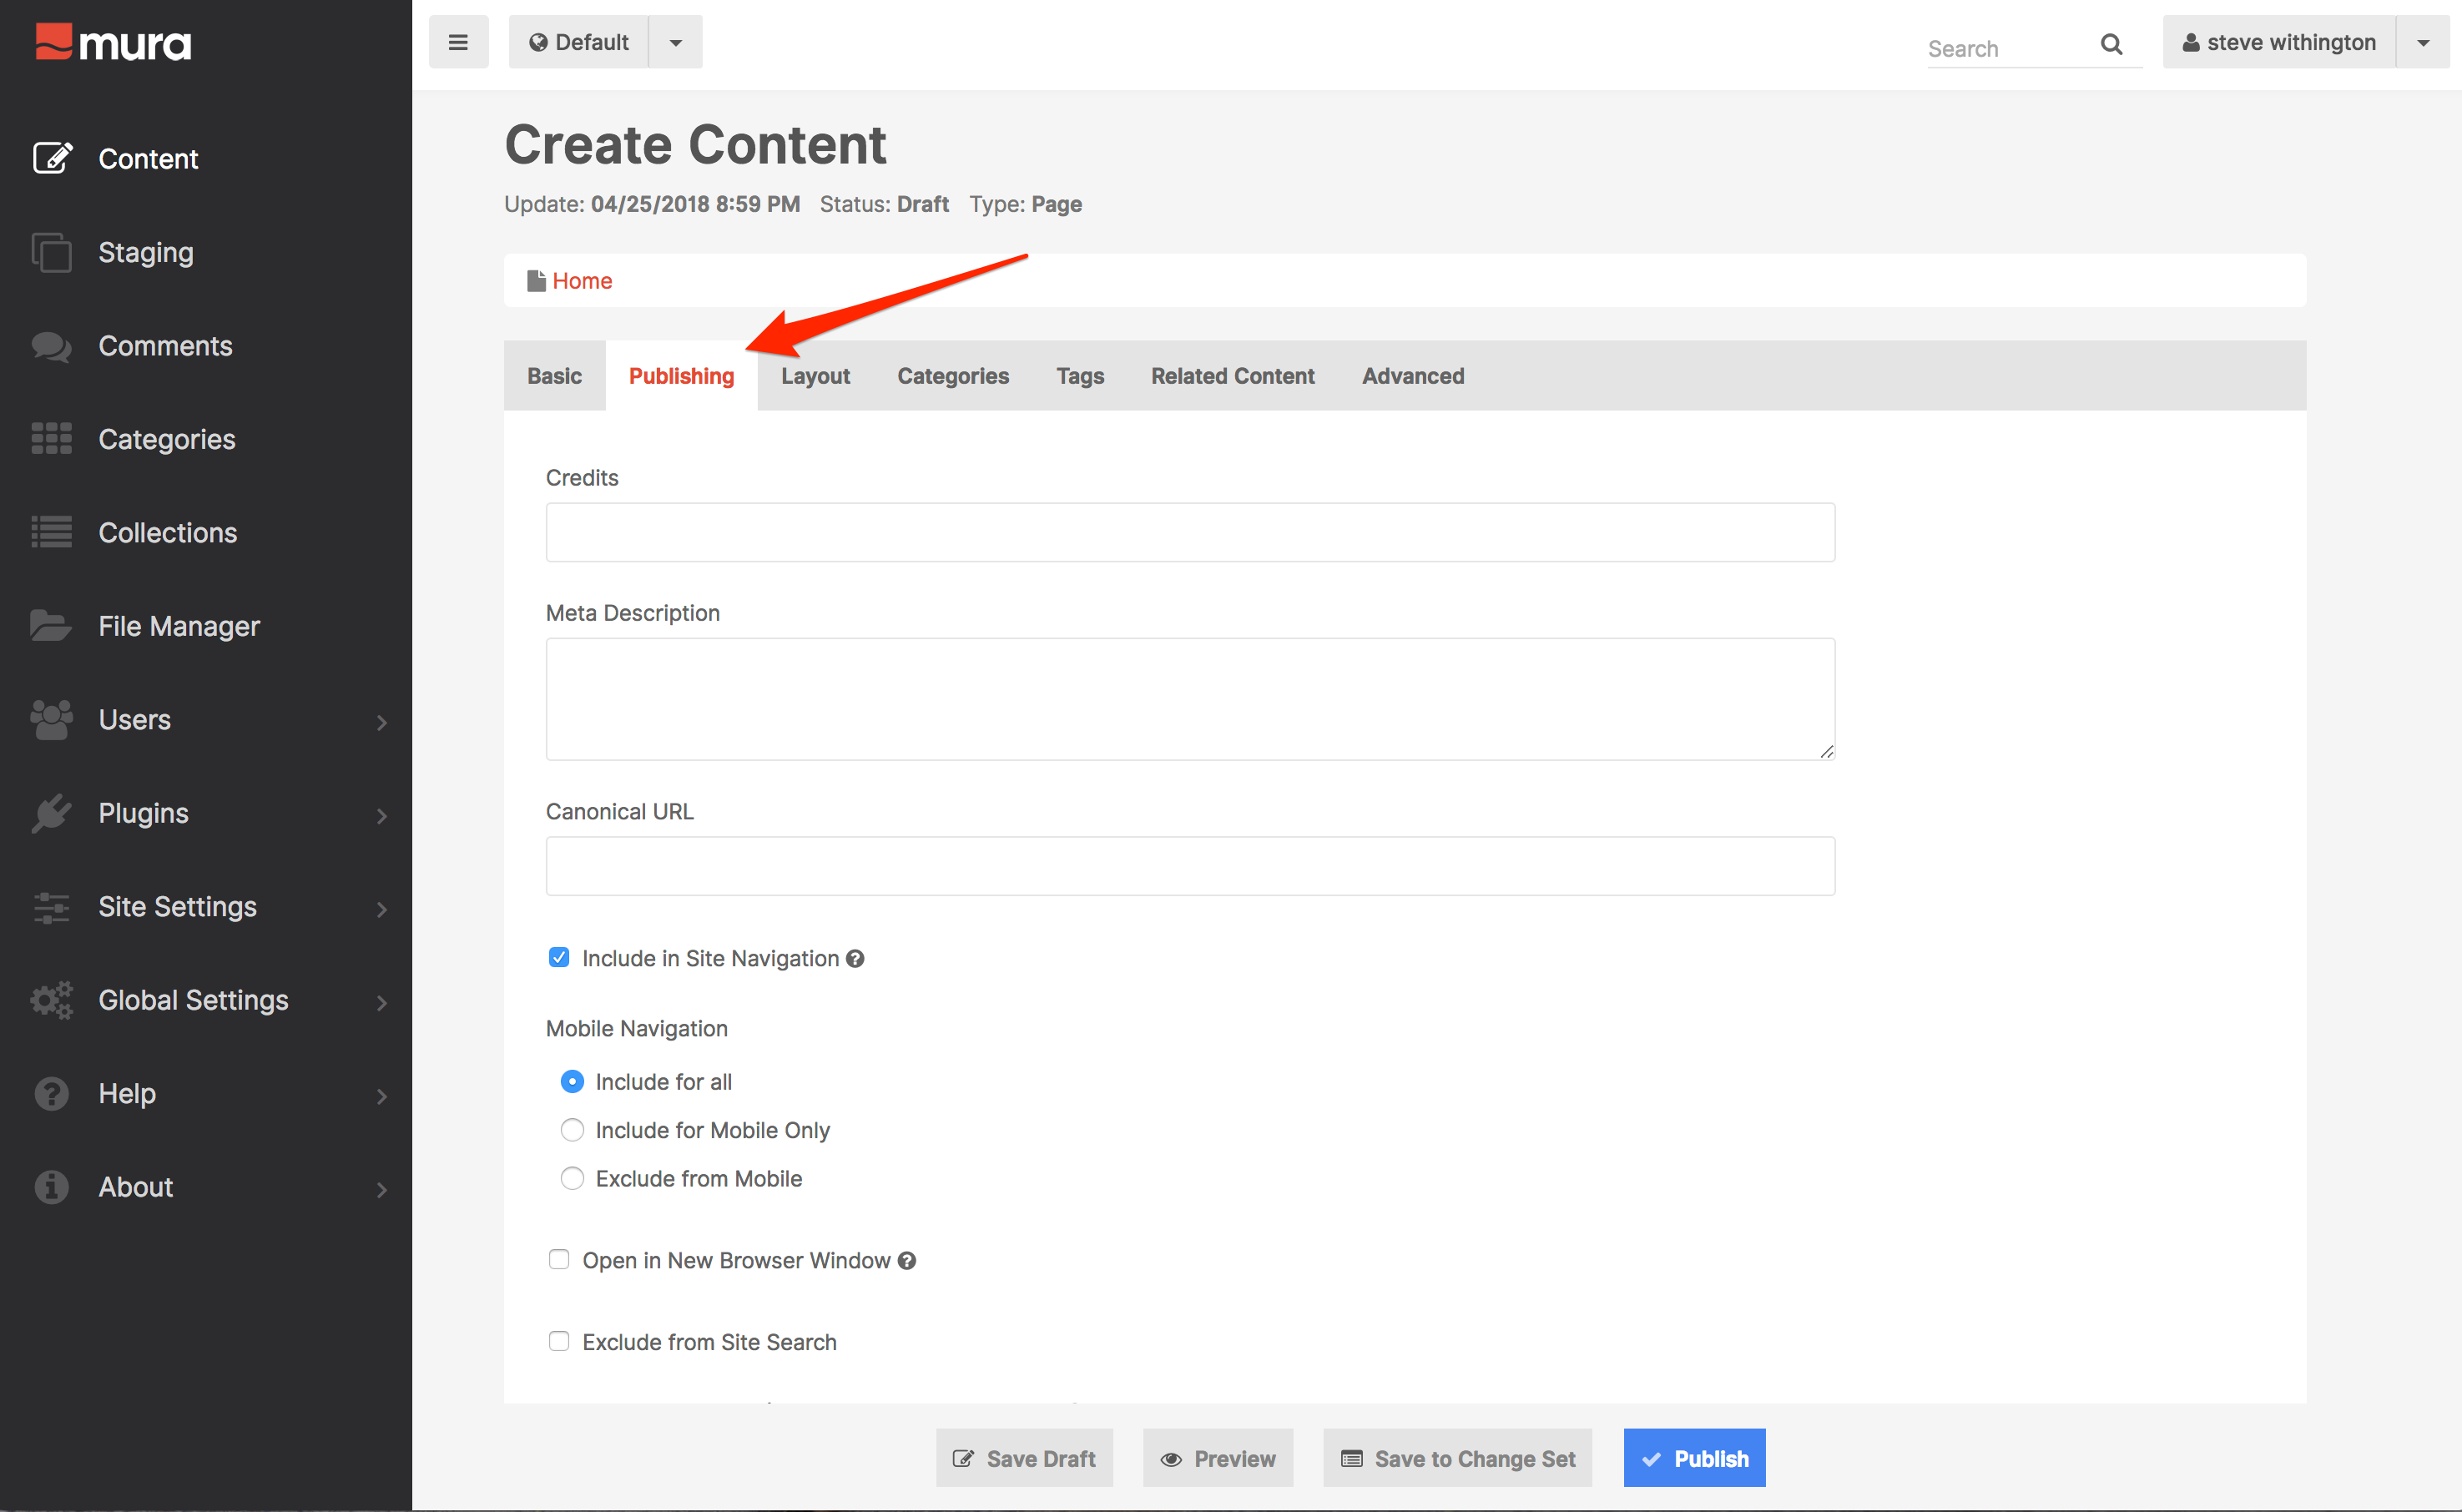
- On the Publishing tab, deselect Include in Site Navigation, and enable Exclude from Site Search to prevent it from appearing in search results.
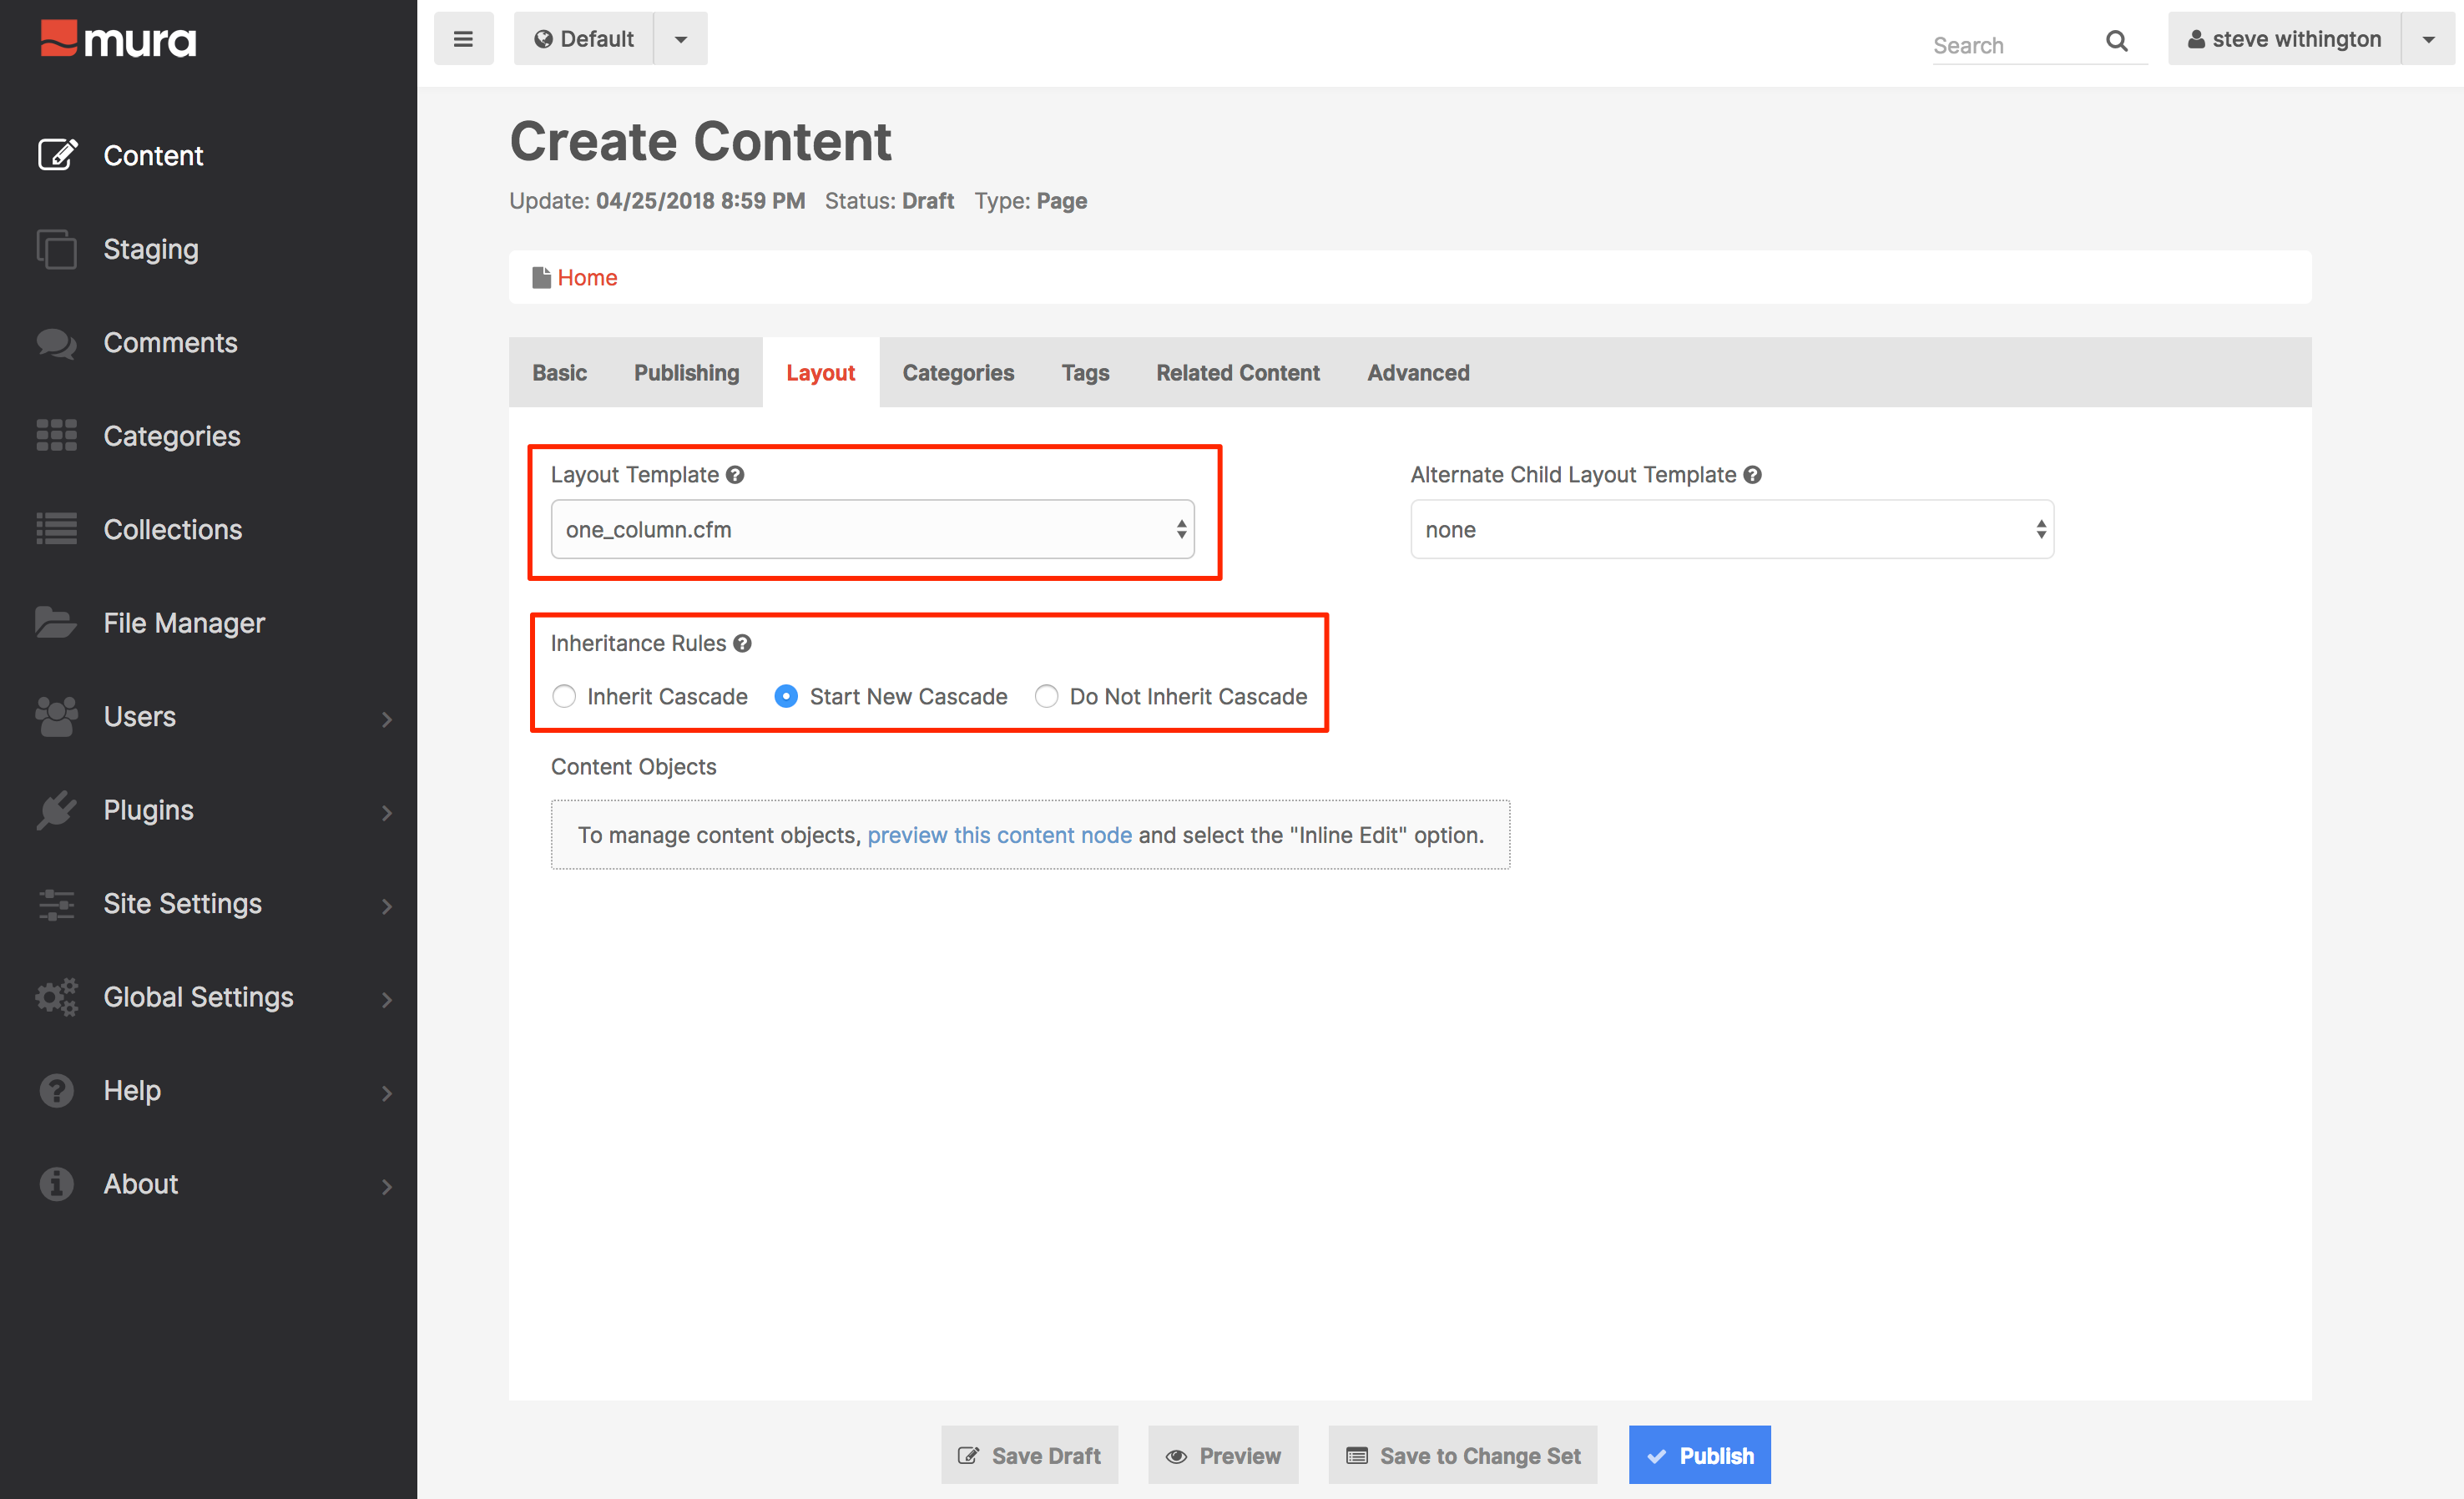
- Select the Layout tab.
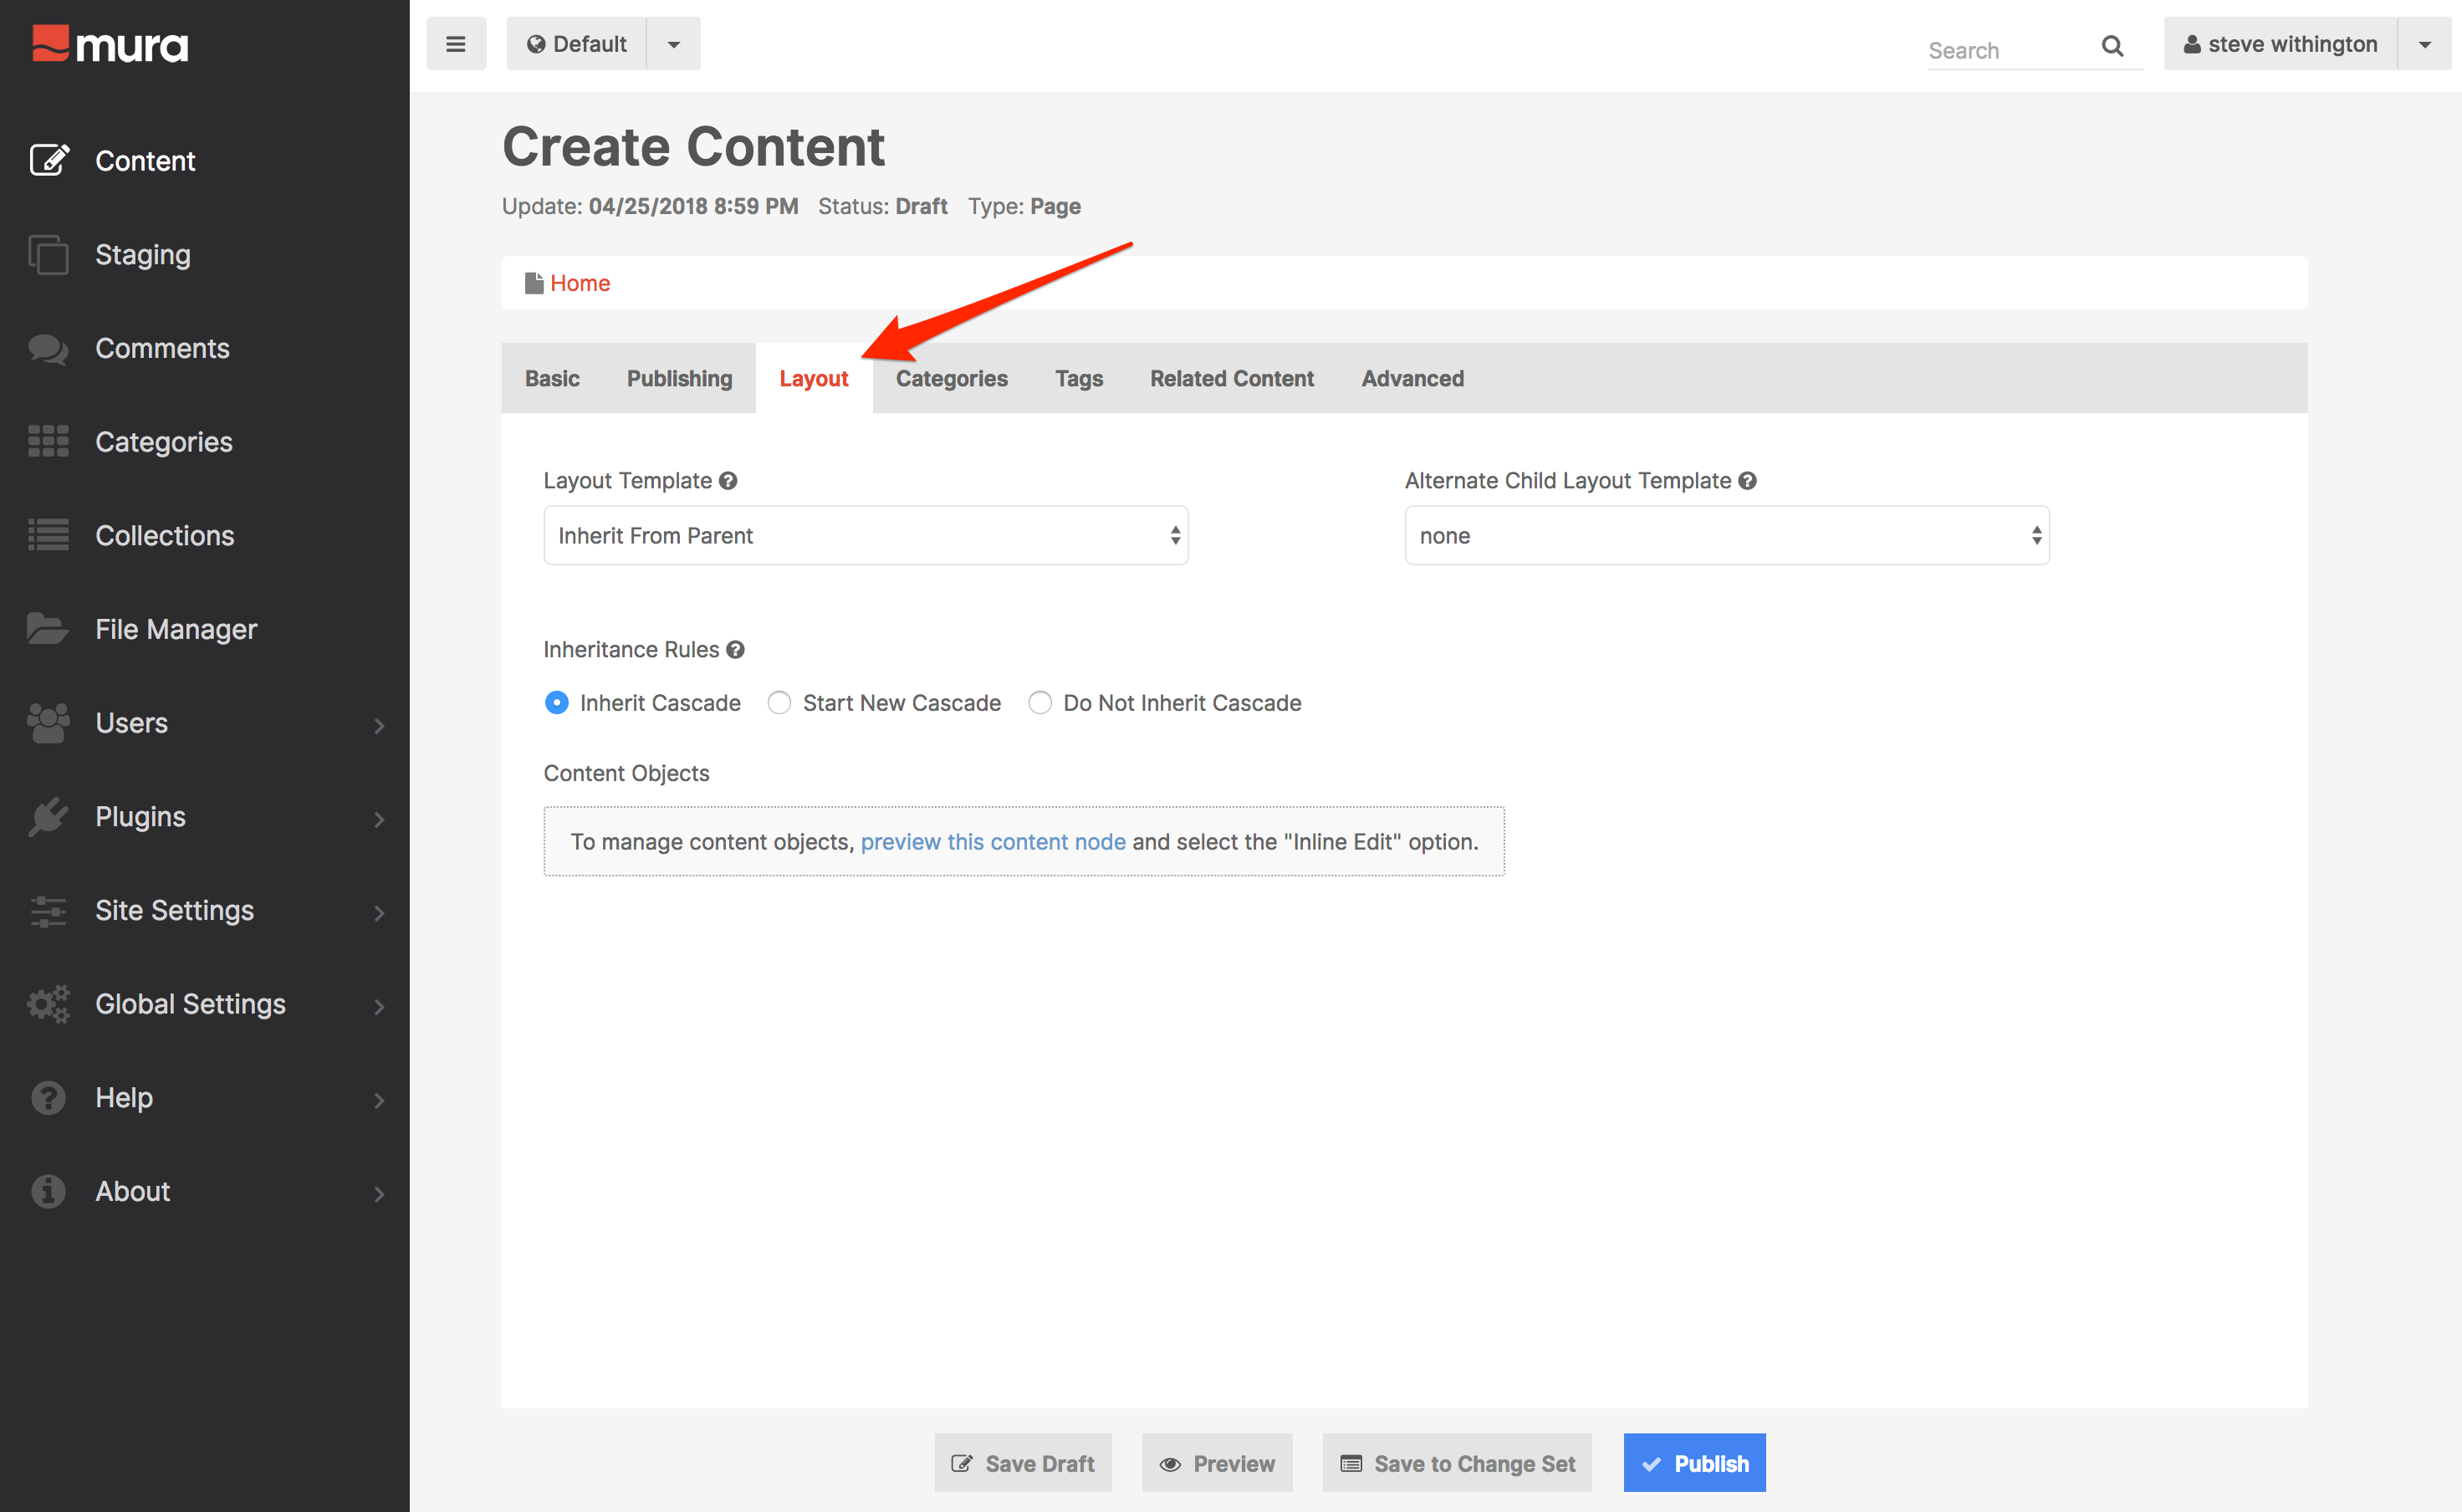
- On the Layout tab, select your desired Layout Template, and set the Inheritance Rules to Start New Cascade so that any display objects assigned to the Home page don't display on the 404 page.
- Select Publish to save your new 404 page.
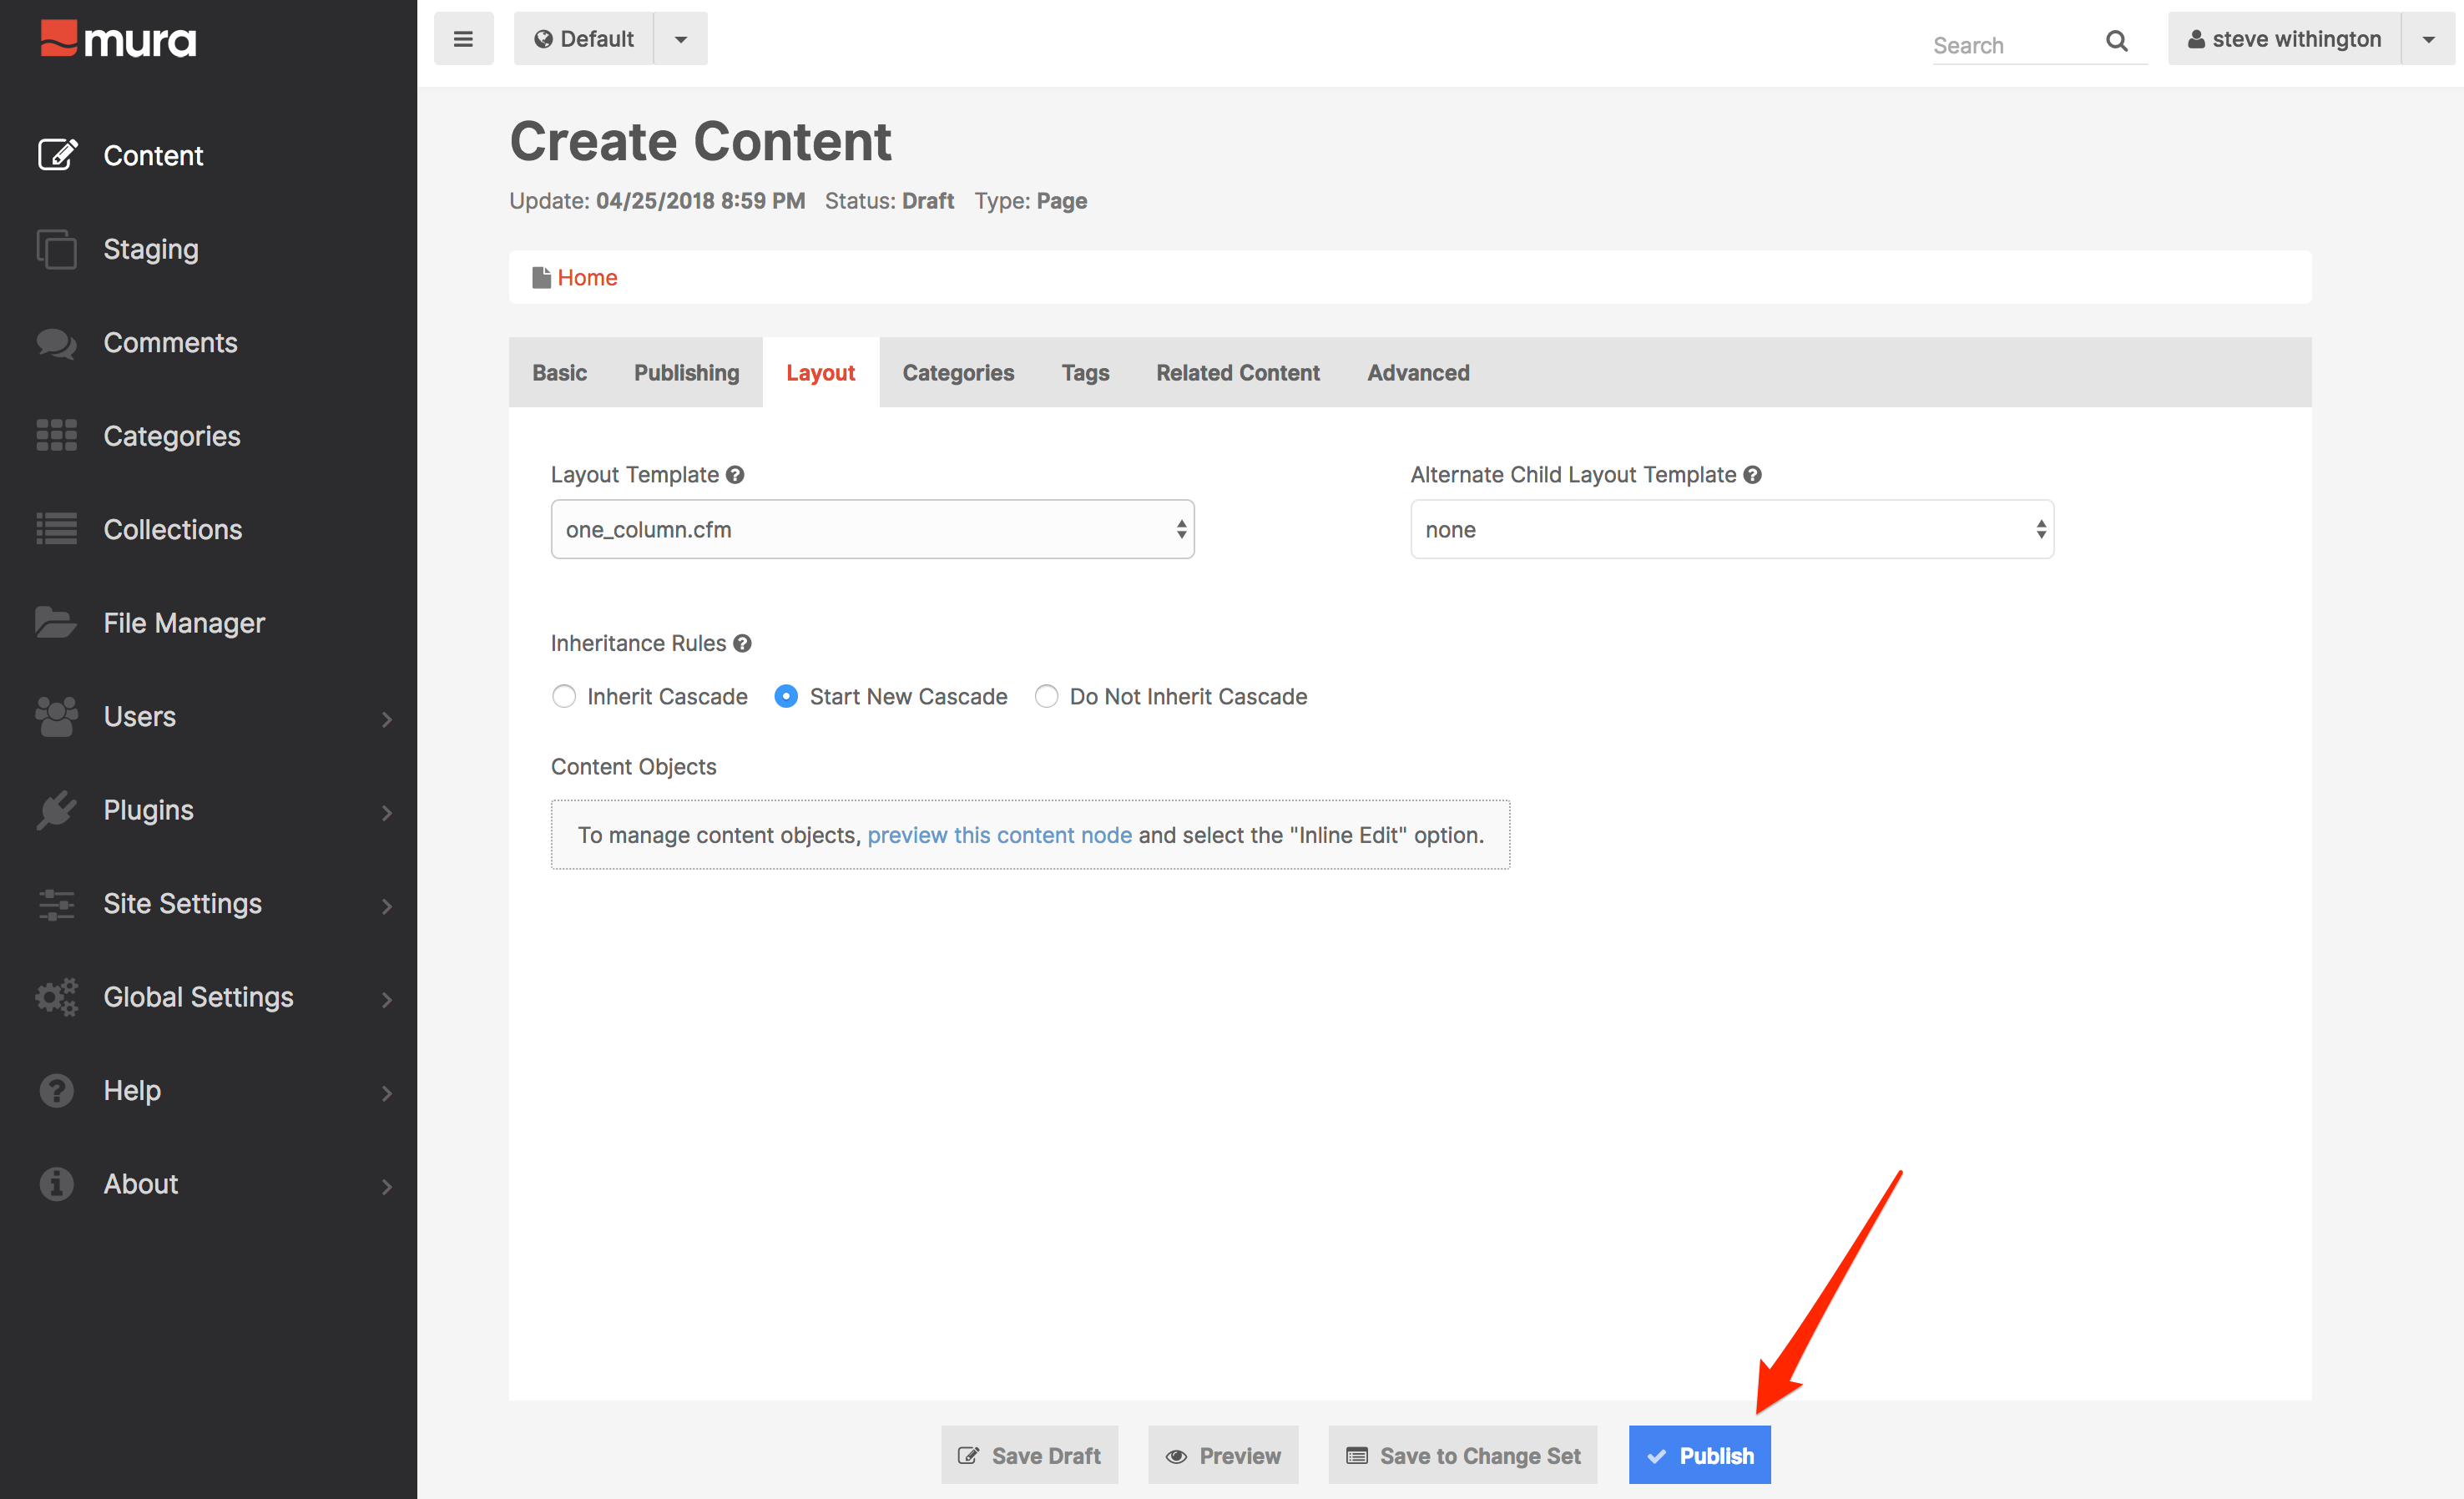
- Now, whenever anyone visits a page that doesn't exist in Mura, they should be presented with your custom 404 page.
Custom Error Page
If your website has any CFML errors, Mura will display information about that error by default. However, in a production environment, you probably don't want visitors to your website, or the general public, to see these errors. In most cases, you probably want to display a special "Site Error" message, and possibly log information about the error.
Mura offers a few settings to control whether or not you want these errors to display. If you don't want the errors to display, you can then supply a path to a specific file for Mura to use instead of its default.
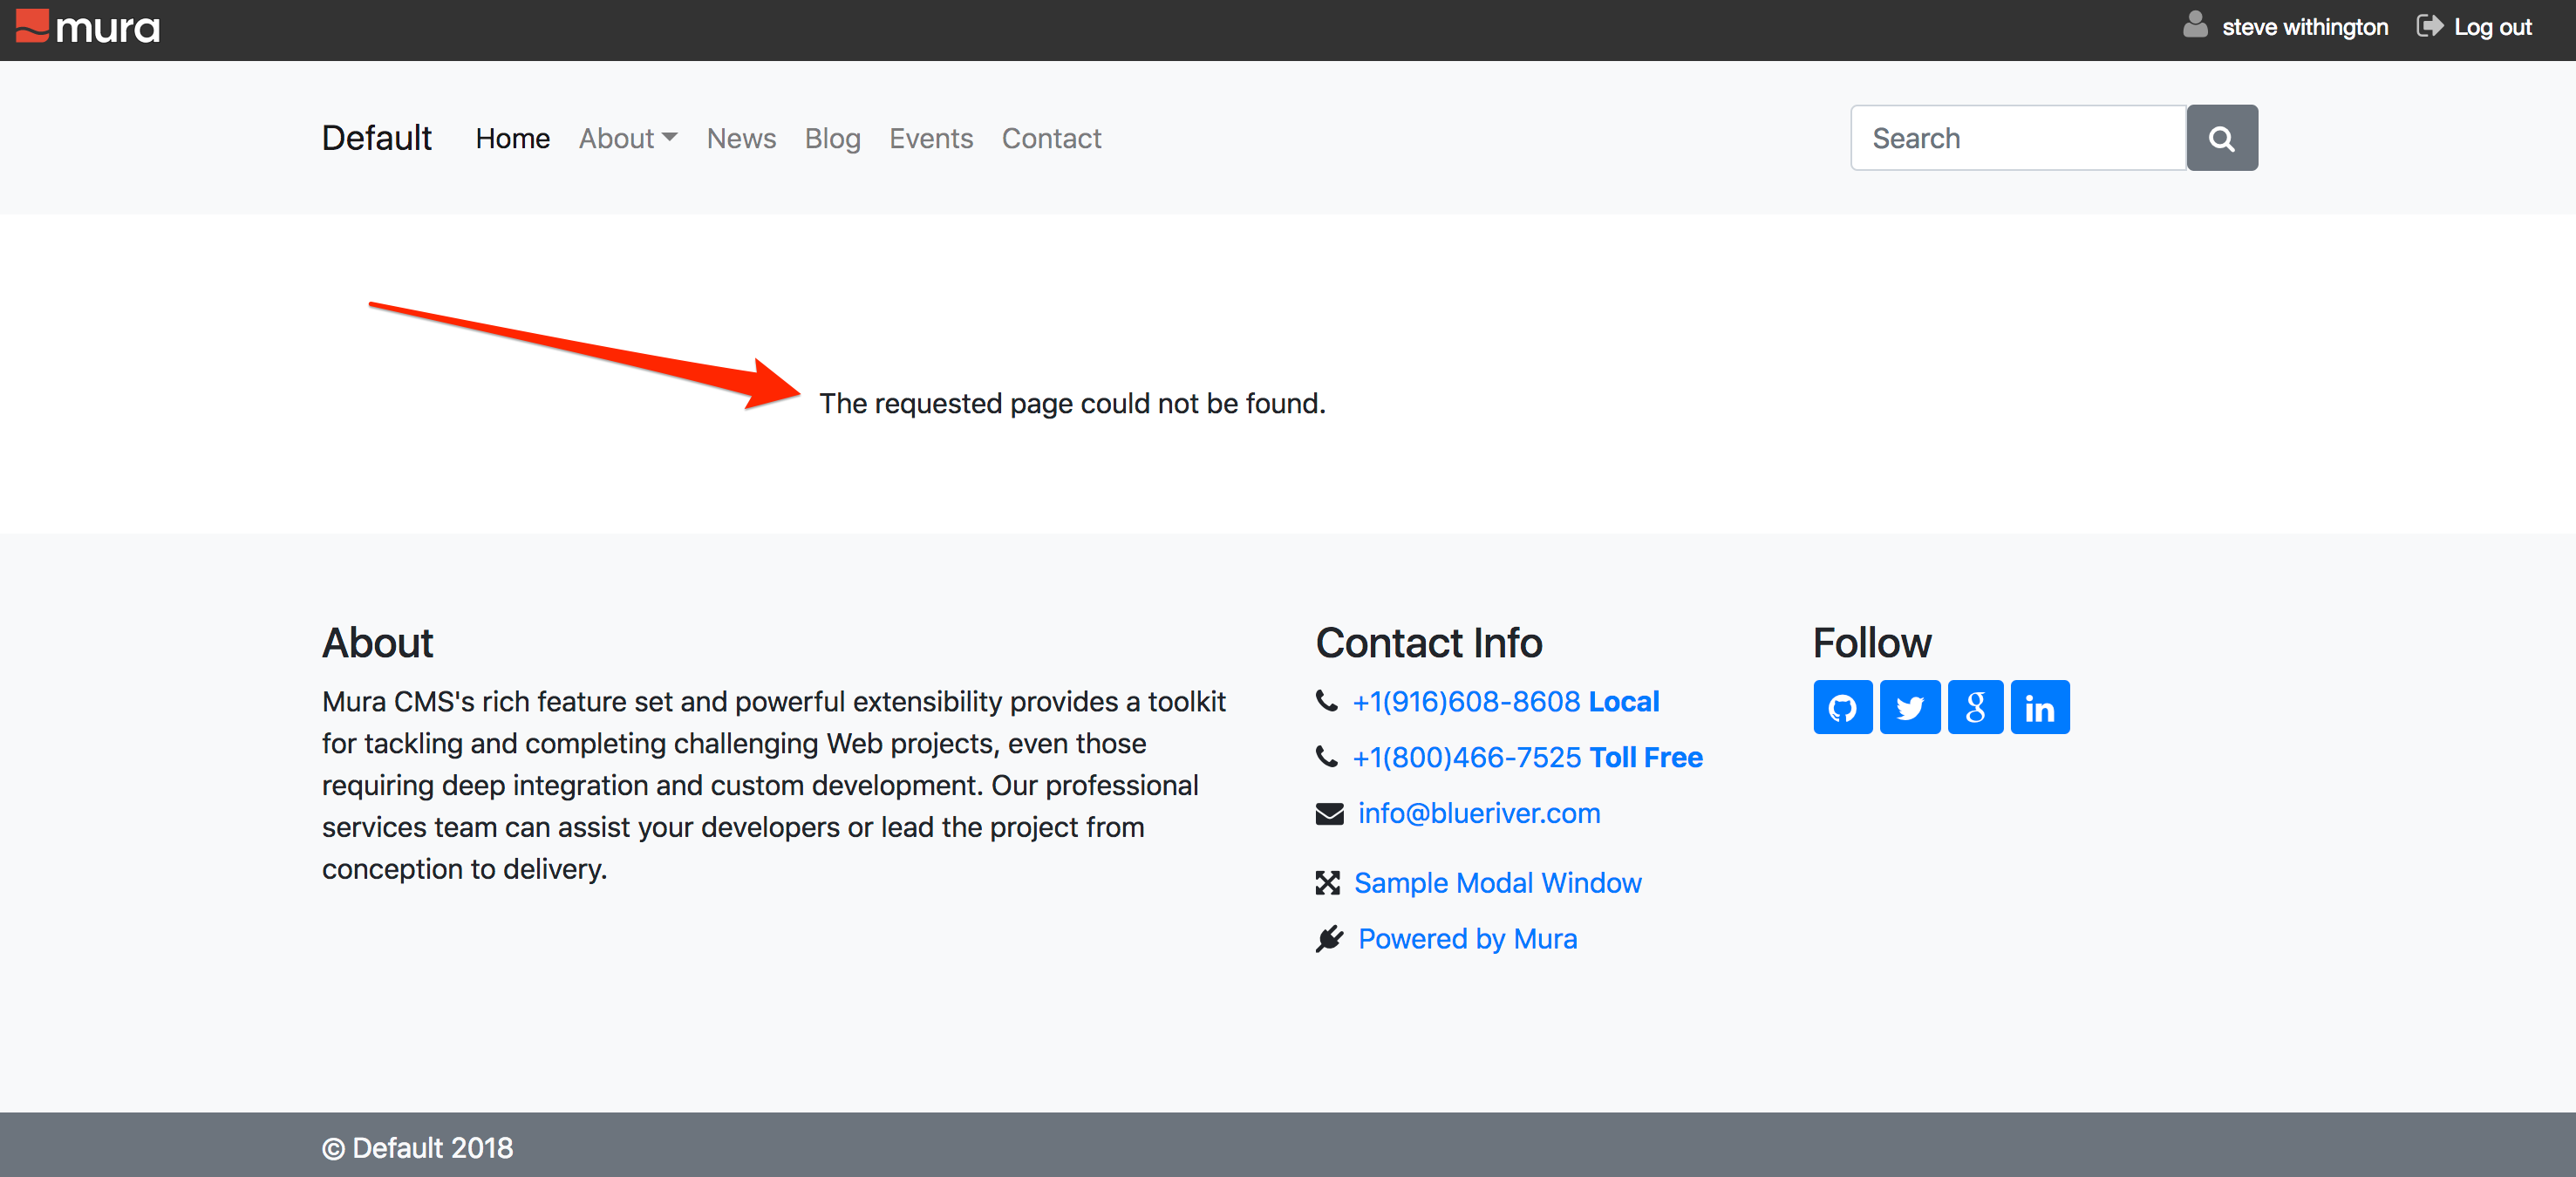
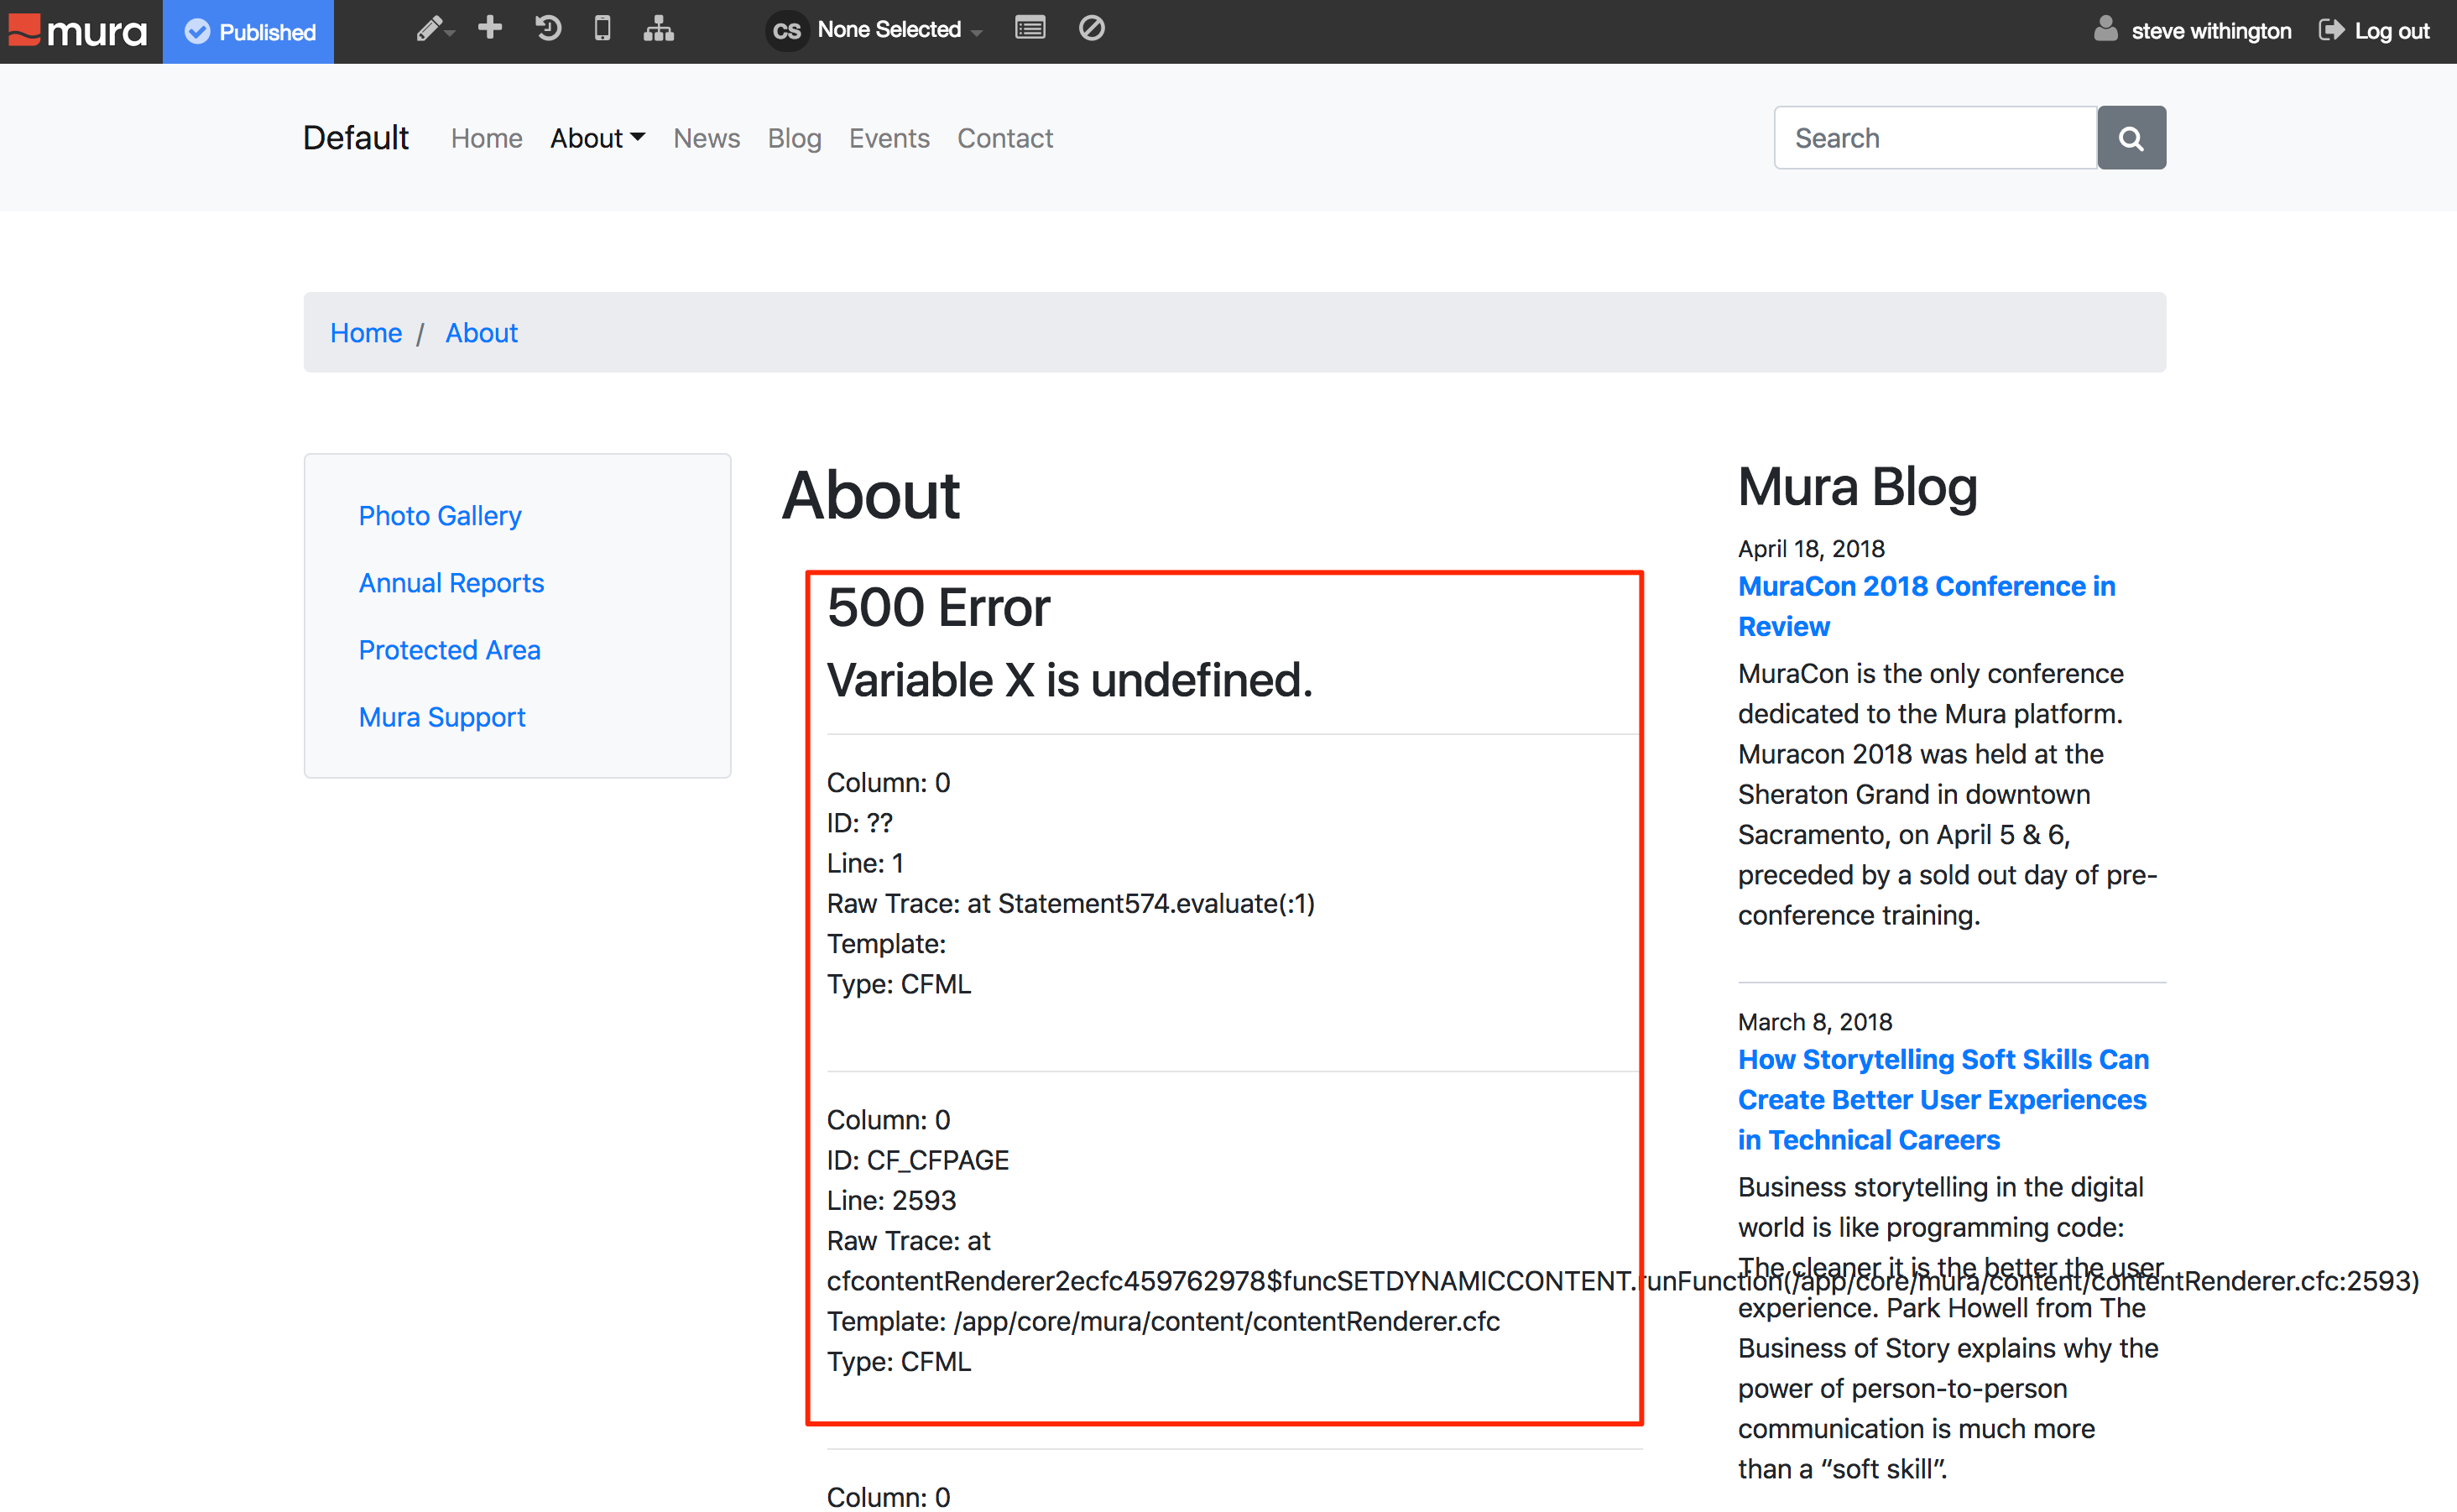
Before proceeding, you may want to purposefully create an error, so you can see what happens by default. For example, if you edit a content item, and use some Mura [m] tags to output an undefined variable, you will generate an error.
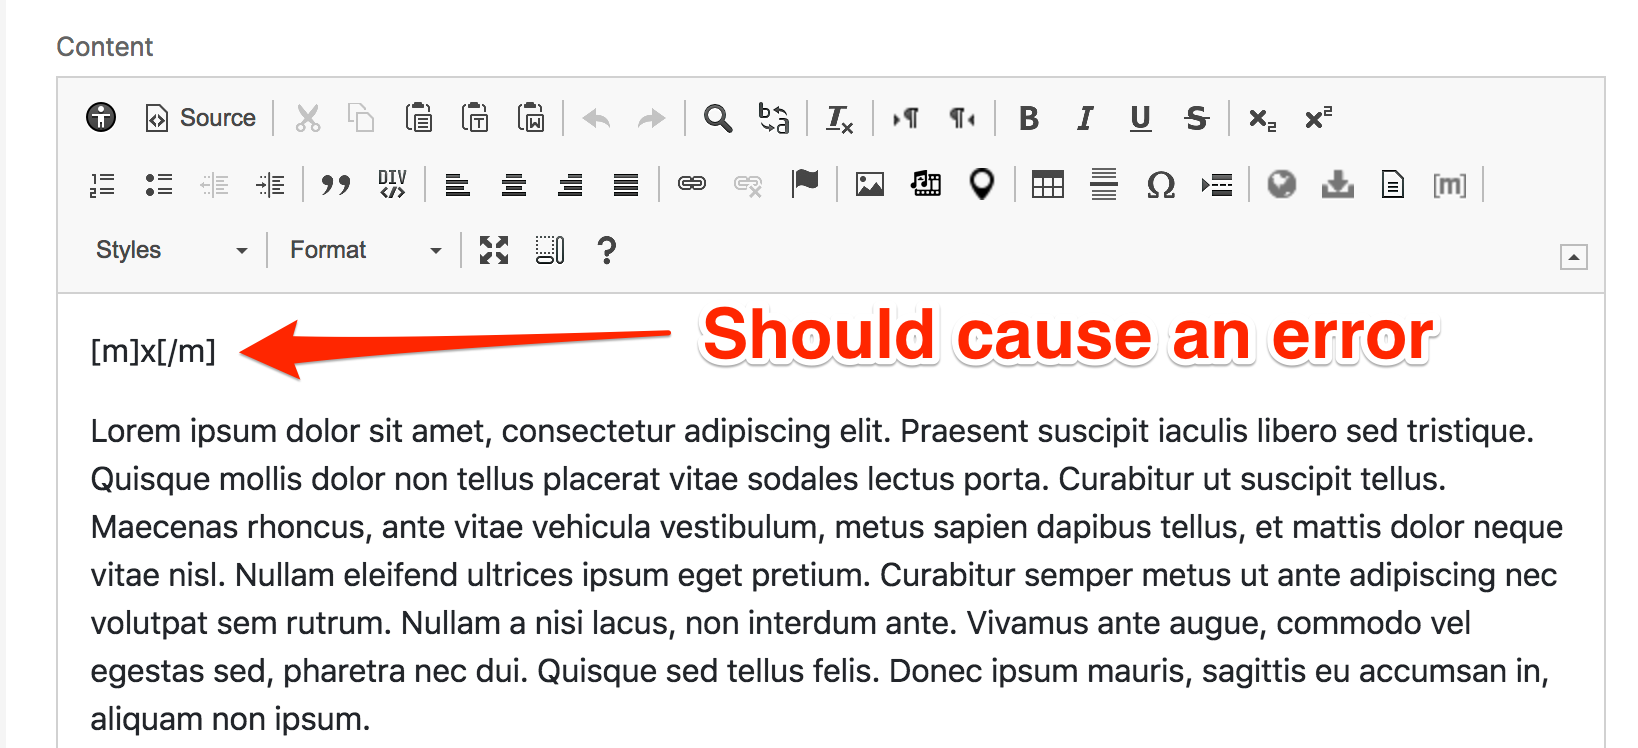
In the example above, we're attempting to output variable "x" which is not defined anywhere. So, because it's undefined, and Mura displays errors by default, the following image illustrates the generated error message.
How To Create A Custom Error Screen
Mura will only display a custom error screen when error messages are disabled. So, before proceeding, you will need to follow the steps under How to Enable/Disable Error Messages, and set debuggingenabled to false.
Once you've disabled error messages, follow the steps below to use your custom error screen.
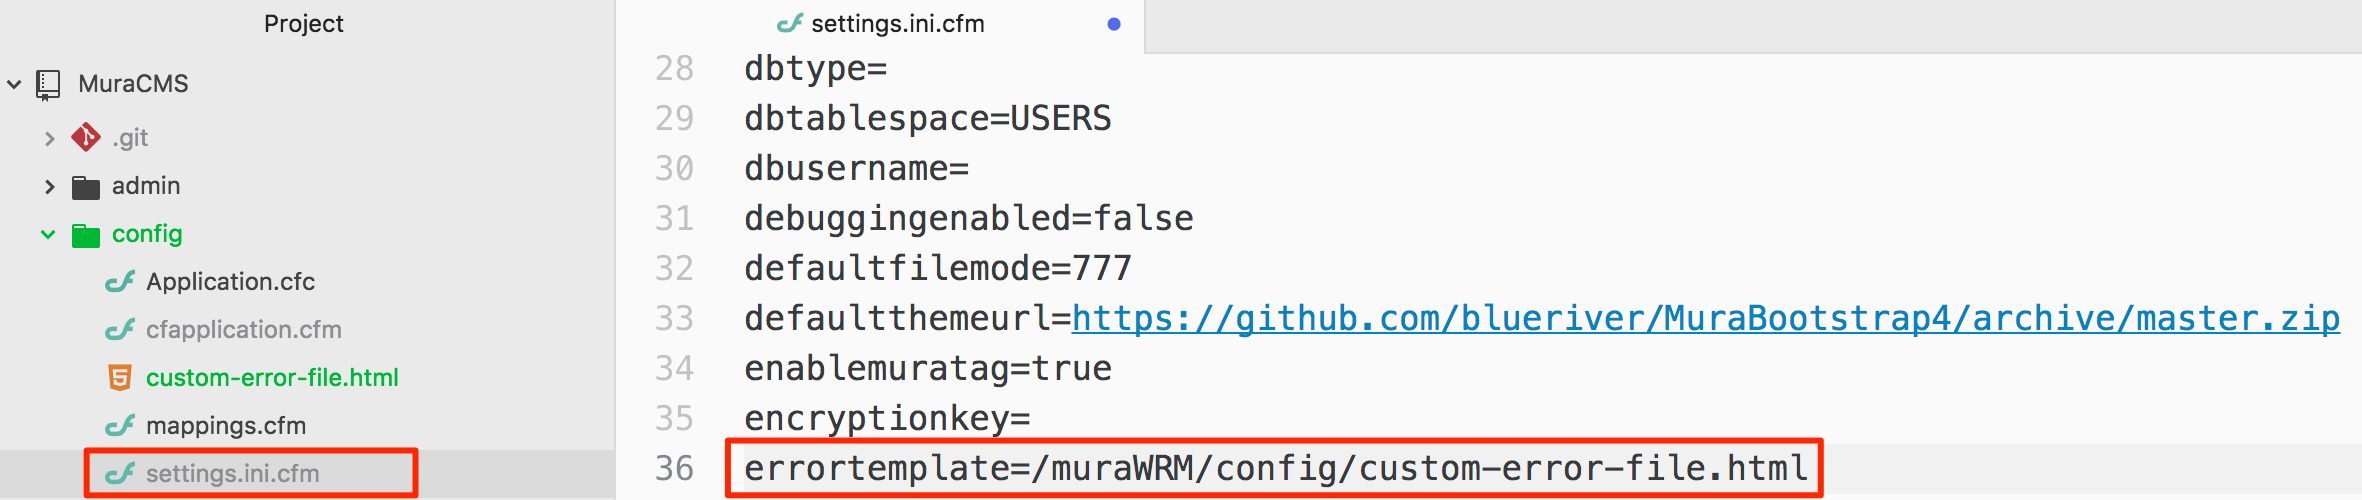
- Open the file located at
{context}/config/settings.ini.cfm.

- Locate the setting labeled
errortemplate. By default, the errortemplate setting is set to /muraWRM/core/templates/error.html.

- The default error template points to the file located under
{context}/core/templates/error.html.
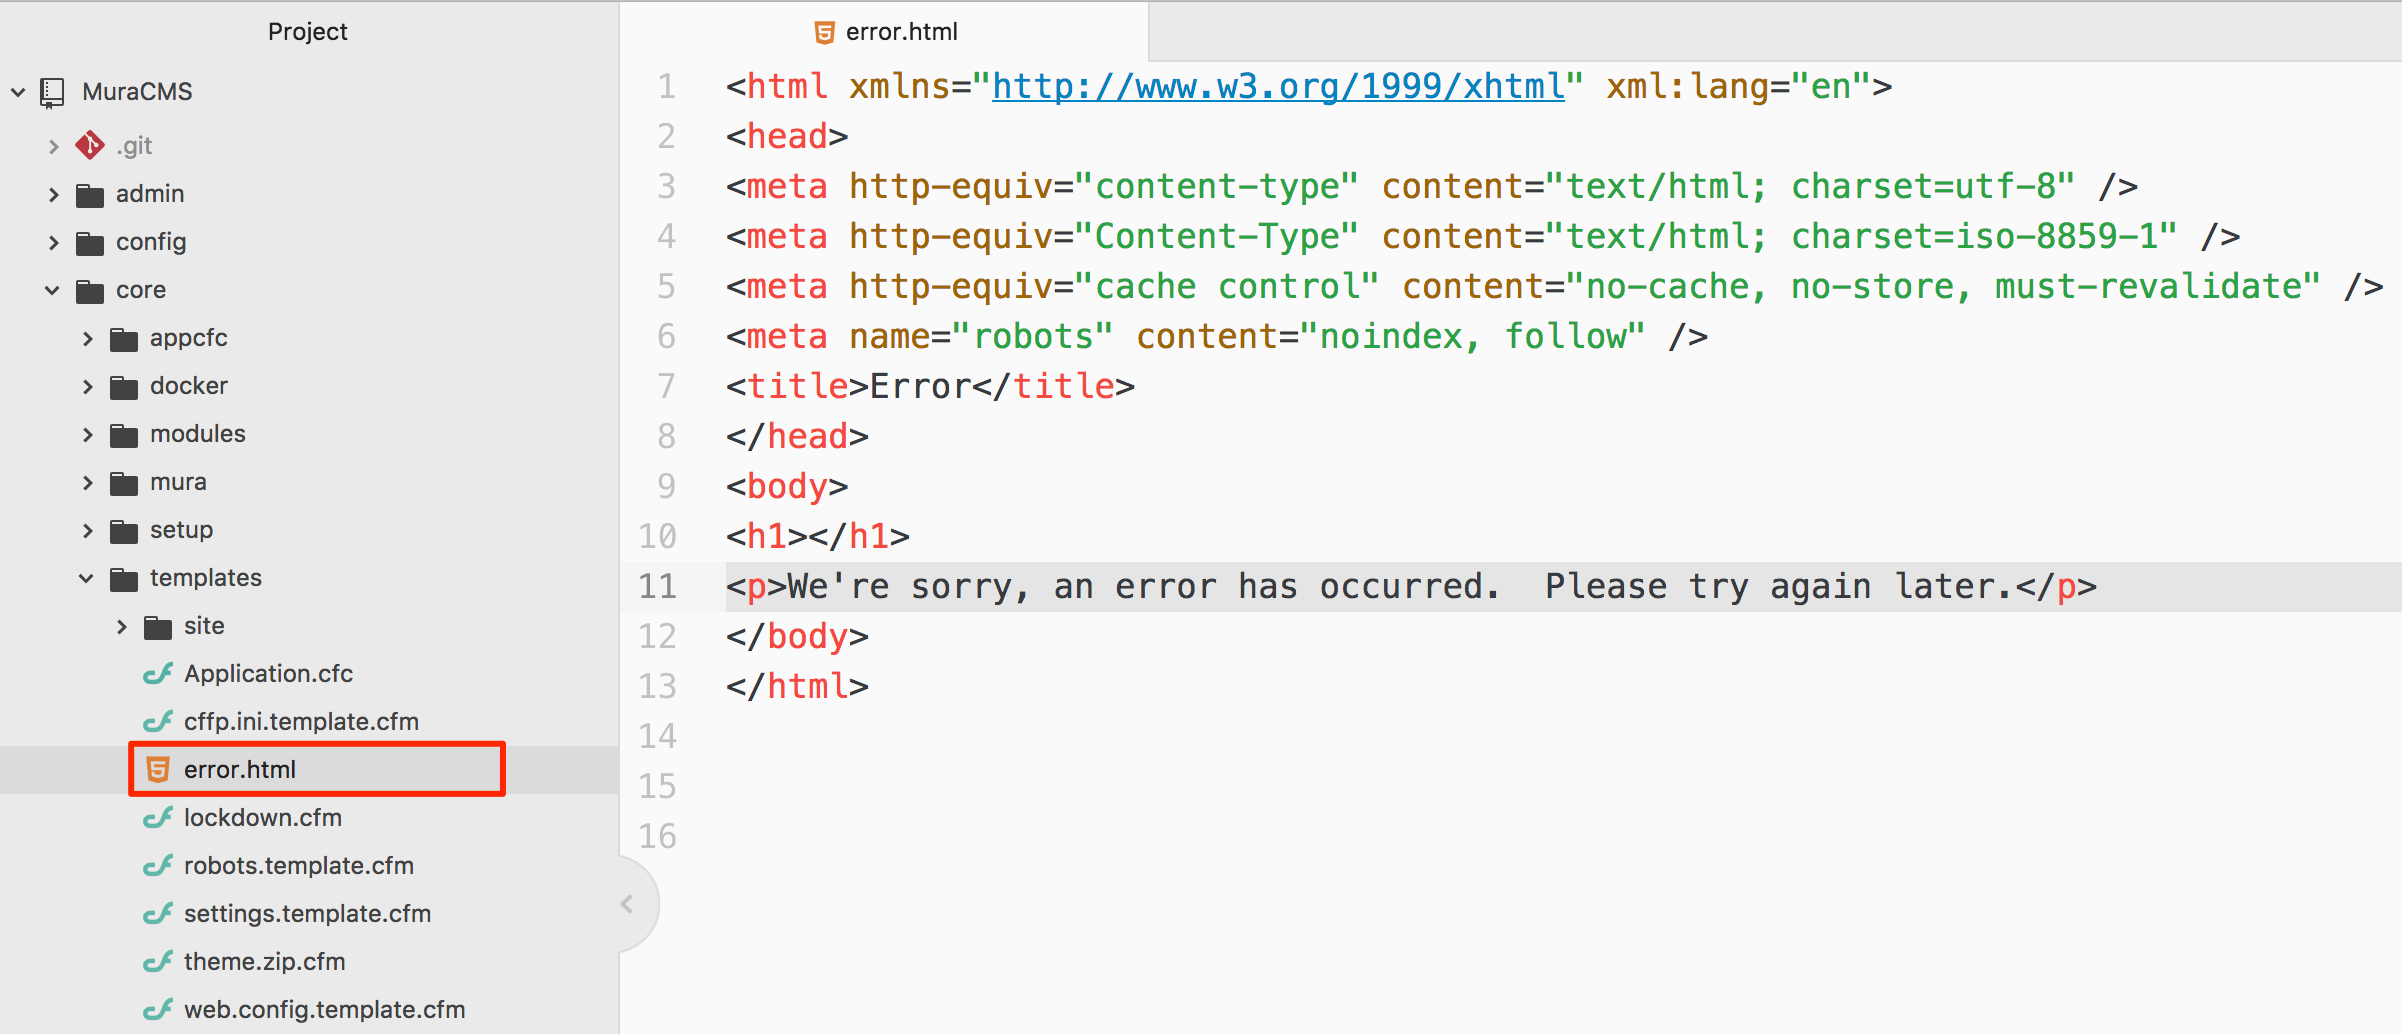
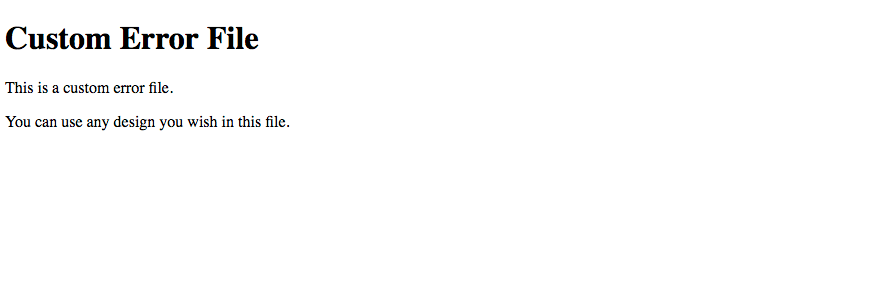
- The
error.html file simply generates the following screen by default.
- Do not modify the
error.html file directly. If you do, you run the risk of the file being overwritten after performing a "core" update.
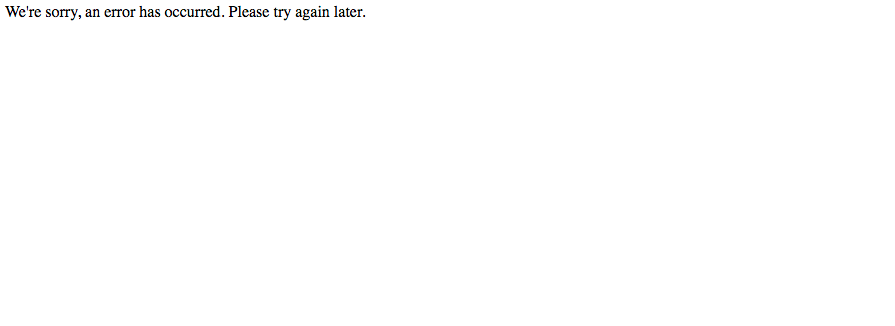
- Instead, create a new file with whatever you want to appear, and save it under your desired directory (e.g.,
{context}/config/custom-error-file.html). Technically, you could save it wherever you want under Mura, but you'll have to be aware of the file path for the next step. The illustration below shows a new file labeled "custom-error-file.html" and the file contains some simple HTML. You could create and use a custom CFML file as well, if desired.
- Next, we need to update the
errortemplate setting to point to the newly created file.
- Save the file.
- Reload Mura for the new settings to take effect.
Customizing the Web Editor
Mura is a Content Management System (CMS), and as such, supports the creation and modification of digital content. Part of the user interface includes a "web editor" that allows a user, even with limited expertise, to add, modify, and remove content from a website without the intervention of a webmaster.
The web editor is most often encountered in Mura when editing content, and is used for form fields such as "Content" and "Summary" that require HTML, yet abstracts the vast majority of the syntax from the content manager.
The current version of Mura utilizes CKEditor, an open source WYSIWYG text editor, which is designed to bring common word processor features directly to web pages, simplifying their content creation. The image below illustrates the default configuration of the web editor.

Many of the features and customization options for the web editor can be found in the CKEditor Documentation at http://docs.ckeditor.com. As a Mura theme developer, you are probably most interested in how to leverage information from the CKEditor Developer Guide. While the information contained there definitely applies, you will need to be aware of where to go in Mura, to make your customizations in an upgrade-safe manner. Throughout this section, you should be able to do just that.
Editor Settings
Mura's web editor, CKEditor, comes with a rich set of configuration options that make it possible to customize its appearance, features, and behavior.
Custom Configuration File
Mura utilizes a custom configuration file for setting CKEditor's configuration. Using a custom configuration file allows you to customize the various toolbars, and offers a way to control much of the way the web editor looks and functions.
The important piece to know is where you can place your custom configuration information. Mura automatically scans for specific files within your theme to use for CKEditor's configuration file. Listed below are the files Mura checks for in the specified order.
../themes/{ThemeName}/js/editor/config.js.cfm../themes/{ThemeName}/js/editor/config.js
The default theme for Mura as of v7.1, MuraBootstrap4, includes a sample file with miscellaneous configuration examples. You can find it under ../MuraBootstrap4/js/editor/config.js.cfm.txt
Since the sample file's extension ends with ".txt", Mura will ignore it. If you wish to use it, simply rename the file to remove the ".txt" file extension.
Custom Toolbar
A common question from developers centers around the ability to customize the editor toolbar. For example, if you only want the "Default" editor toolbar to display Bold, Italic, and Underline options, your configuration file could look something like the following code example.
if ( 'CKEDITOR' in window) {
    CKEDITOR.editorConfig = function( config ) {

        config.toolbar_Default = [
          {name:'group1',items:['Bold','Italic','Underline']}
        ];

    };
}
Using the example code above, the editor toolbars for "Content" will only display the Bold, Italic, and Underline options. However, the "Summary" toolbar will not change, as shown below.

As noted in the sample configuration file, if you wish to update the "Summary" toolbar, you'll need to explicitly define that as well. In addition, the front-end toolbar may be referenced with "QuickEdit". Below is an example that would update all three toolbars.
if ( 'CKEDITOR' in window) {
    CKEDITOR.editorConfig = function( config ) {

        config.toolbar_Default = [
          {name:'group1',items:['Bold','Italic','Underline']}
        ];

        config.toolbar_Summary = config.toolbar_Default;
        config.toolbar_QuickEdit = config.toolbar_Default;

    };
}
As you can see in the example code, we're simply using the first definition for the other toolbars. However, you could easily have different options for each toolbar definition, if you wish.
The example below displays both the Summary, and Content ("Default") toolbars.

The example below displays the "QuickEdit" toolbar used for front-end editing.
As you can see, Mura exposes CKEditor's configuration settings to allow you the ability to customize Mura's web editor quickly and easily.
Where to Learn More
All available CKEditor configuration options can be found in the CKEditor API documentation. Please refer to the CKEDITOR.config object definition for full details on each option.
Editor Styles Drop-down
Mura's web editor, CKEditor, includes a Styles drop-down list which contains styles that you can apply to editor content in order to assign semantic value to the text you are creating. The functionality is provided by the Styles Combo plugin.

Defining Styles
Mura automatically scans for specific files within your theme to apply styles to the drop-down list. Listed below are the files Mura checks for in the specified order.
../themes/{ThemeName}/js/editor/styles.js.cfm../themes/{ThemeName}/js/editor/styles.js
Using the first option with a ".cfm" file extension, allows you the ability to include dynamic code, in the event you wanted to do so.
The default theme for Mura as of v7.1, MuraBootstrap4, includes a sample file with some styles included. You can find it under ../MuraBootstrap4/js/editor/styles.js. Any styles defined here will appear in the Style drop-down list.
Where to Learn More
To learn more about CKEditor Styles, visit the Applying Styles to Editor Content section in the CKEditor documentation. Please refer to the CKEDITOR.styleSet object definition for full details on each option. The Styles section also has some useful information.
Editor Content CSS
Mura's web editor, CKEditor, can include your own CSS files to be used to apply style to the editor content. Generally, these styles should reflect the CSS used in the target pages where the content is to be displayed.
Mura automatically scans for specific files within your theme, specifically for this purpose. Listed below are the files Mura checks for in the specified order.
../themes/{ThemeName}/css/editor.css.cfm../themes/{ThemeName}/css/editor.css
Using the first option with a ".cfm" file extension, allows you the ability to include dynamic code, in the event you wanted to do so.
The default theme for Mura as of v7.1, MuraBootstrap4, includes a sample file with basic styles included. You can find it under ../MuraBootstrap4/css/editor.css. Any style definitions found in the file are applied to content entered in the editor body/content area.
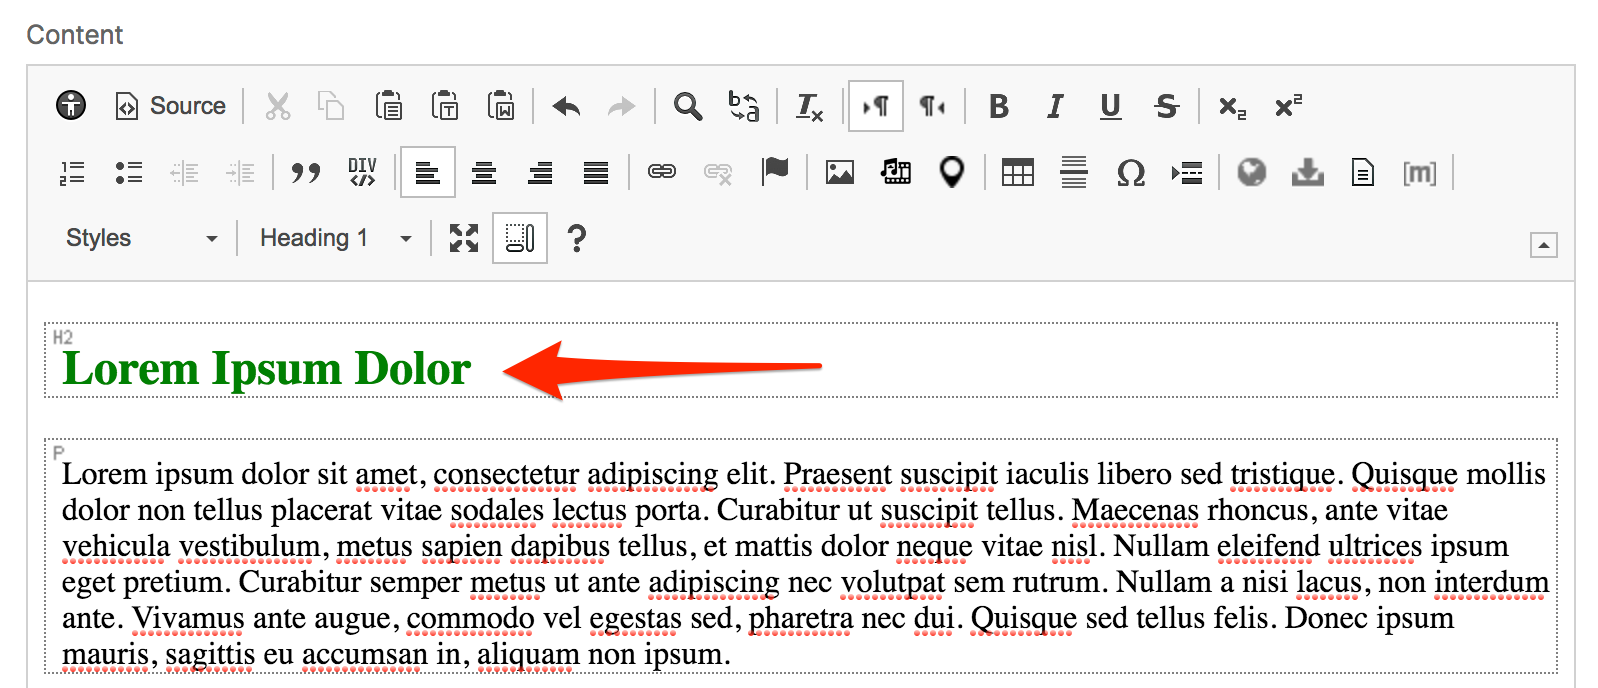
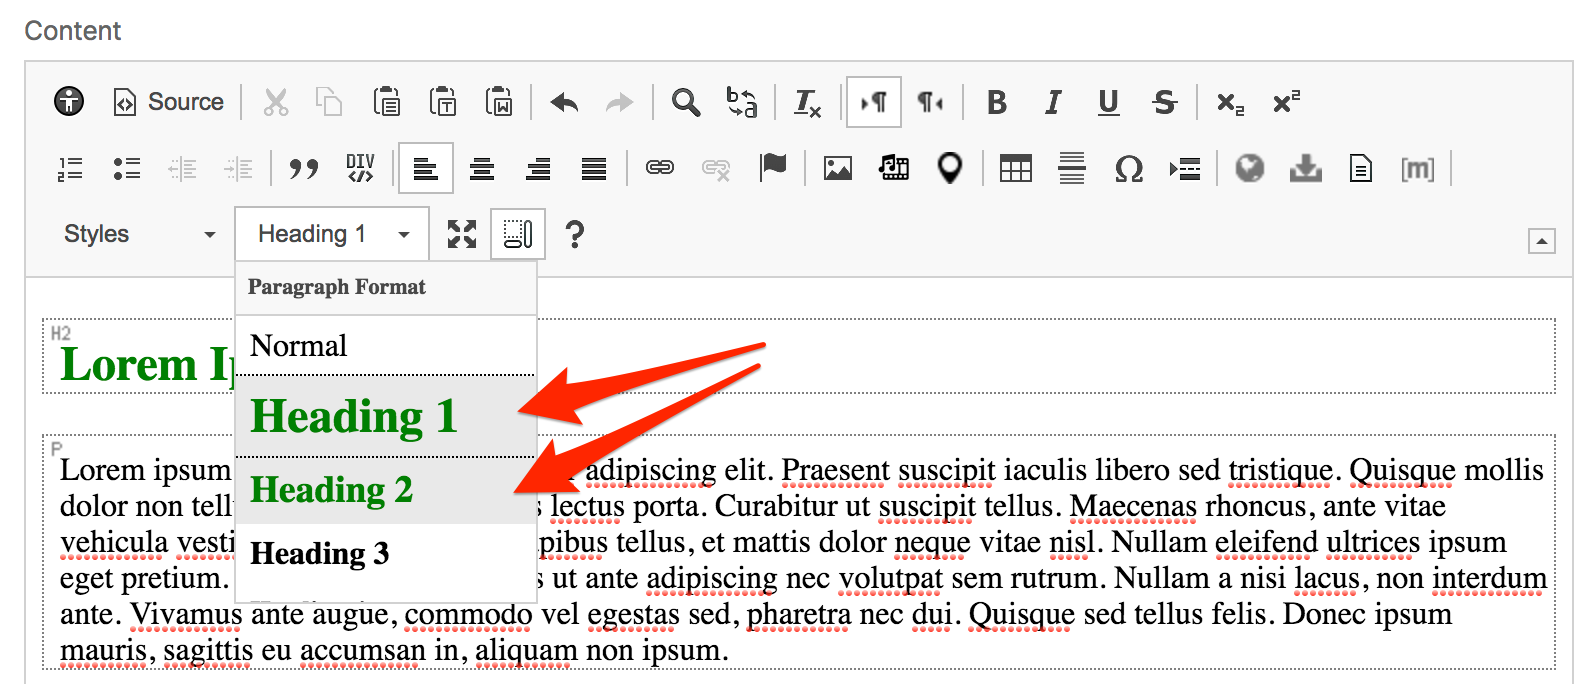
For example, if you wanted to set the color of <h2> and <h3> tags to "green", you could add the following to your CSS file.
h2, h3 {
    color: green;
}
The example image below illustrates the result of the <h2> tag (visible due to the Show Blocks button being enabled).
Your style definitions may also affect the styles of elements in the Paragraph Format select menu.
Where to Learn More
The CKEditor documentation has more information. The section on Applying Block-Level Text Formats contains some useful information as well.
Editor Body Templates
Mura includes the Content Templates plugin for CKEditor, which provides a dialog to offer predefined content templates - with page layout, text formatting and styles. It comes with a couple of sample templates, and theme developers may also create their own templates.
This feature only impacts the "Content/Body" area of the layout, and is separate from Mura's layout templates.
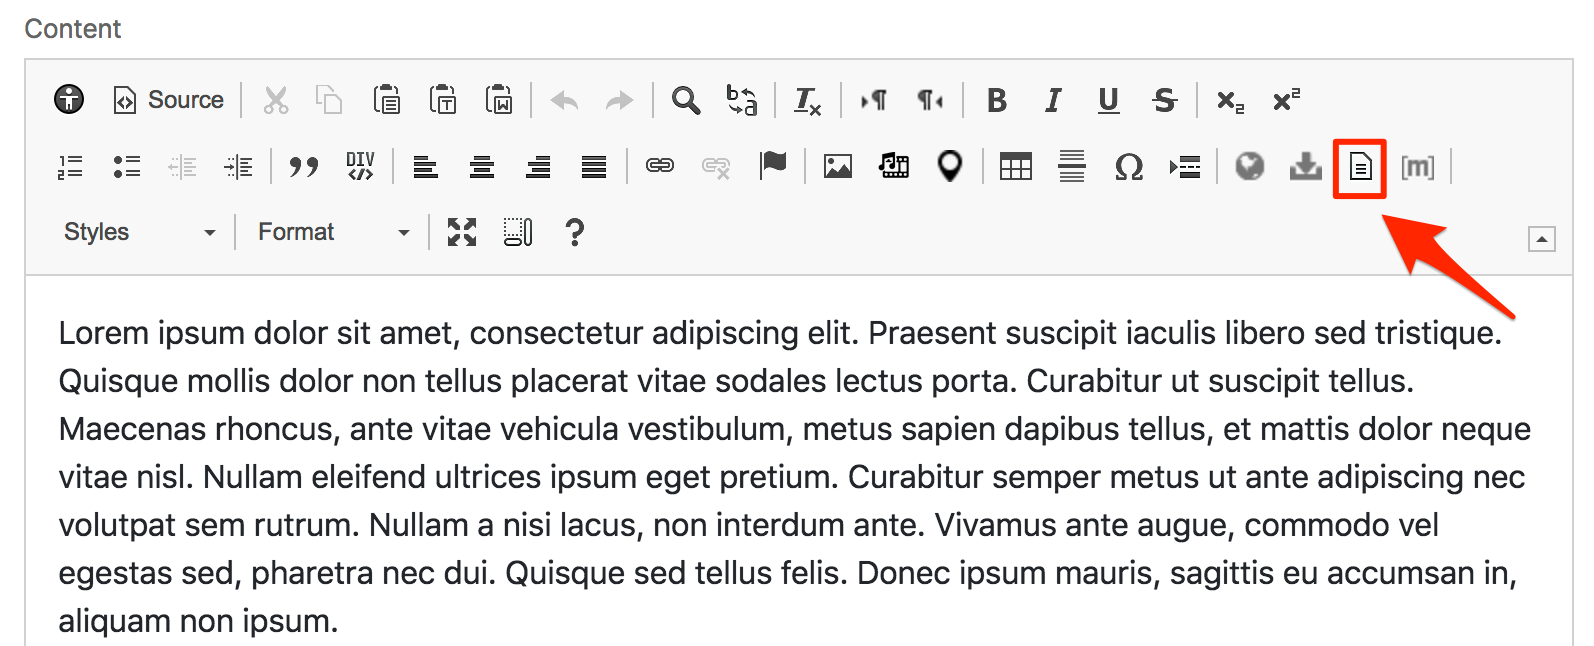
To see the sample templates in action, select a content item to edit, and locate the template button on the web editor toolbar. It's typically located on the last row, just before the Mura [m] tag button, as highlighted below.
Clicking the template button will launch the Content Templates dialog window.

The sample layouts include 2 Columns, 3 Columns, and 4 Columns. If "Replace actual contents" is enabled, all content will be deleted and replaced with the sample content. If you wish to disable this feature by default, you can add config.templates_replaceContents = false; to your editor's configuration settings.
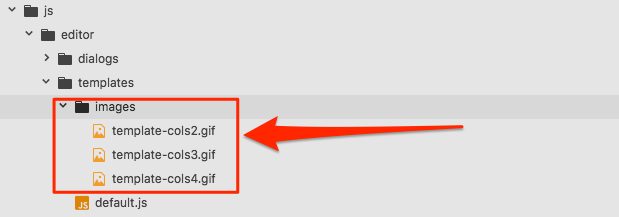
The options on this dialog window are controlled by files located under the theme at ../themes/{ThemeName}/js/editor/templates/. Example files can be found in the default theme for Mura as of v7.1, currently MuraBootstrap4.
The images directory contains the preview images that will display in the dialog window.
The default.js file contains the code used by CKEditor for the templates.
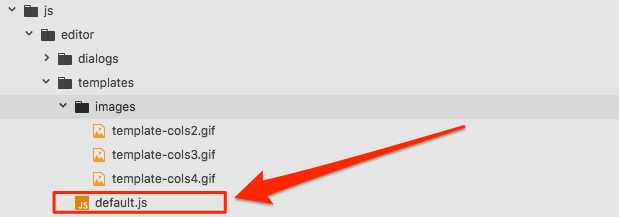
If you open the default.js file, you'll see where the "templates" are defined.

Each template definition should include the following:
title
- This is the text used next to the image in the dialog window as the Title.
image
- This is the image file used for the example layout to be displayed in the dialog window.
description
- This text will display under the Title in the dialog window.
html
- This markup is used to populate the web editor, if the template is selected.
You may add, modify, replace, or delete, any of the examples included.
Note: The sample default.js file included with MuraBootstrap4 includes the use of Bootstrap class names. You may want to modify these to match your own framework's classes.
Image Sizes
Most content types in Mura have a field labeled Assign Associated Image located on the Basic tab of the Edit Content screen. Your Mura Developers may also have created additional image fields, which all function the same way as Associated Images.

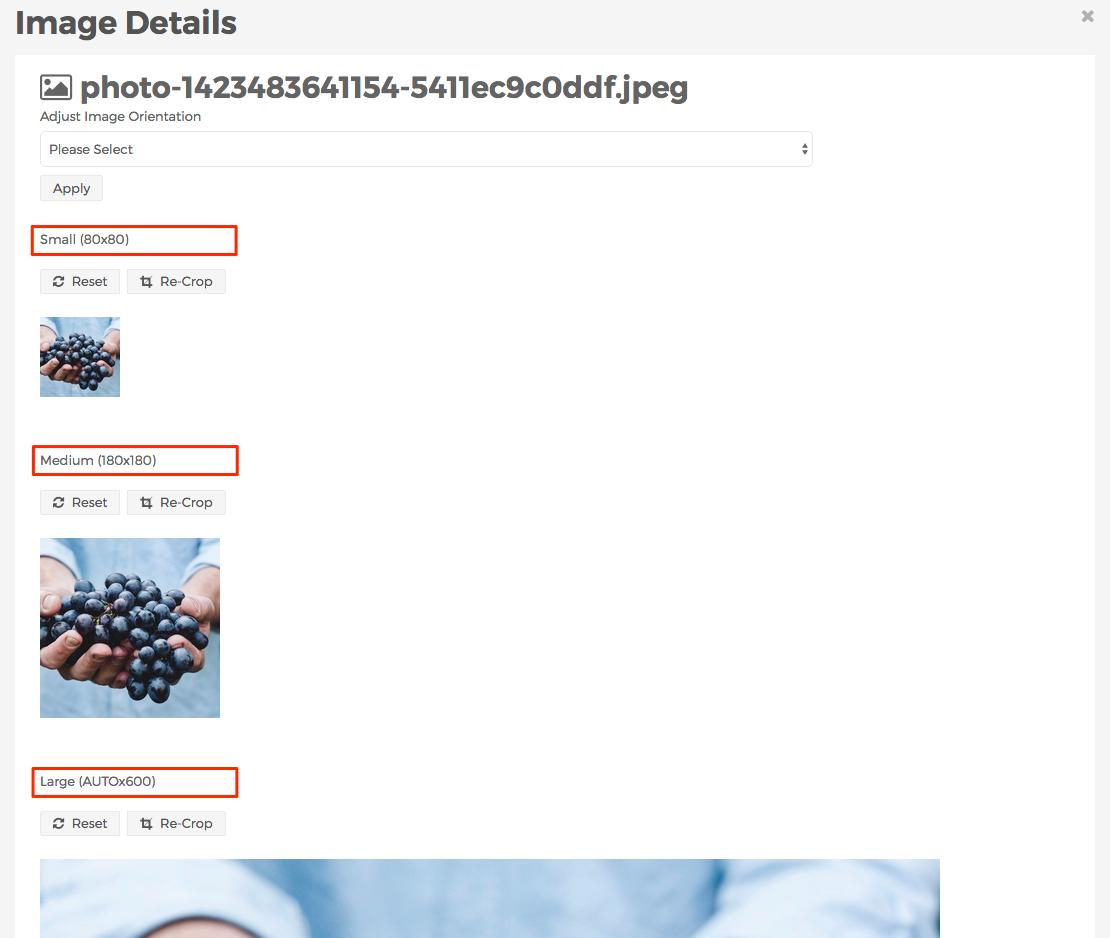
When you upload an Image, Mura automatically creates three (3) different sizes of the image. You can see these images on the Image Details screen by clicking the crop marks button.

The three (3) primary image sizes are labeled Small, Medium, and Large, and you can see a preview of each image, as well as have the ability to select a different crop region.
To modify image sizes in Mura, visit How to Manage Image Sizes. Also, if you're interested in how to display associated images and/or site placeholder images, visit the getURLForImage page under the Template Variables & Helper Methods section.
How to Manage Image Sizes
Mura allows you the ability to modify default image sizes (Small, Medium, and Large), as well as the option to create additional, pre-defined image sizes. Having pre-defined image sizes allows your content managers the ability to upload an image, and then select their desired crop region. This is quite useful to avoid issues where a person's head, or some other desired feature of the photo may be removed during the automatic cropping process.
Follow the steps below to manage image sizes in Mura.
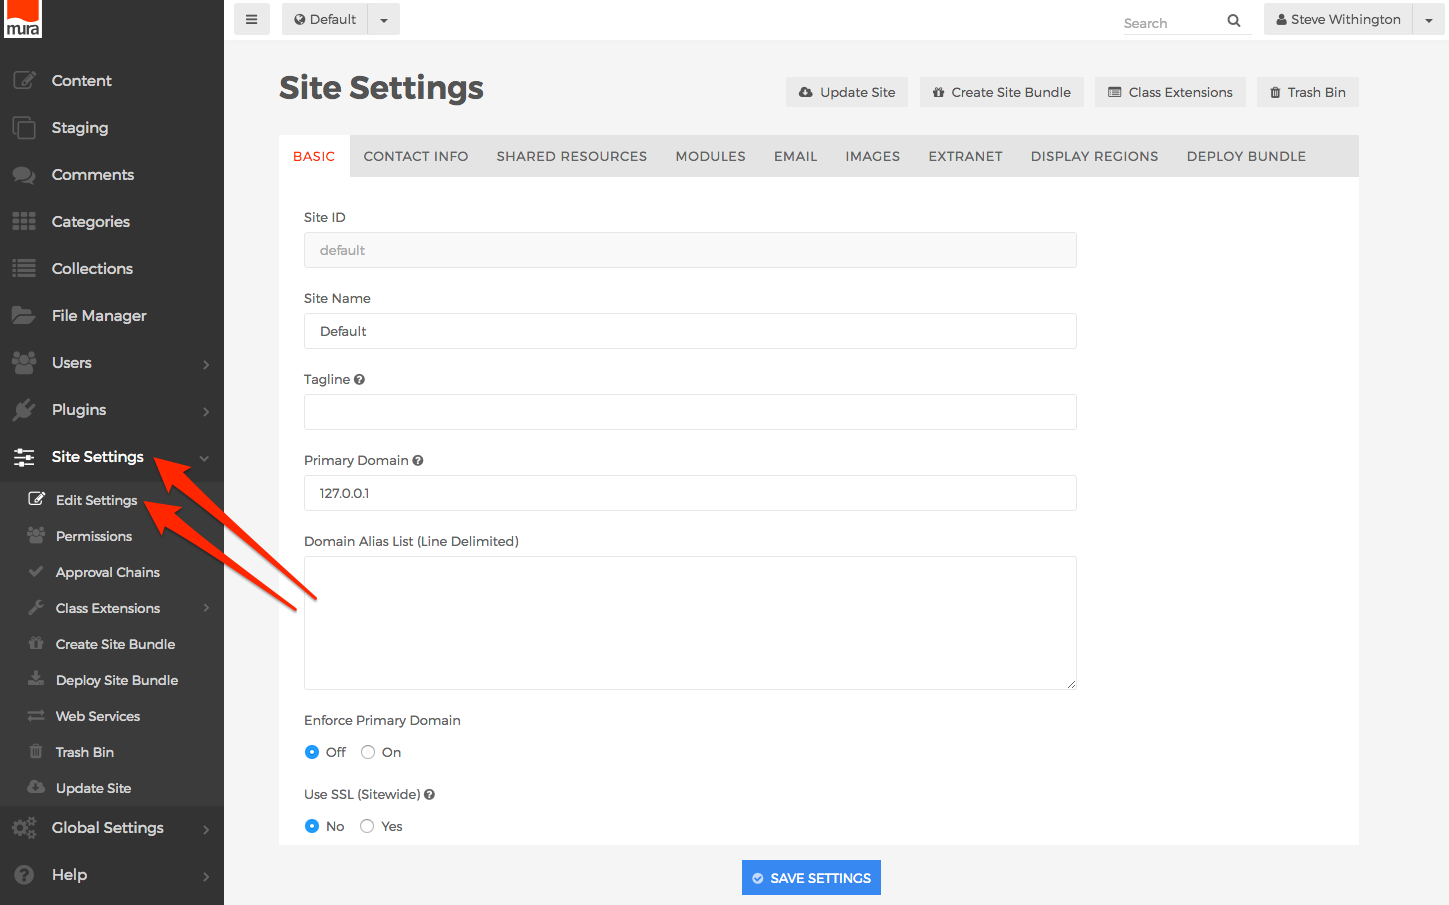
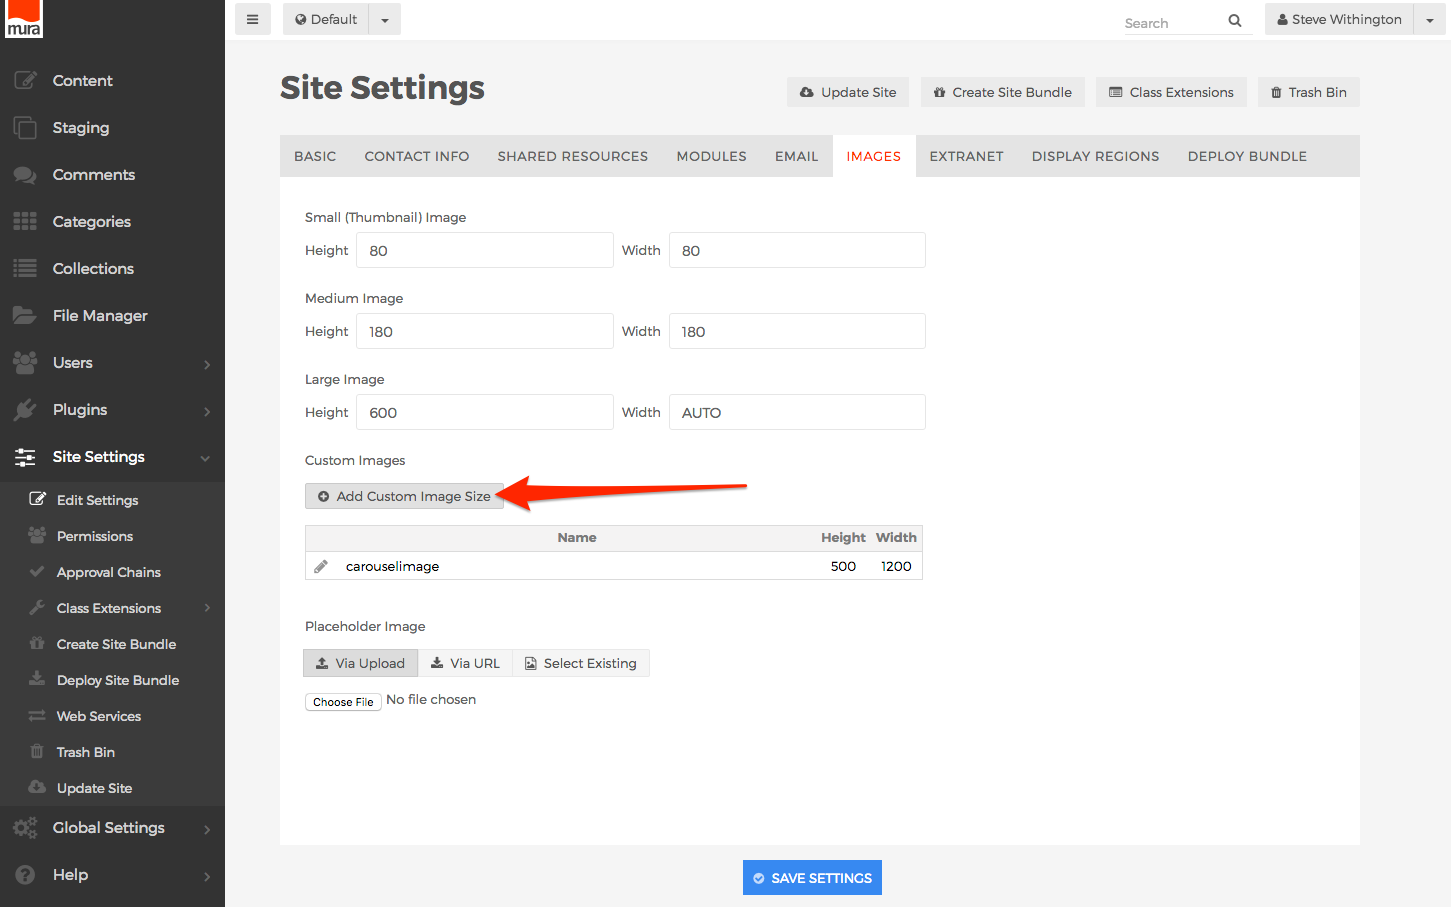
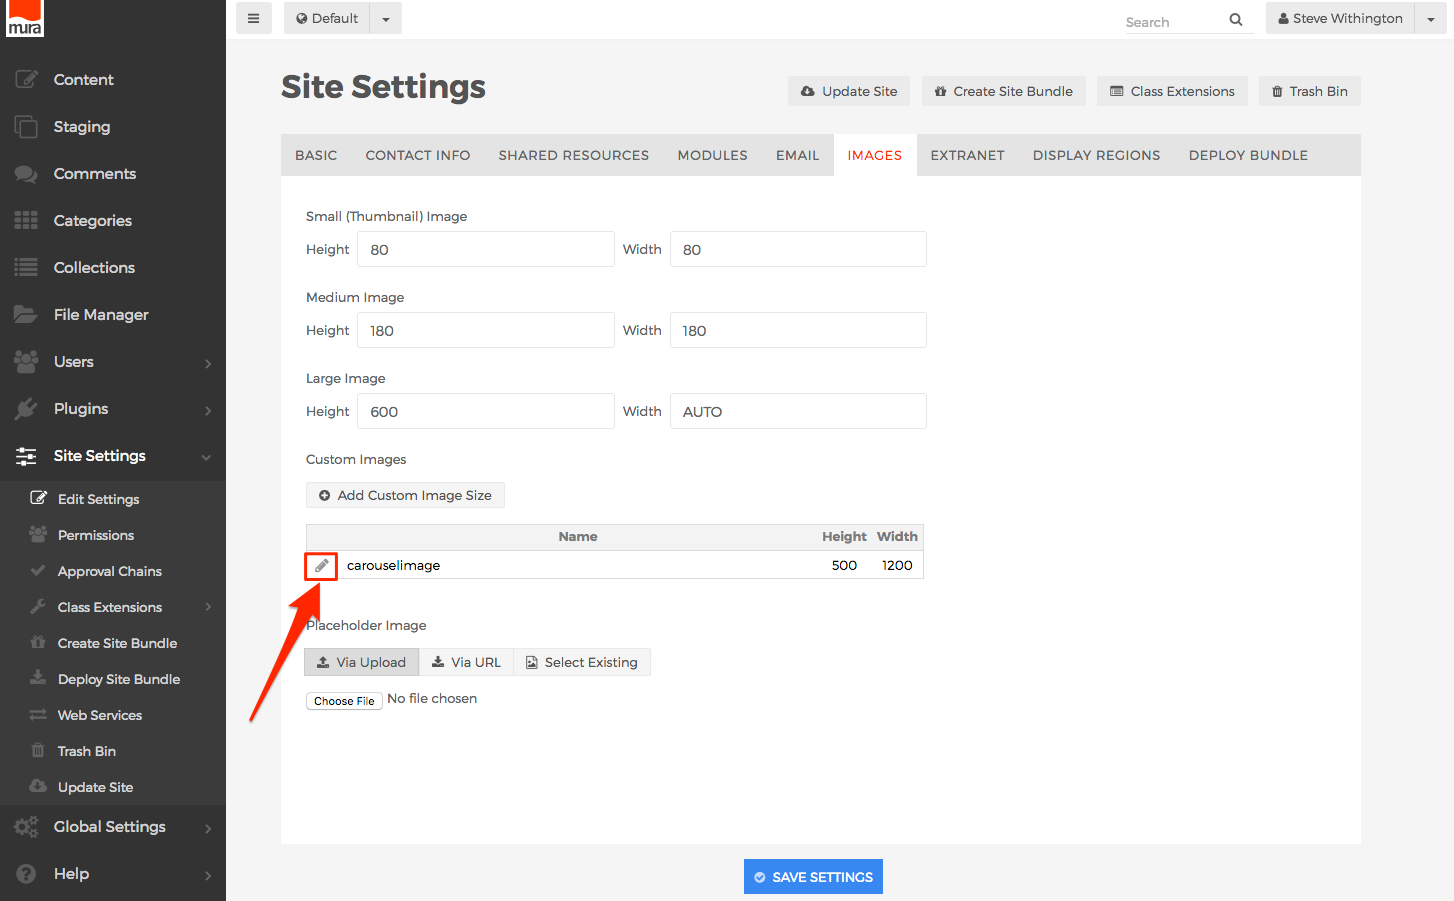
- From the back-end administration area of Mura, select Site Settings on the main navigation, and click Edit Settings.
- Select the Images tab.
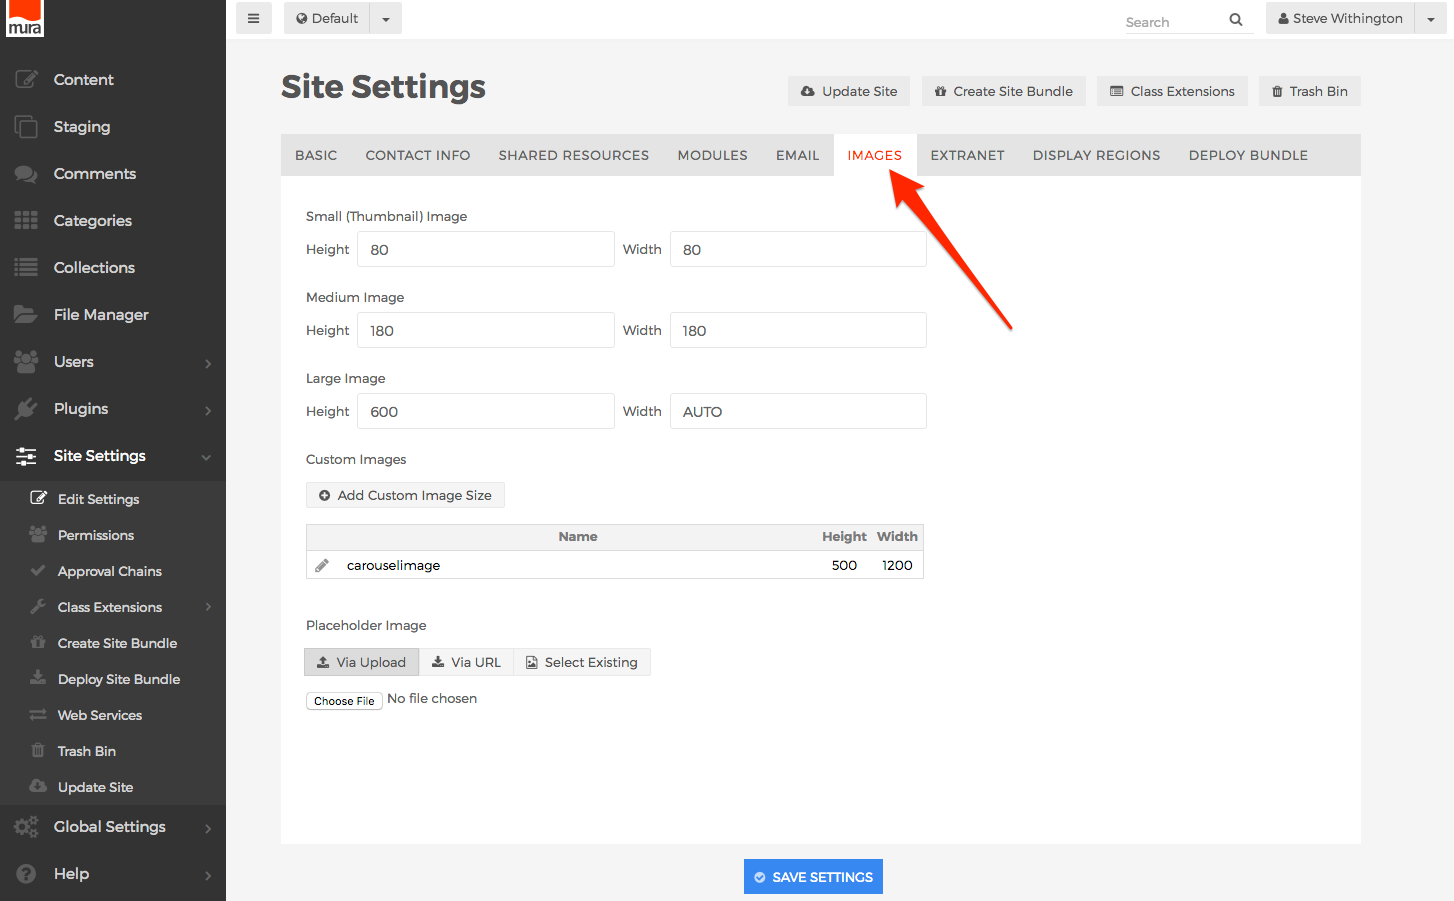
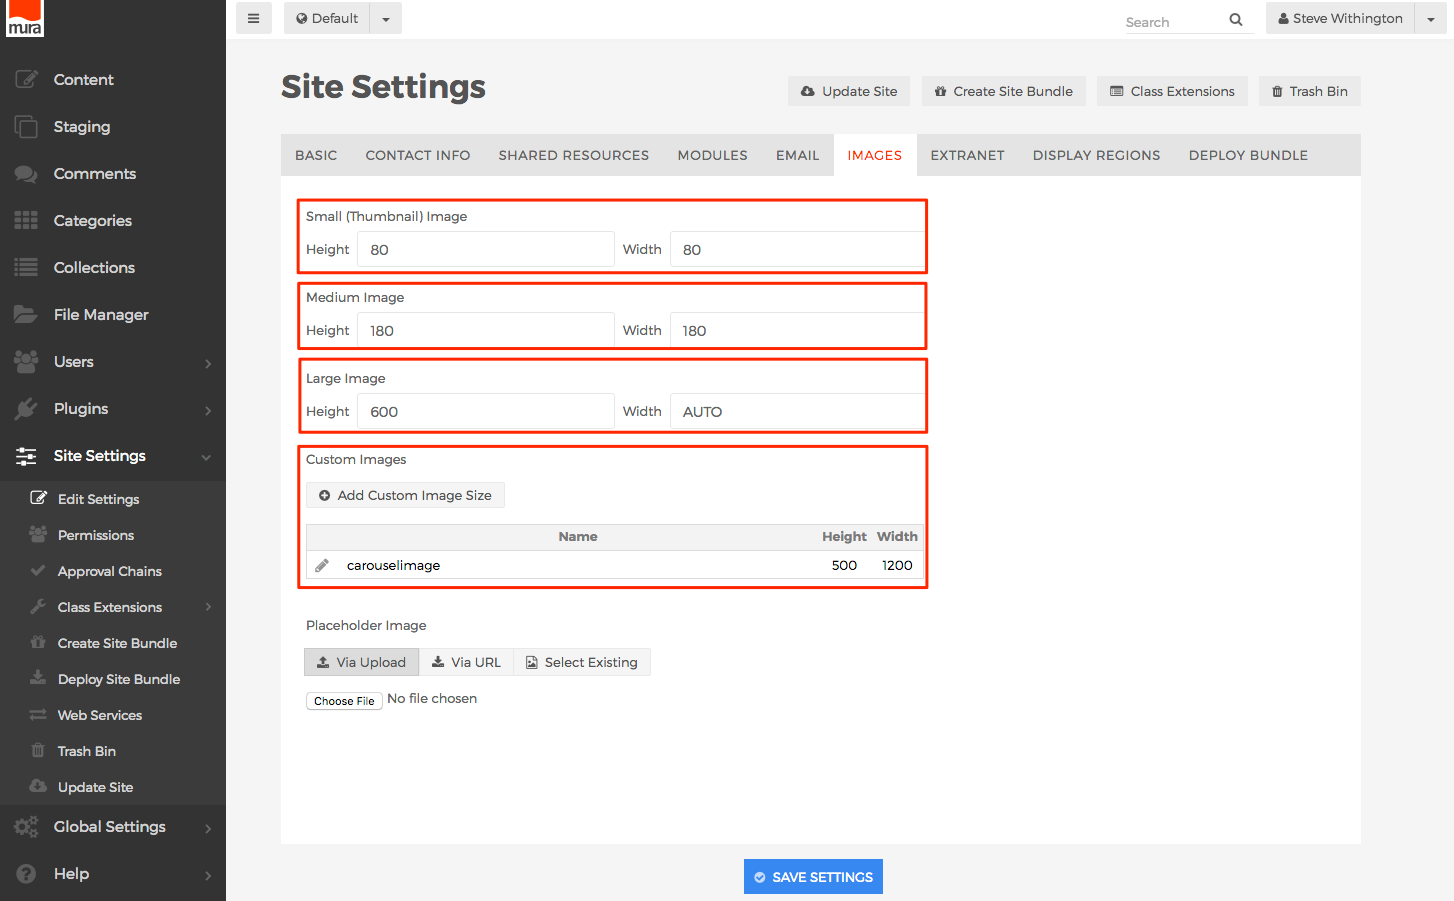
- The Images tab contains the dimensions of the default images sizes (Small, Medium, Large), as well as any Custom Images.
- Small
- This is the default image size used on Folder content types for any listed child content.

- Medium
- This is the default image size used by Mura when using the dspBody template helper method, and setting
showMetaImage to true.
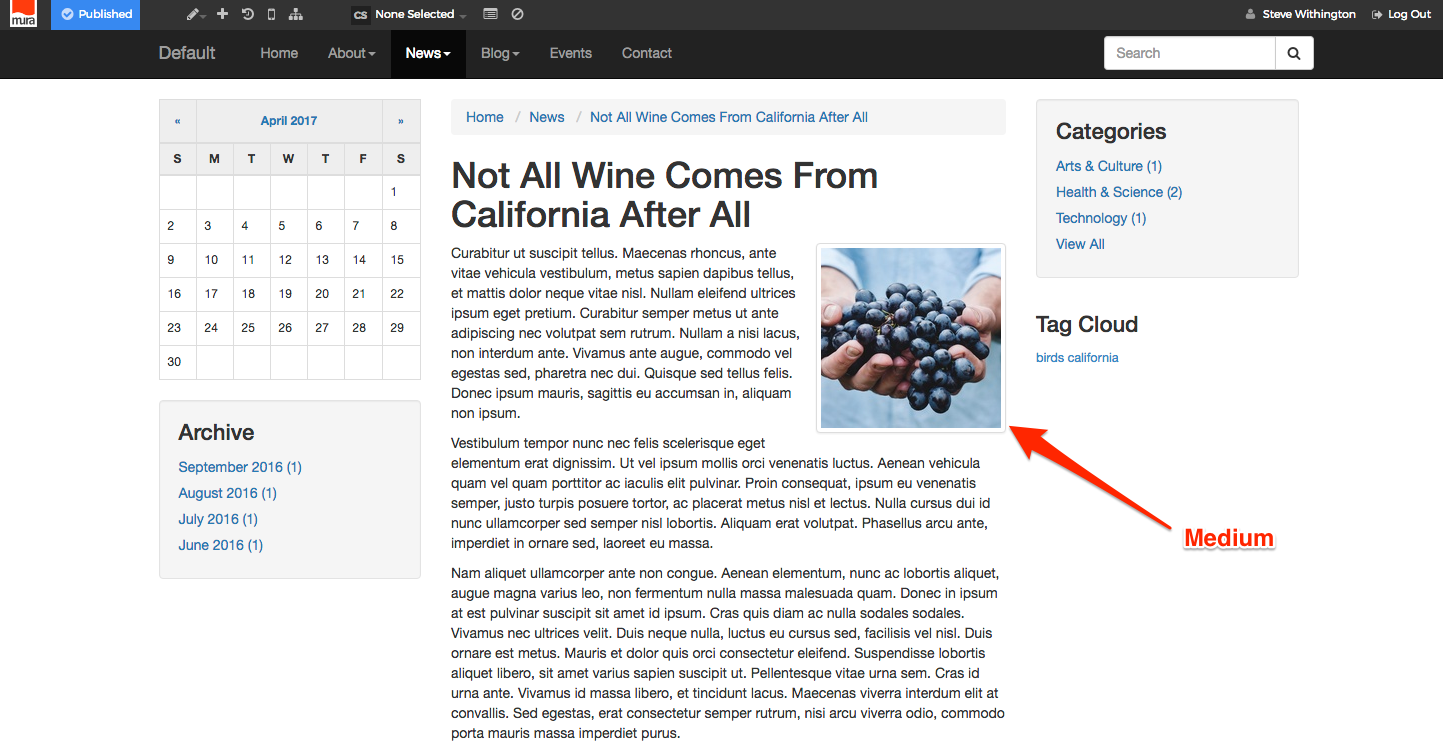
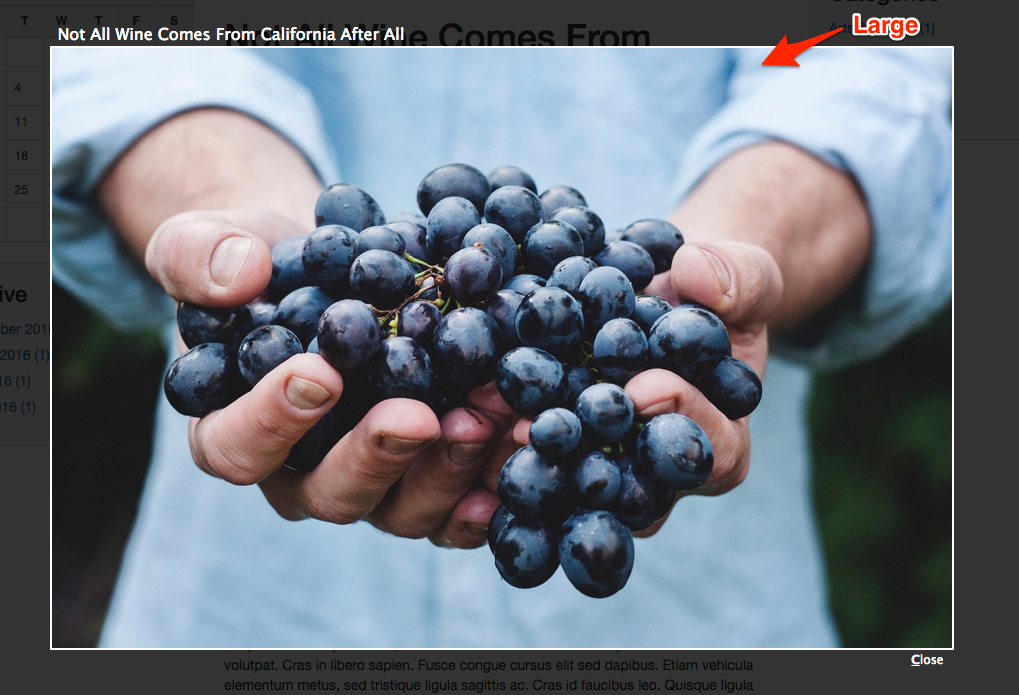
- Large
- This is the default image size used to display when clicking the Medium image, if being output by dspBody and setting
includeMetaHref to true.
- To modify the dimensions of any default image sizes, simply enter your desired Height and/or Width settings.
- To add a new custom image, click the Add Custom Image Size button.
- The Add Custom Image Size window should appear.
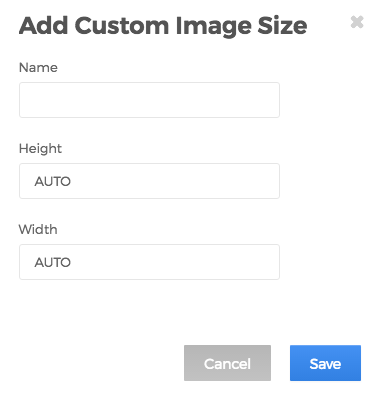
- Enter a Name for the image. The Name should not have any spaces or special characters in it (other than hyphens). Be aware that invalid characters and spaces will be removed upon saving anyway. Also note that any capital letters will be converted to lowercase.

- You may also enter your desired Height and/or Width in pixels. You may optionally specific only one of these attributes, and leave the other as "AUTO" for Mura to make crops proportionately to the original image size.
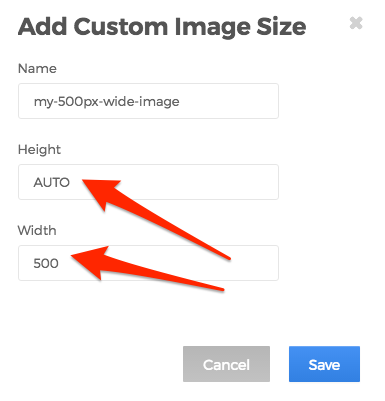
- Click the Save button to save your new custom image size.
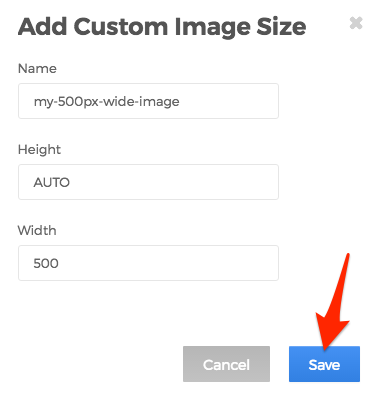
- Your new custom image size should appear in the listing of custom images.
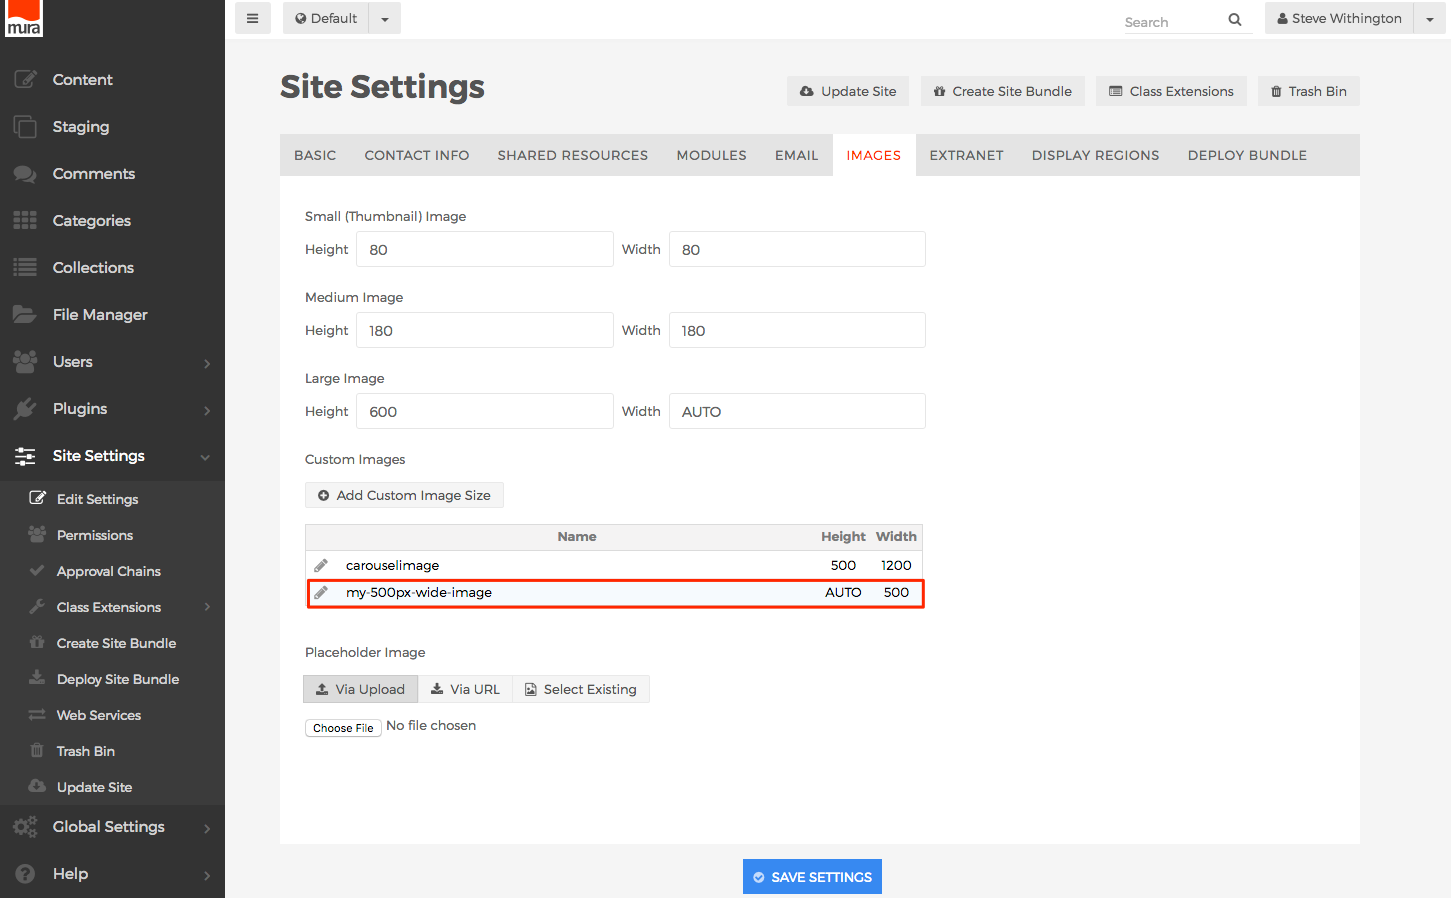
- To edit the dimensions of any Custom Images, click the pencil icon next to the custom image name.
- If you click the pencil icon, the Edit Custom Image Size window should appear.
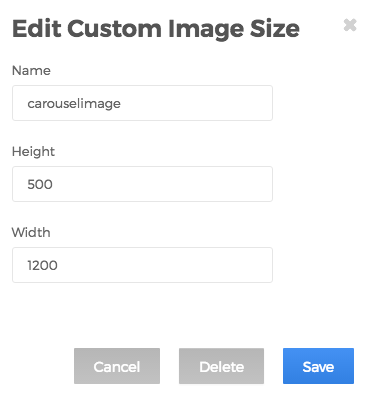
- Enter your desired Height and/or Width in pixels, and click the Save button to save your changes.

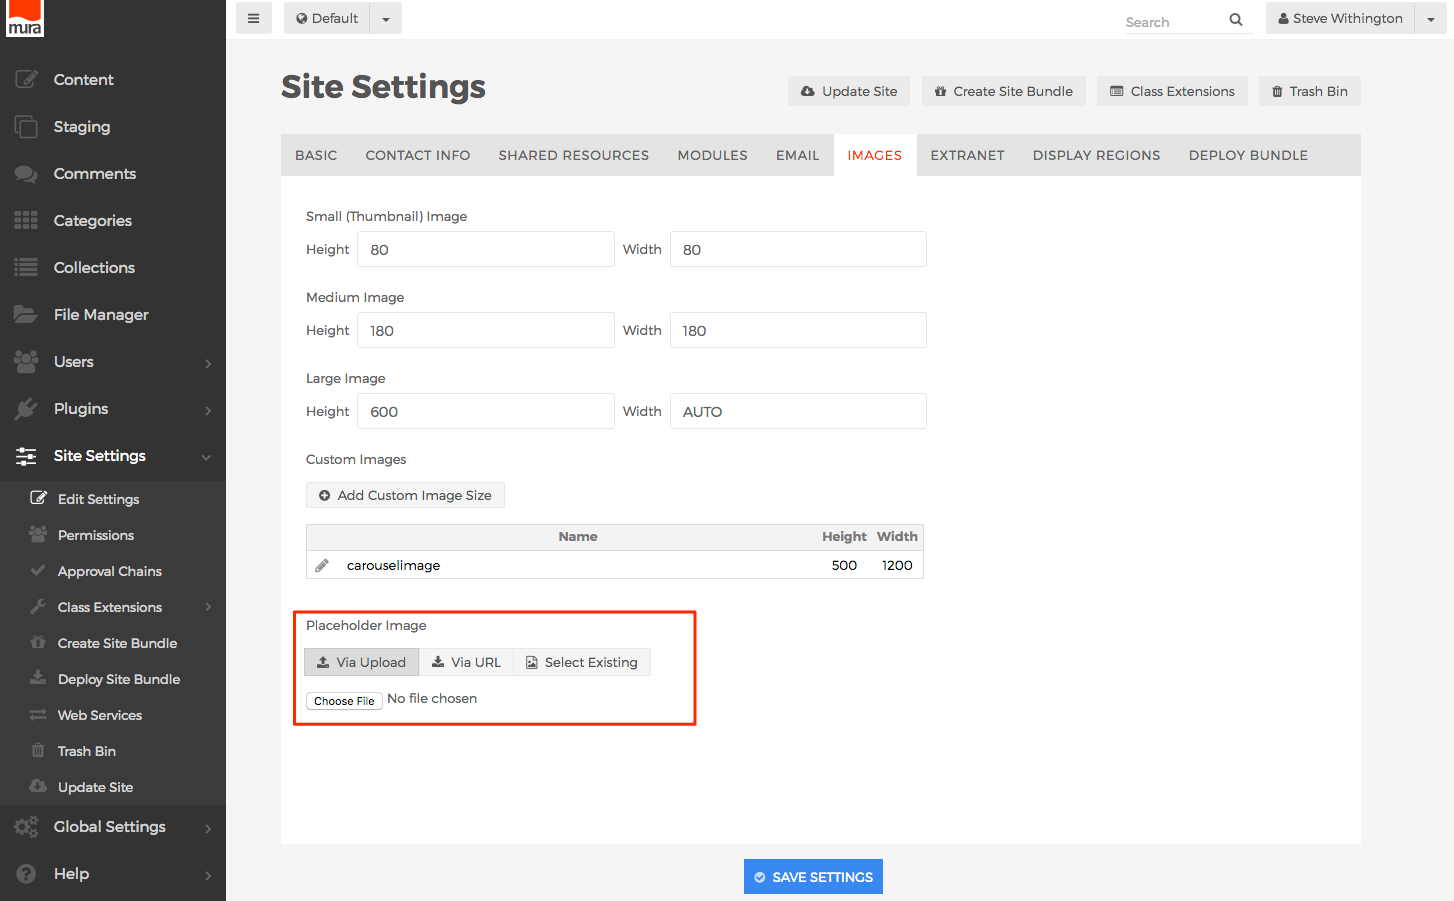
- You can also upload a Placeholder Image that can be used for content items that haven't had an Associated Image uploaded.
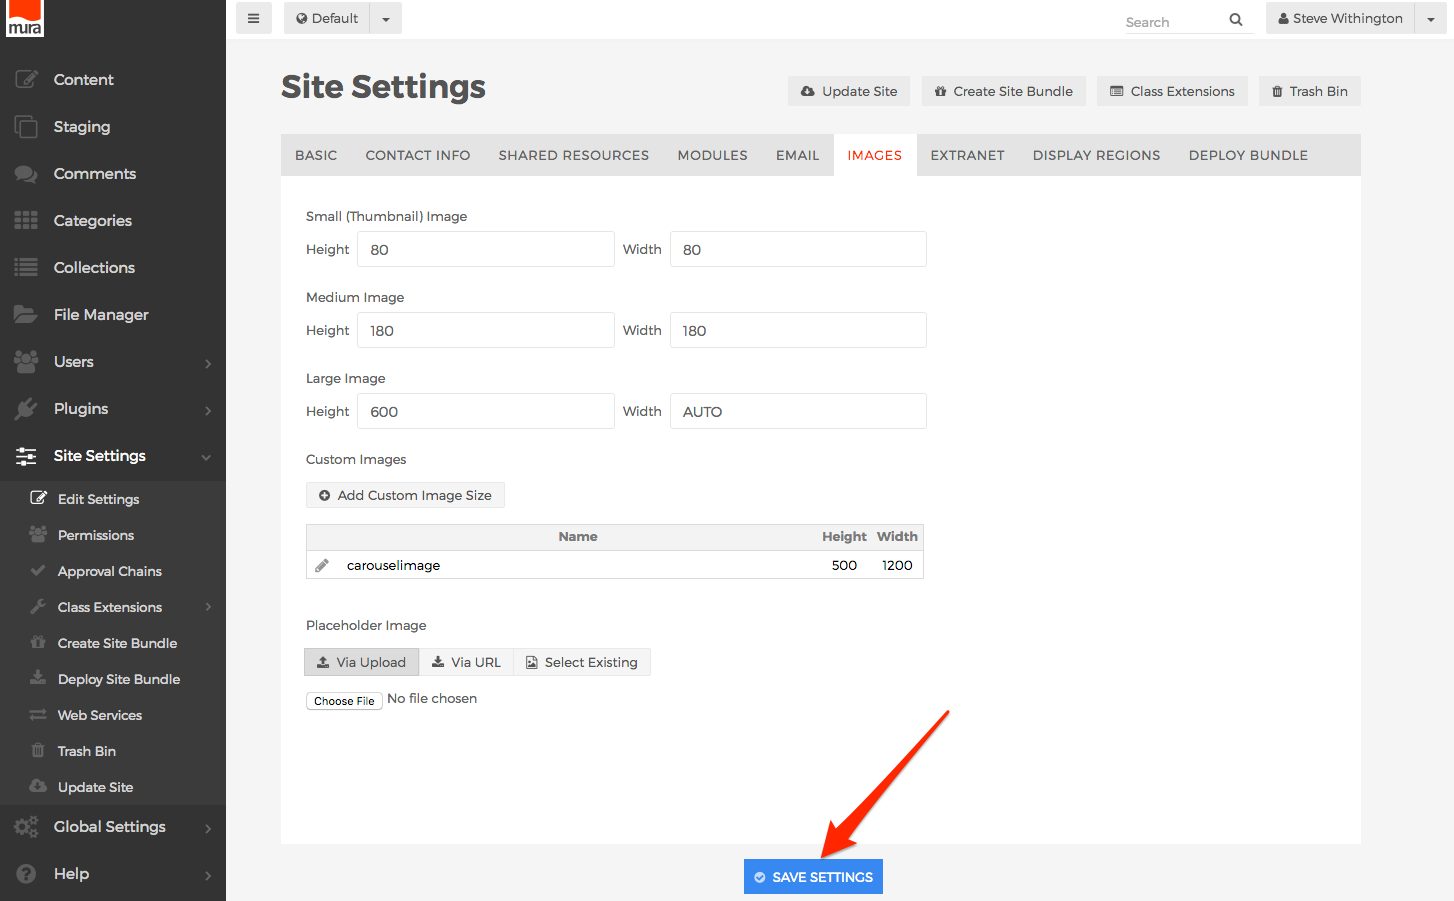
- When you've finished making your edits, click the Save Settings button, to save your changes.
Summary
Throughout this section, you learned how to customize some of Mura's default display output. We covered customizing your very own "404: Page Not Found" page, and how to create your own "Error" screen. You also learned how to make some significant changes to Mura's web editor (CKEditor), as well as how to create and use your own image sizes for your site.
Your journey doesn't have to end here for customizing Mura. Be sure to check out the Mura Developer Guide for even more information, when you're ready.