How to Create a Photo Gallery
As previously mentioned in the Folder section, Folders allow you to aggregate related content into a defined group. While they are typically used to keep content such as "news" or "blog" posts together, they may also be used to create photo galleries. In fact, there's nothing stopping you from creating a "folder of galleries" or "galleries of galleries".
To create a custom photo gallery, follow the steps outlined below.
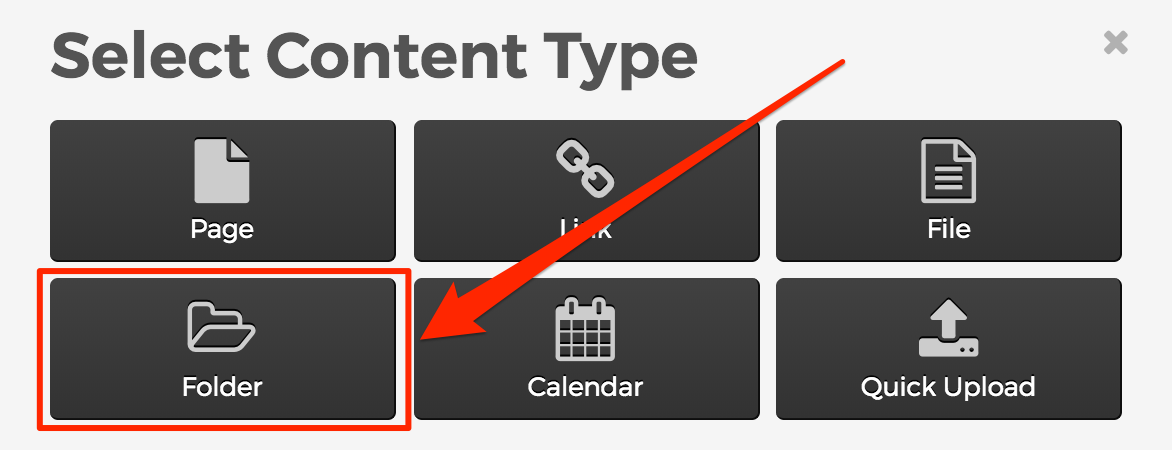
- Navigate to the section of your site where you wish to add a photo gallery (or gallery of galleries, etc.), then add a "Folder" content item.
- In the "Title" field, enter the name of your gallery. For example, "My Photo Gallery".
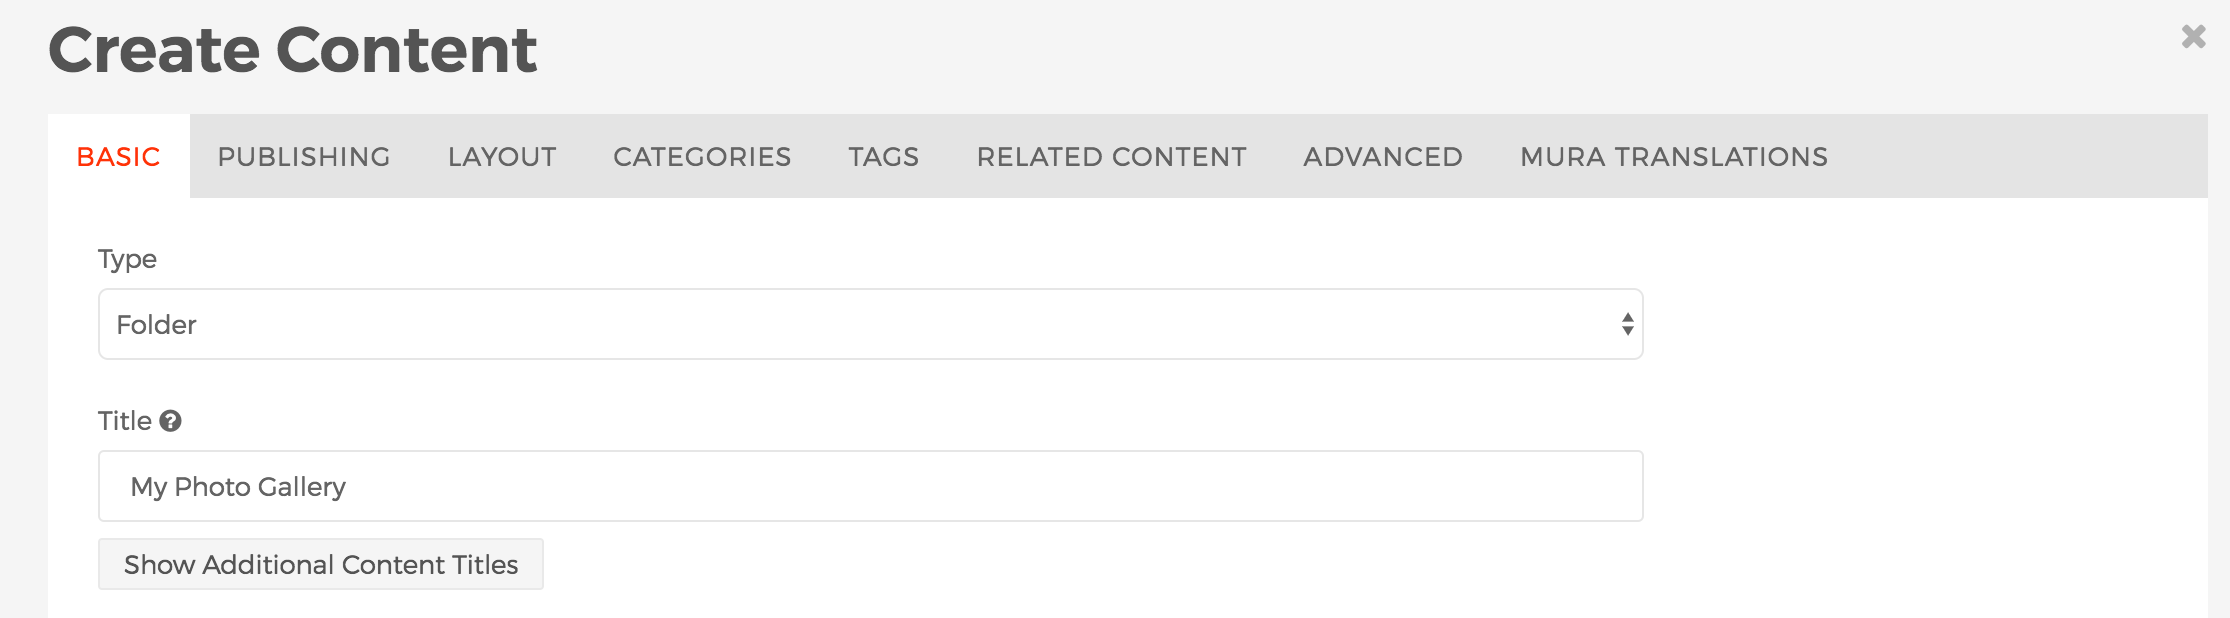
- When finished, select your desired publishing option.

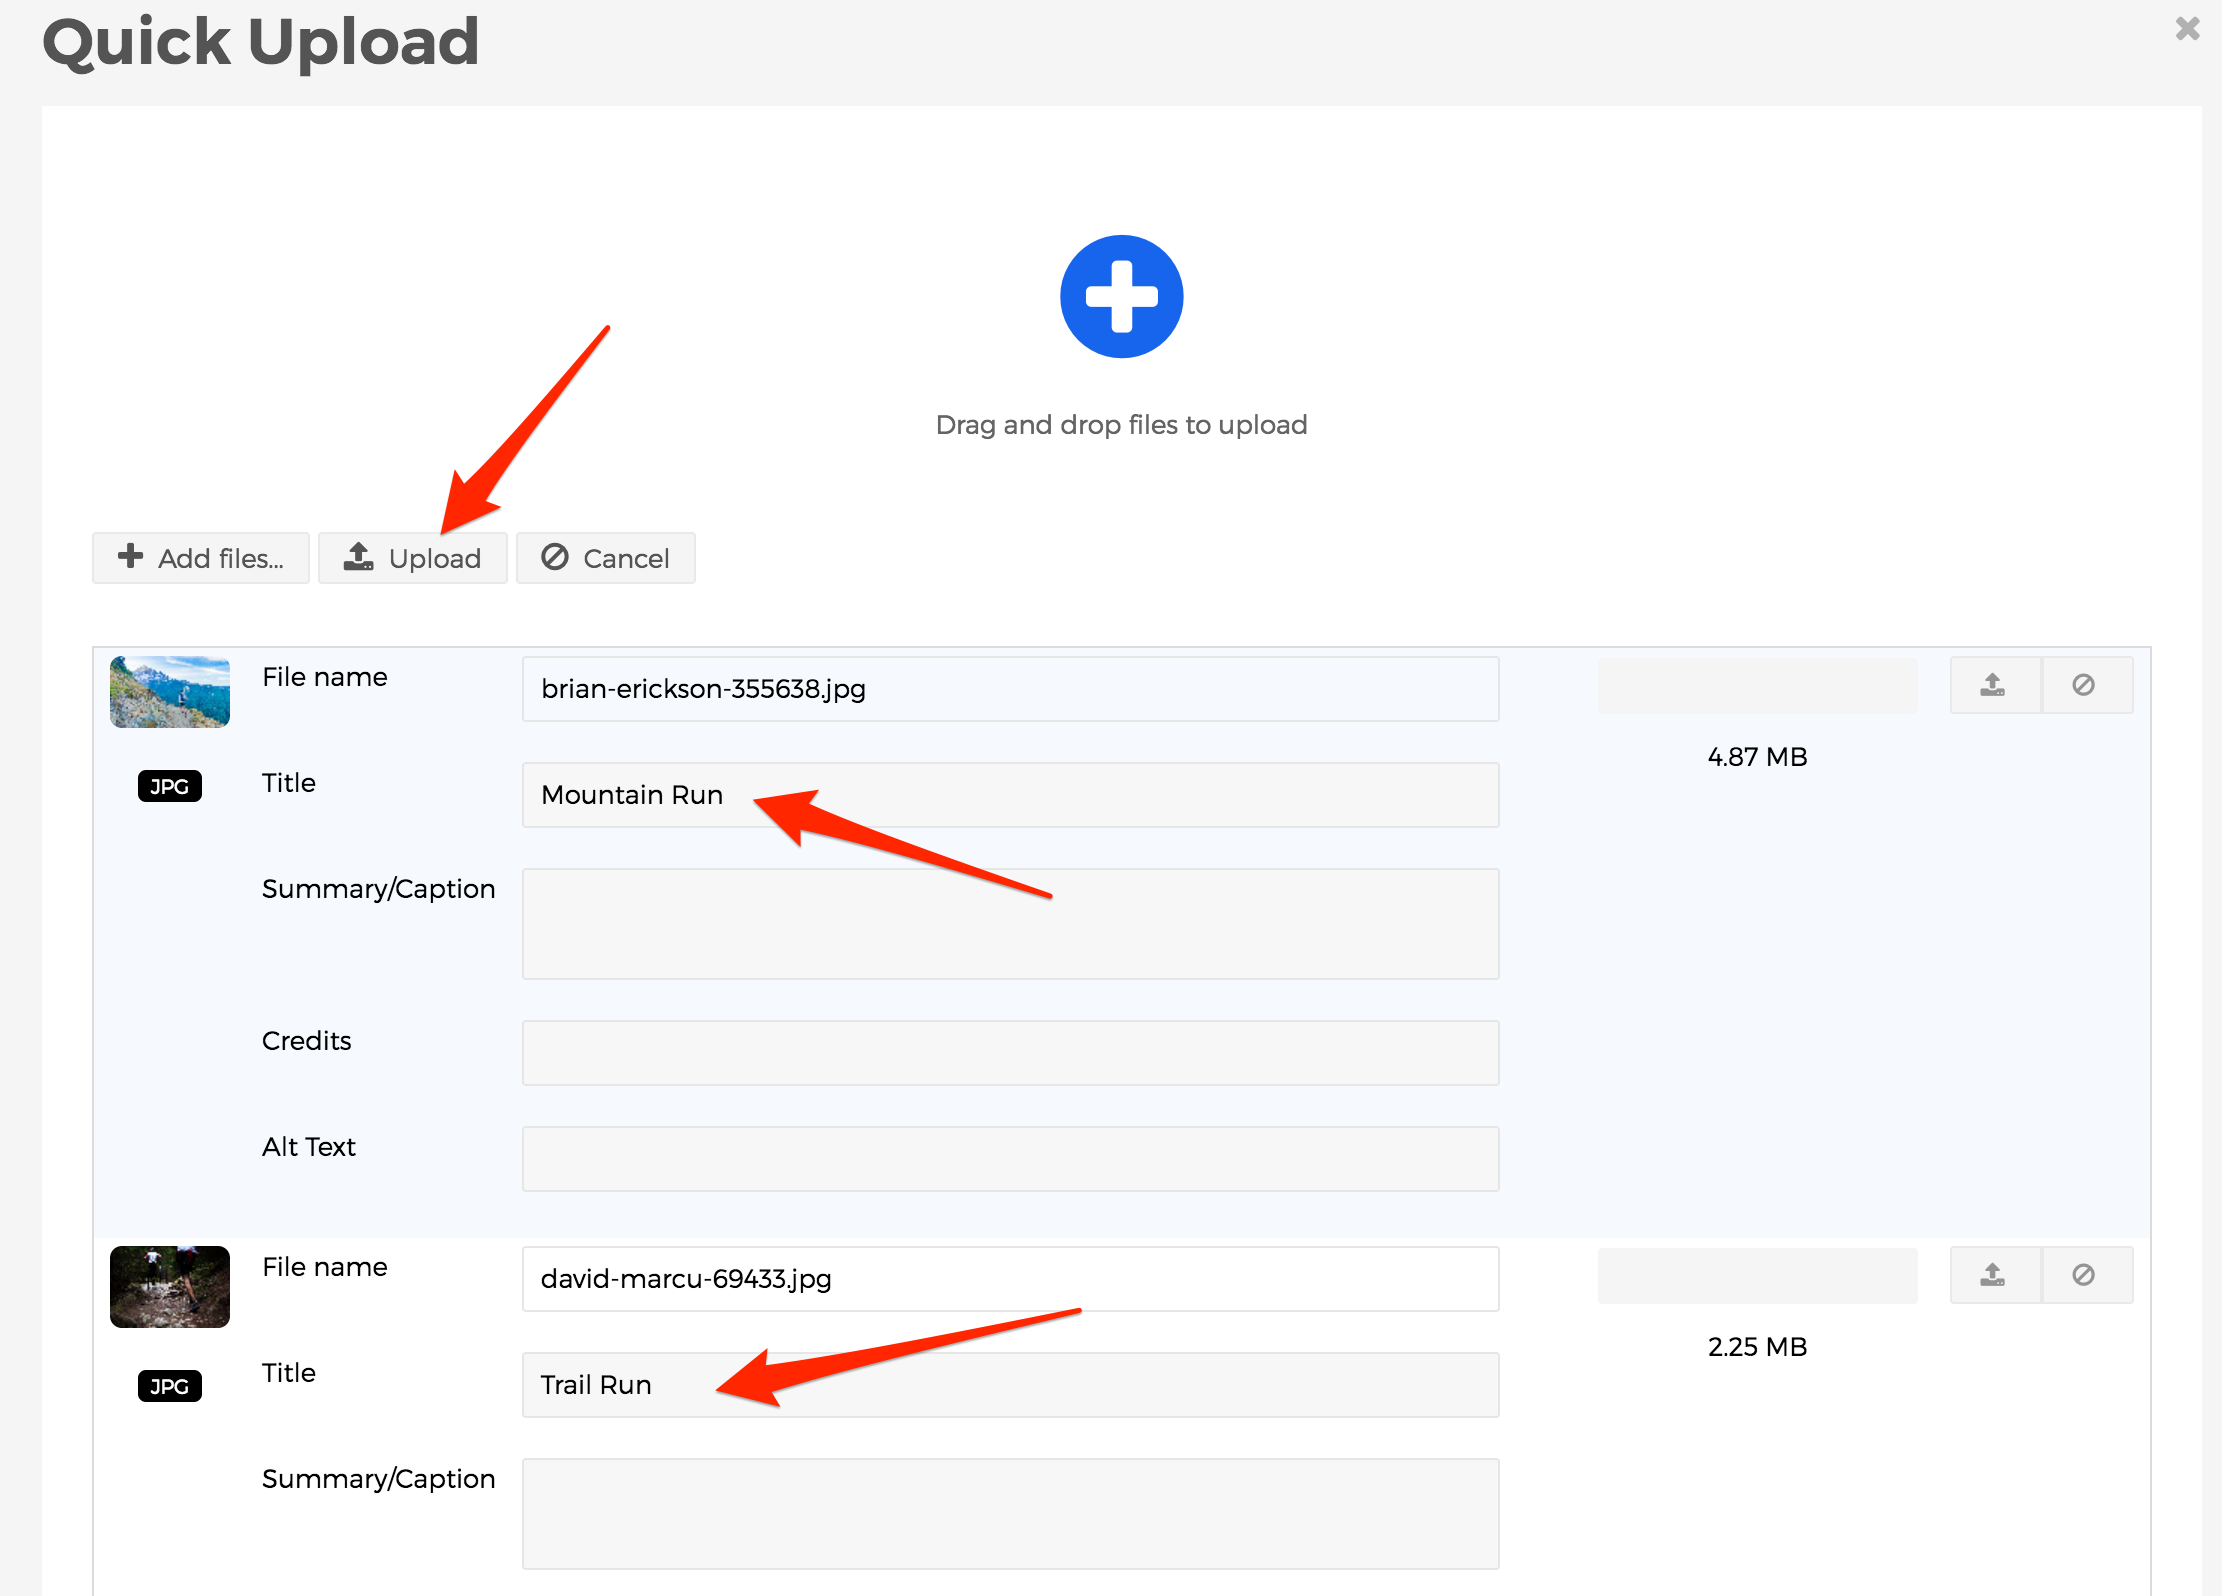
- Now that you've created a new Folder, you can add your images in a few different ways. First, keep in mind, this is just a Folder. So, you can add multiple "Pages", and just make sure you use the "Assign Associated Image" field to add your desired image for each page (this is essentially how "news" or "blog" posts are created. You could also add a "File" content type, and select an image as your file to upload. Or, you could use the "Quick Upload" feature to upload multiple images at the same time. Finally, you could select the "Folder" content type, and use the "Assign Associated Image" field for your image. In fact, using a specified image for the nested Folder is a great way to create "galleries of galleries".
- The example below is using the Quick Upload feature to upload multiple images at the same time. When using this feature, keep in mind that you're able to modify the "Title" of the image before it's uploaded.
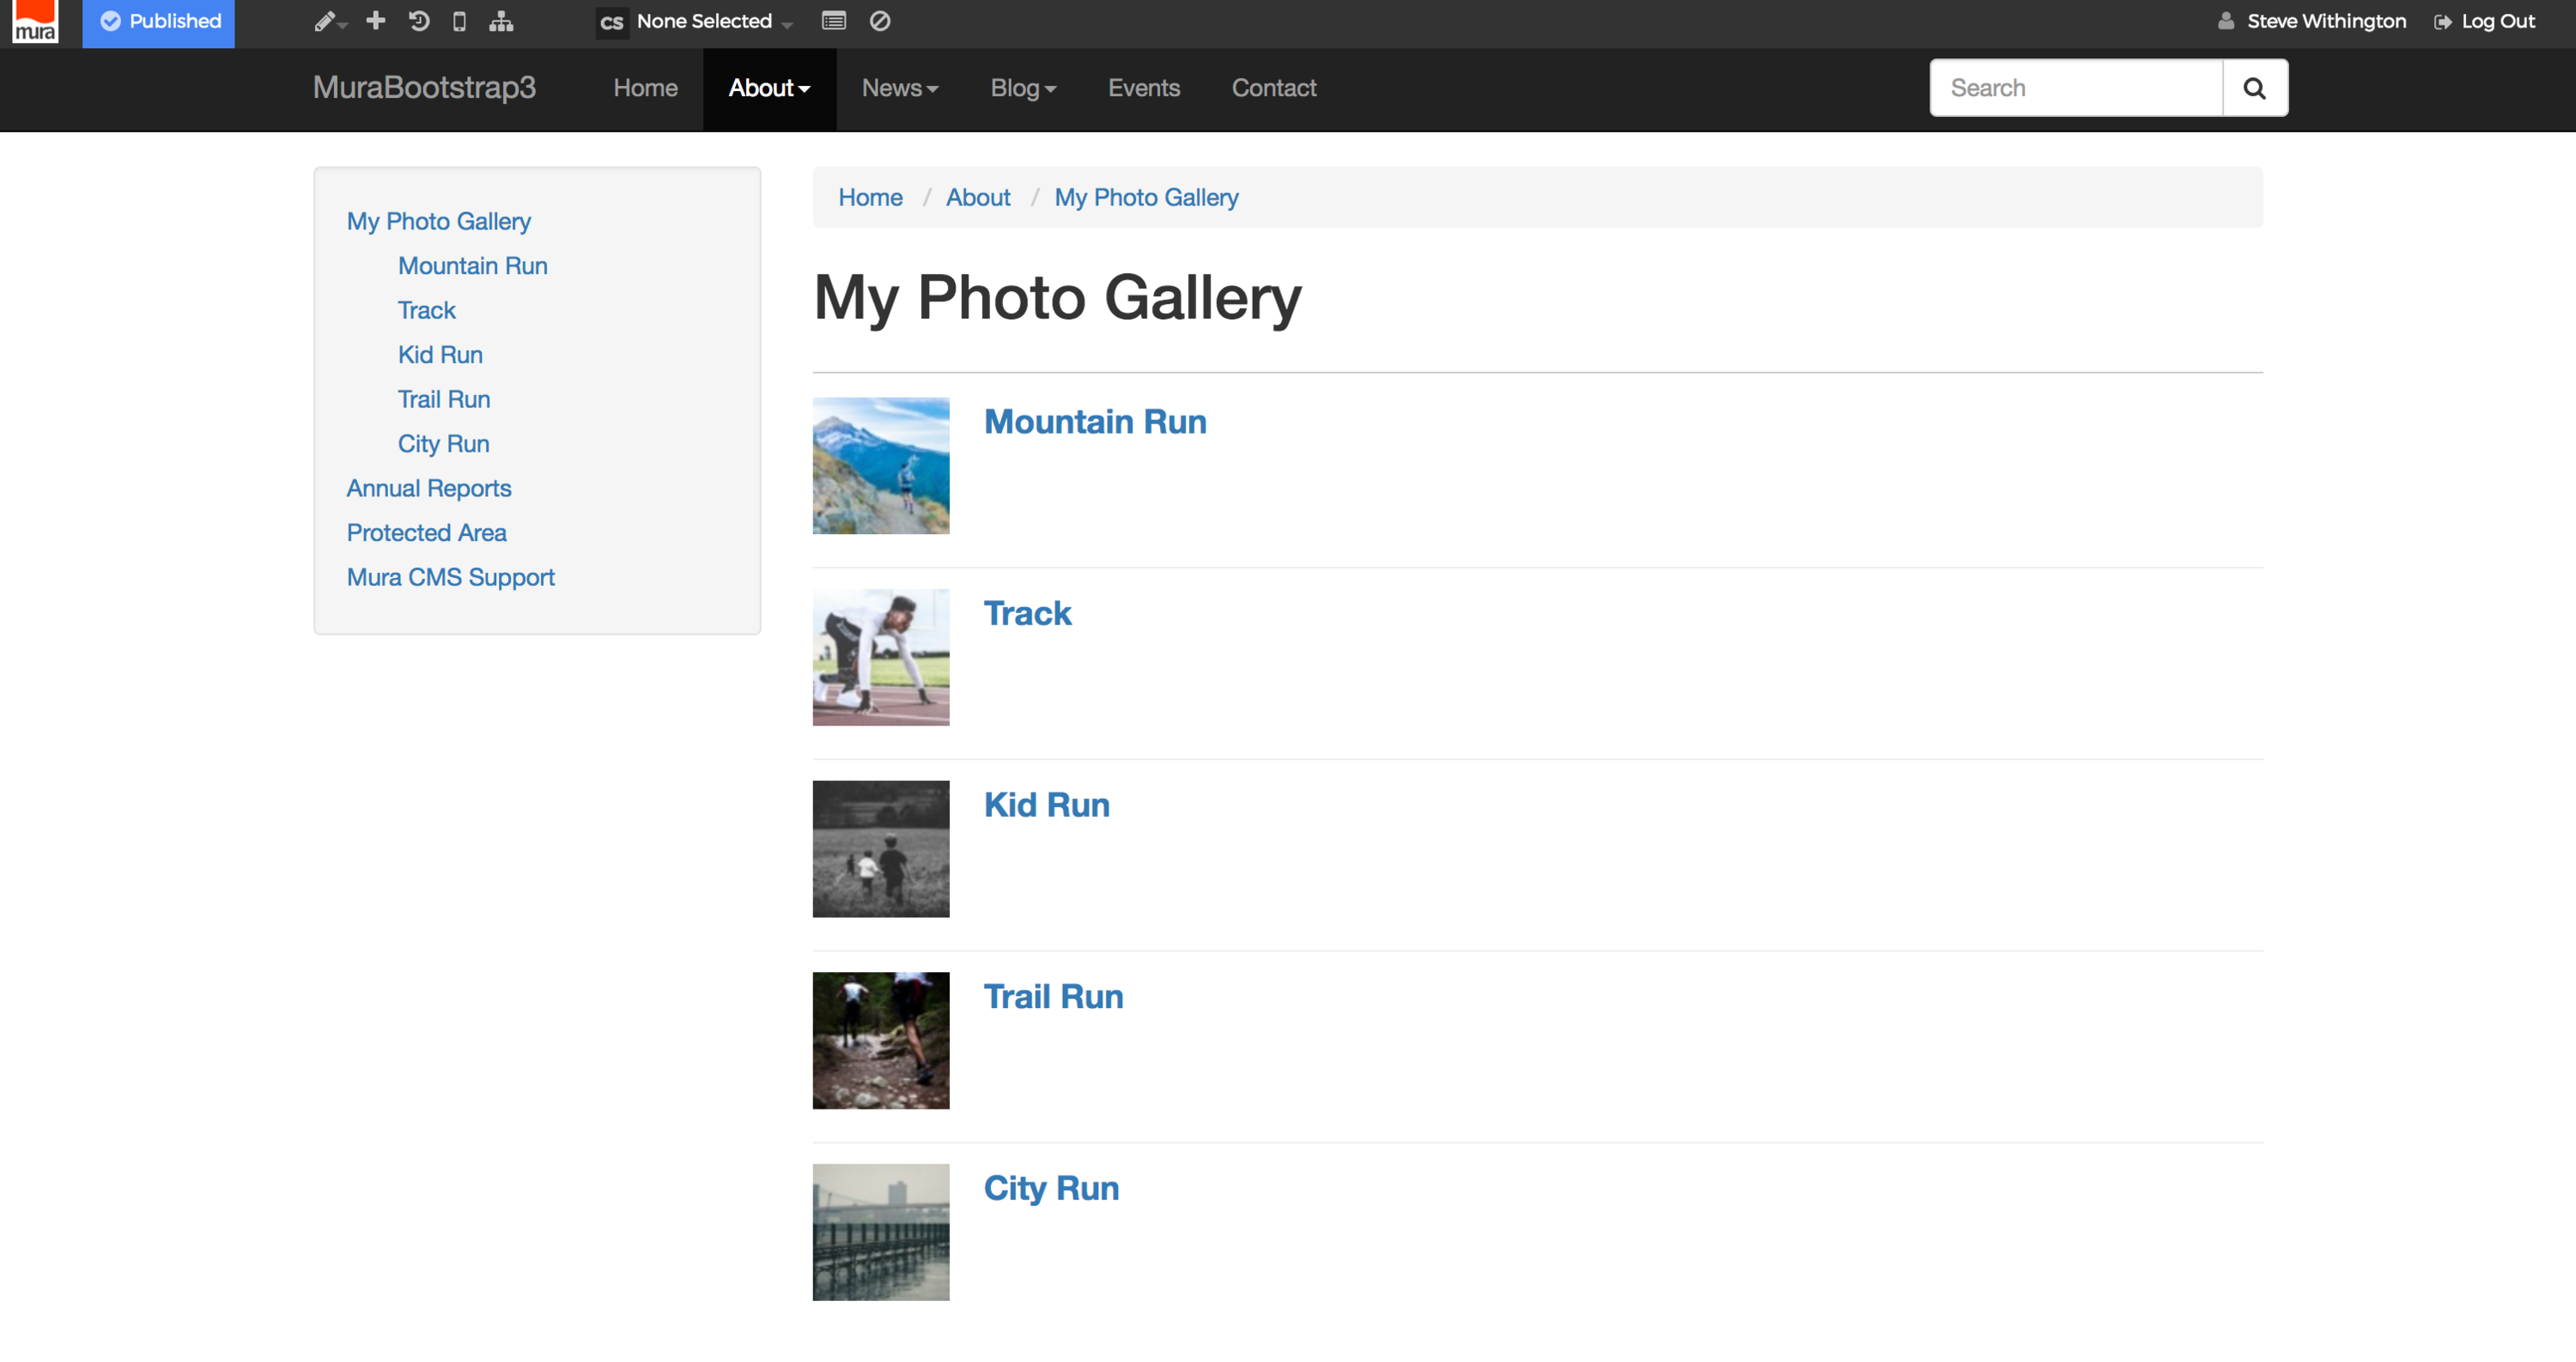
- After you've completed uploading all of your images as content items, whether it's Pages, Folders, Files, or you used the Quick Upload feature, you're ready to customize your Folder to make it function more like a traditional photo gallery, because your gallery will display just like any other Folder does by default.
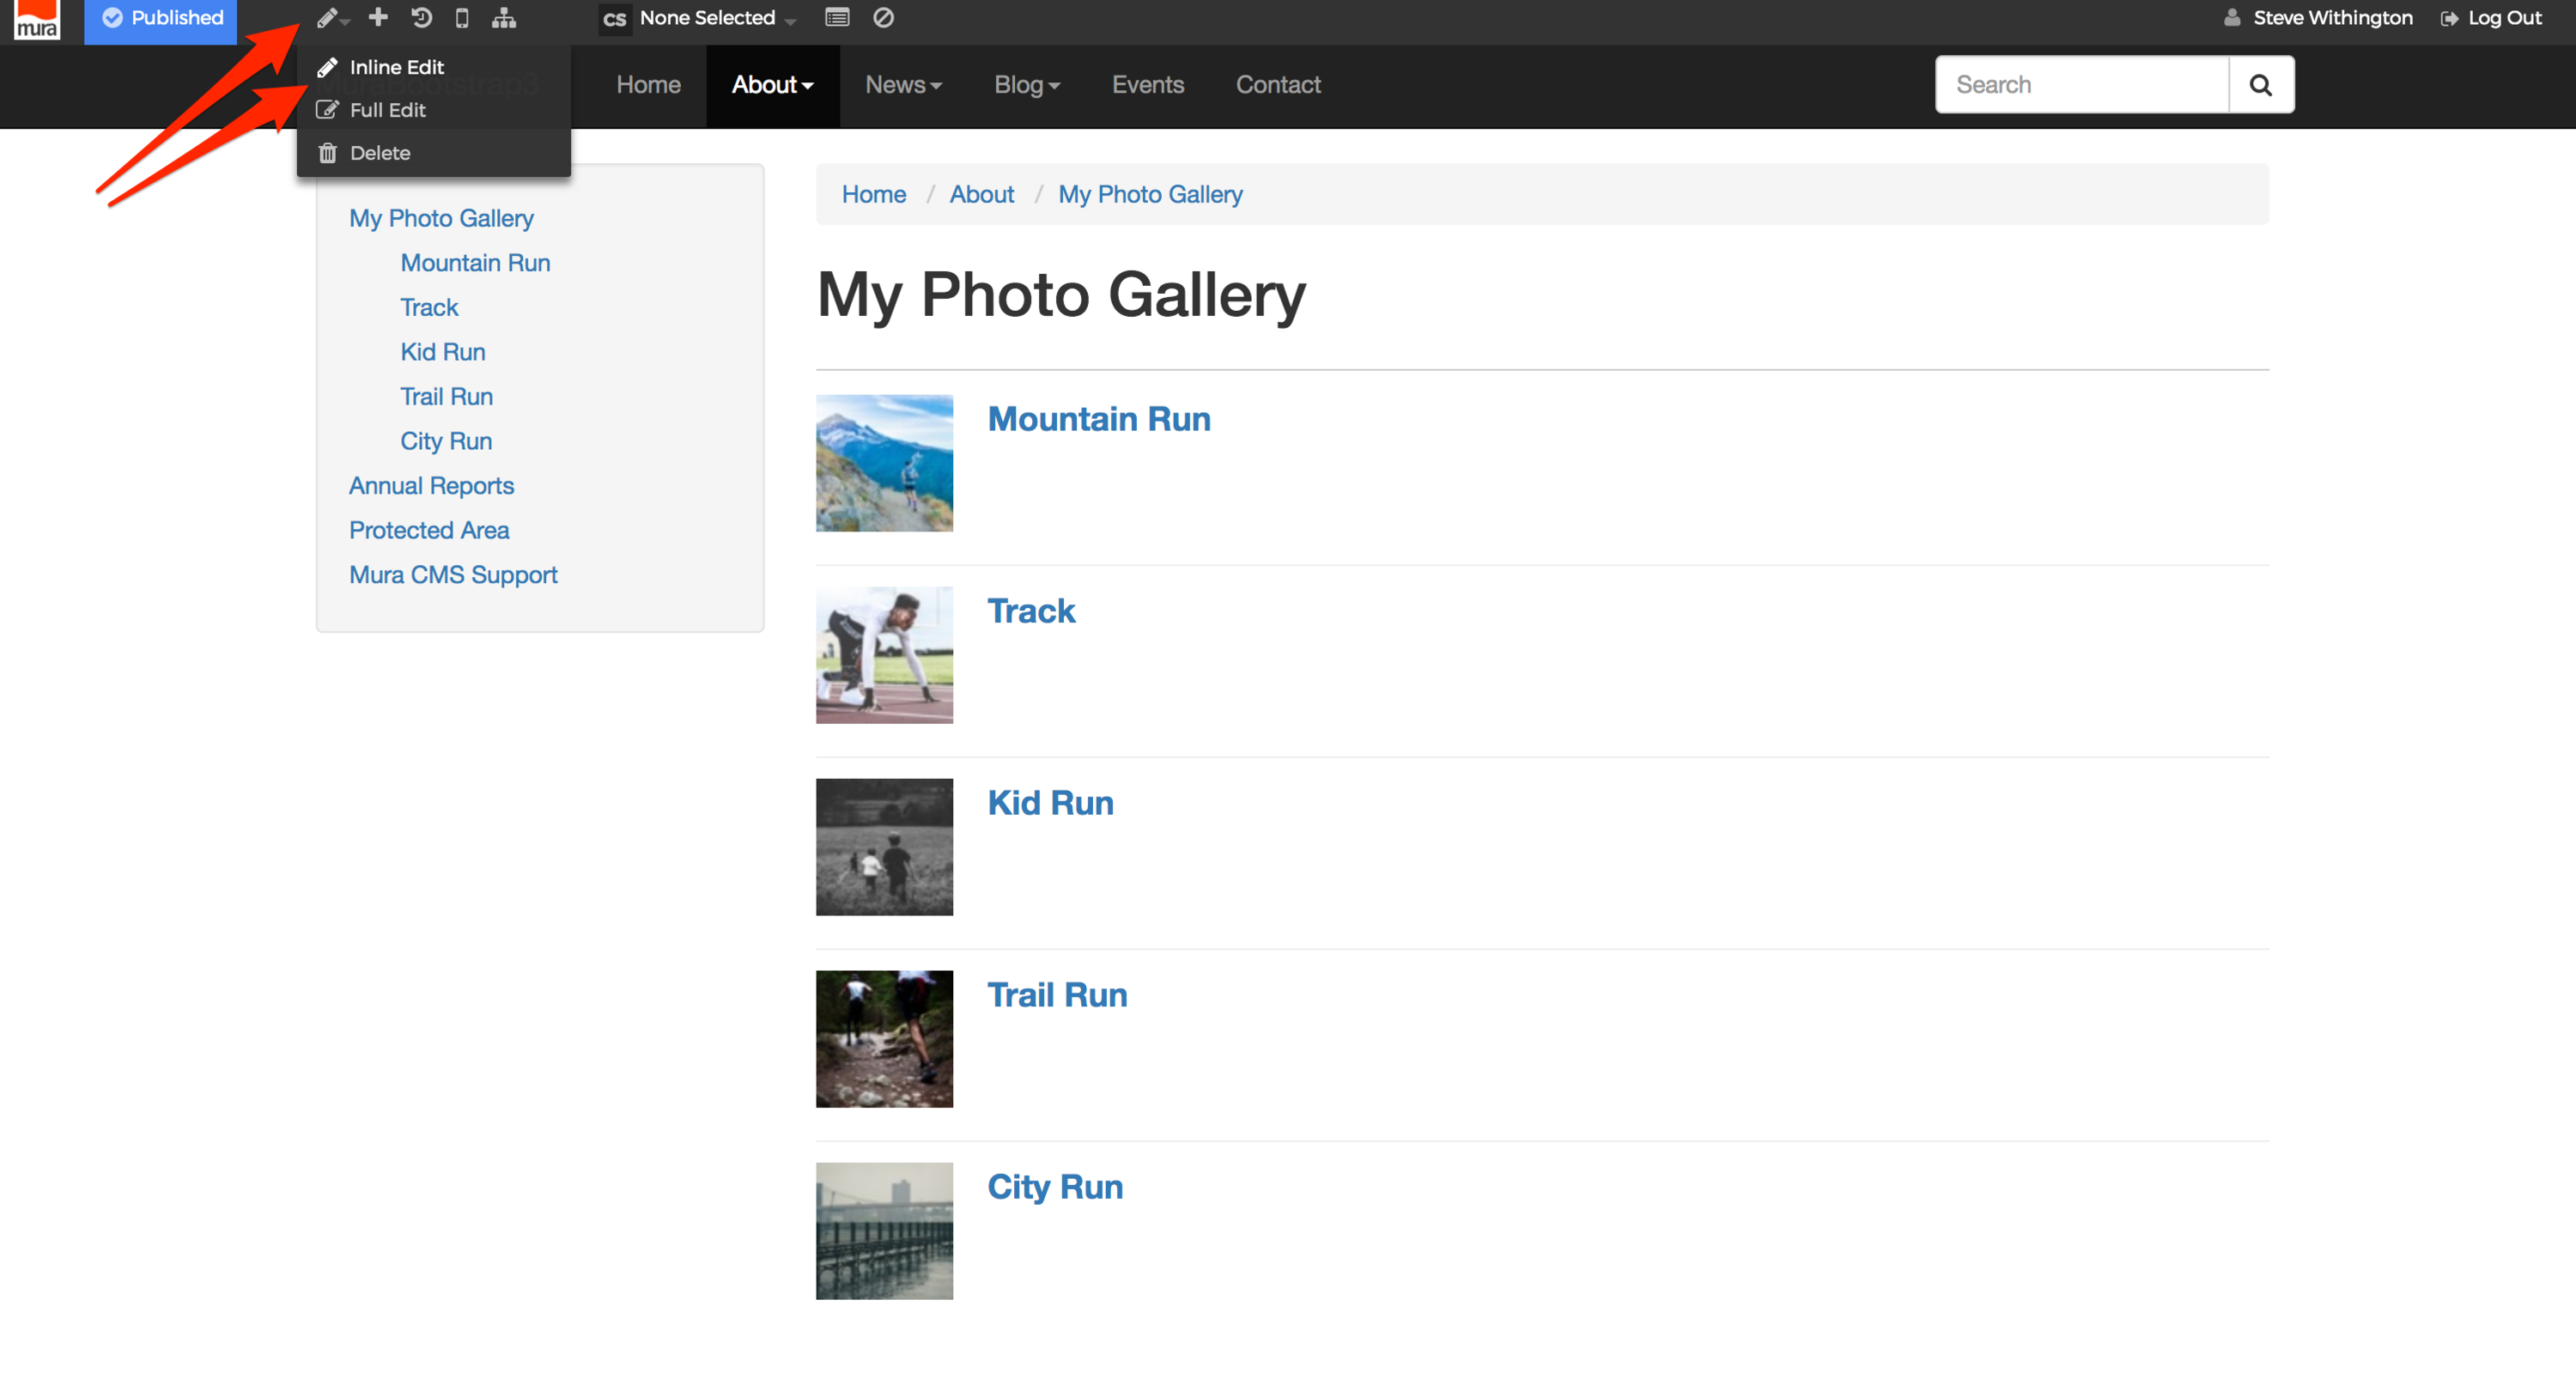
- From the front-end view of your site, hover over the pencil icon, then select "Inline Edit".
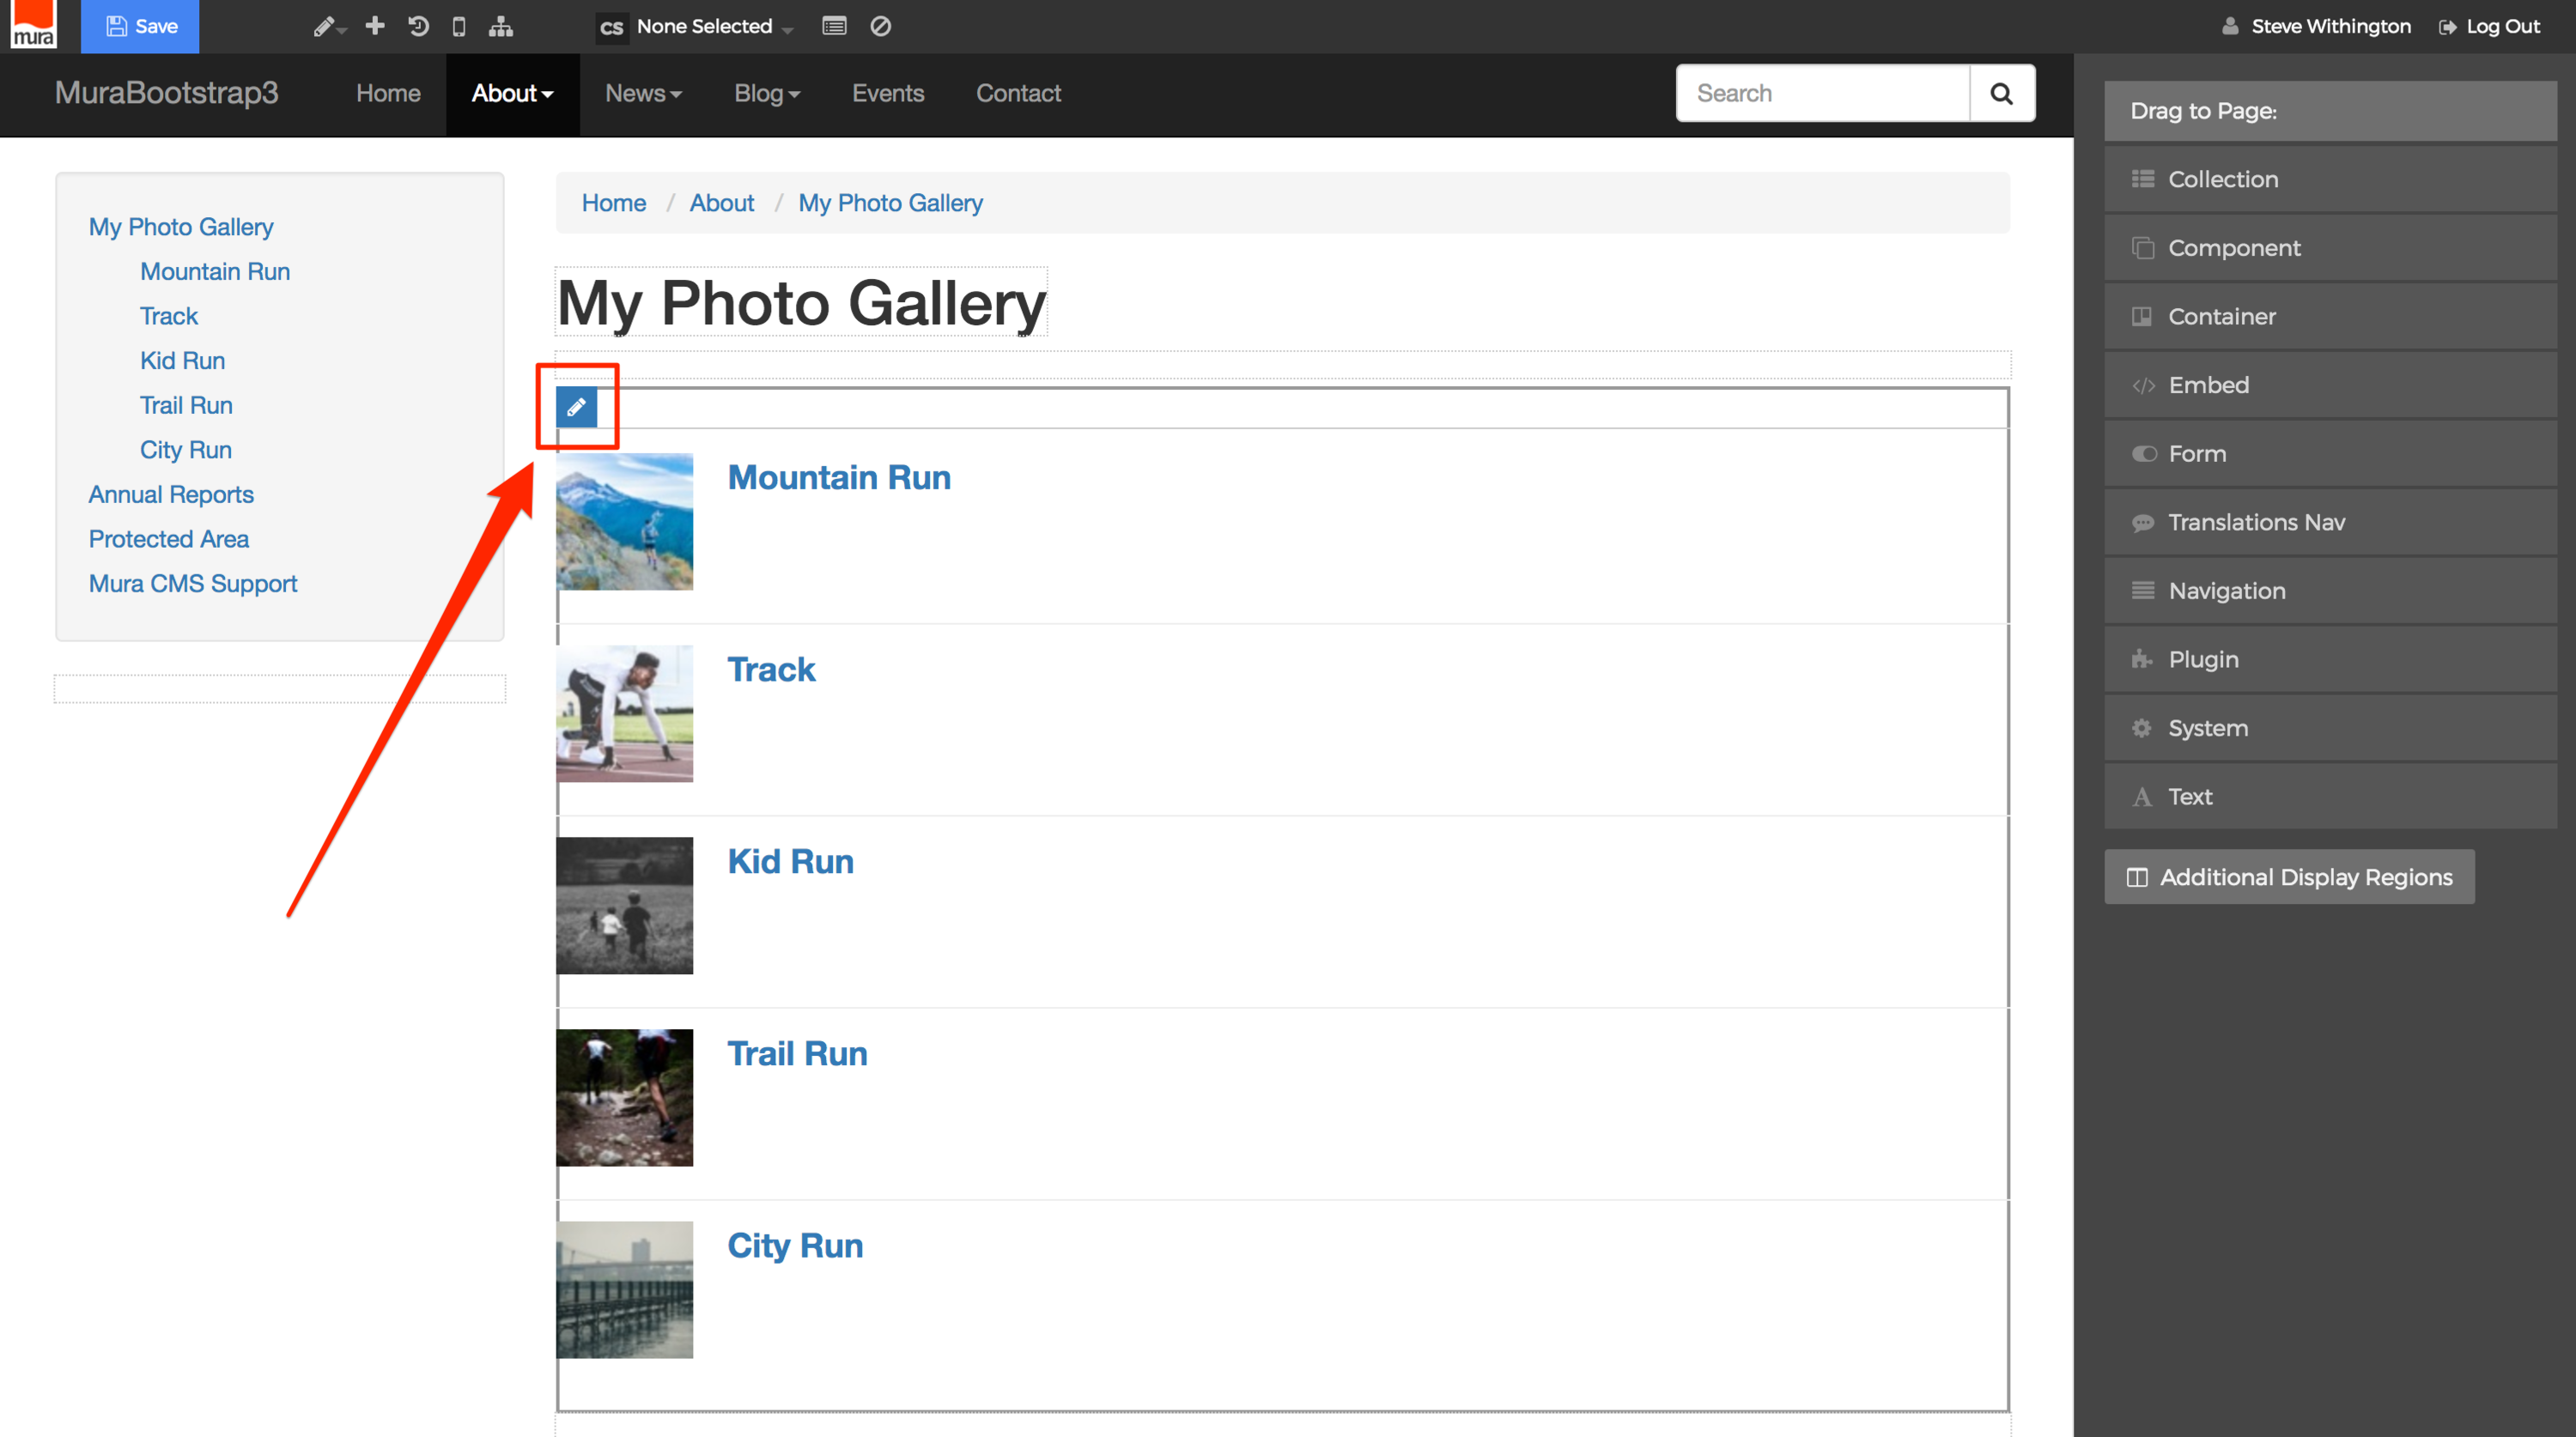
- Hover your mouse over the list of images in the body area, and click the pencil icon which should appear in the top-left corner of the region.
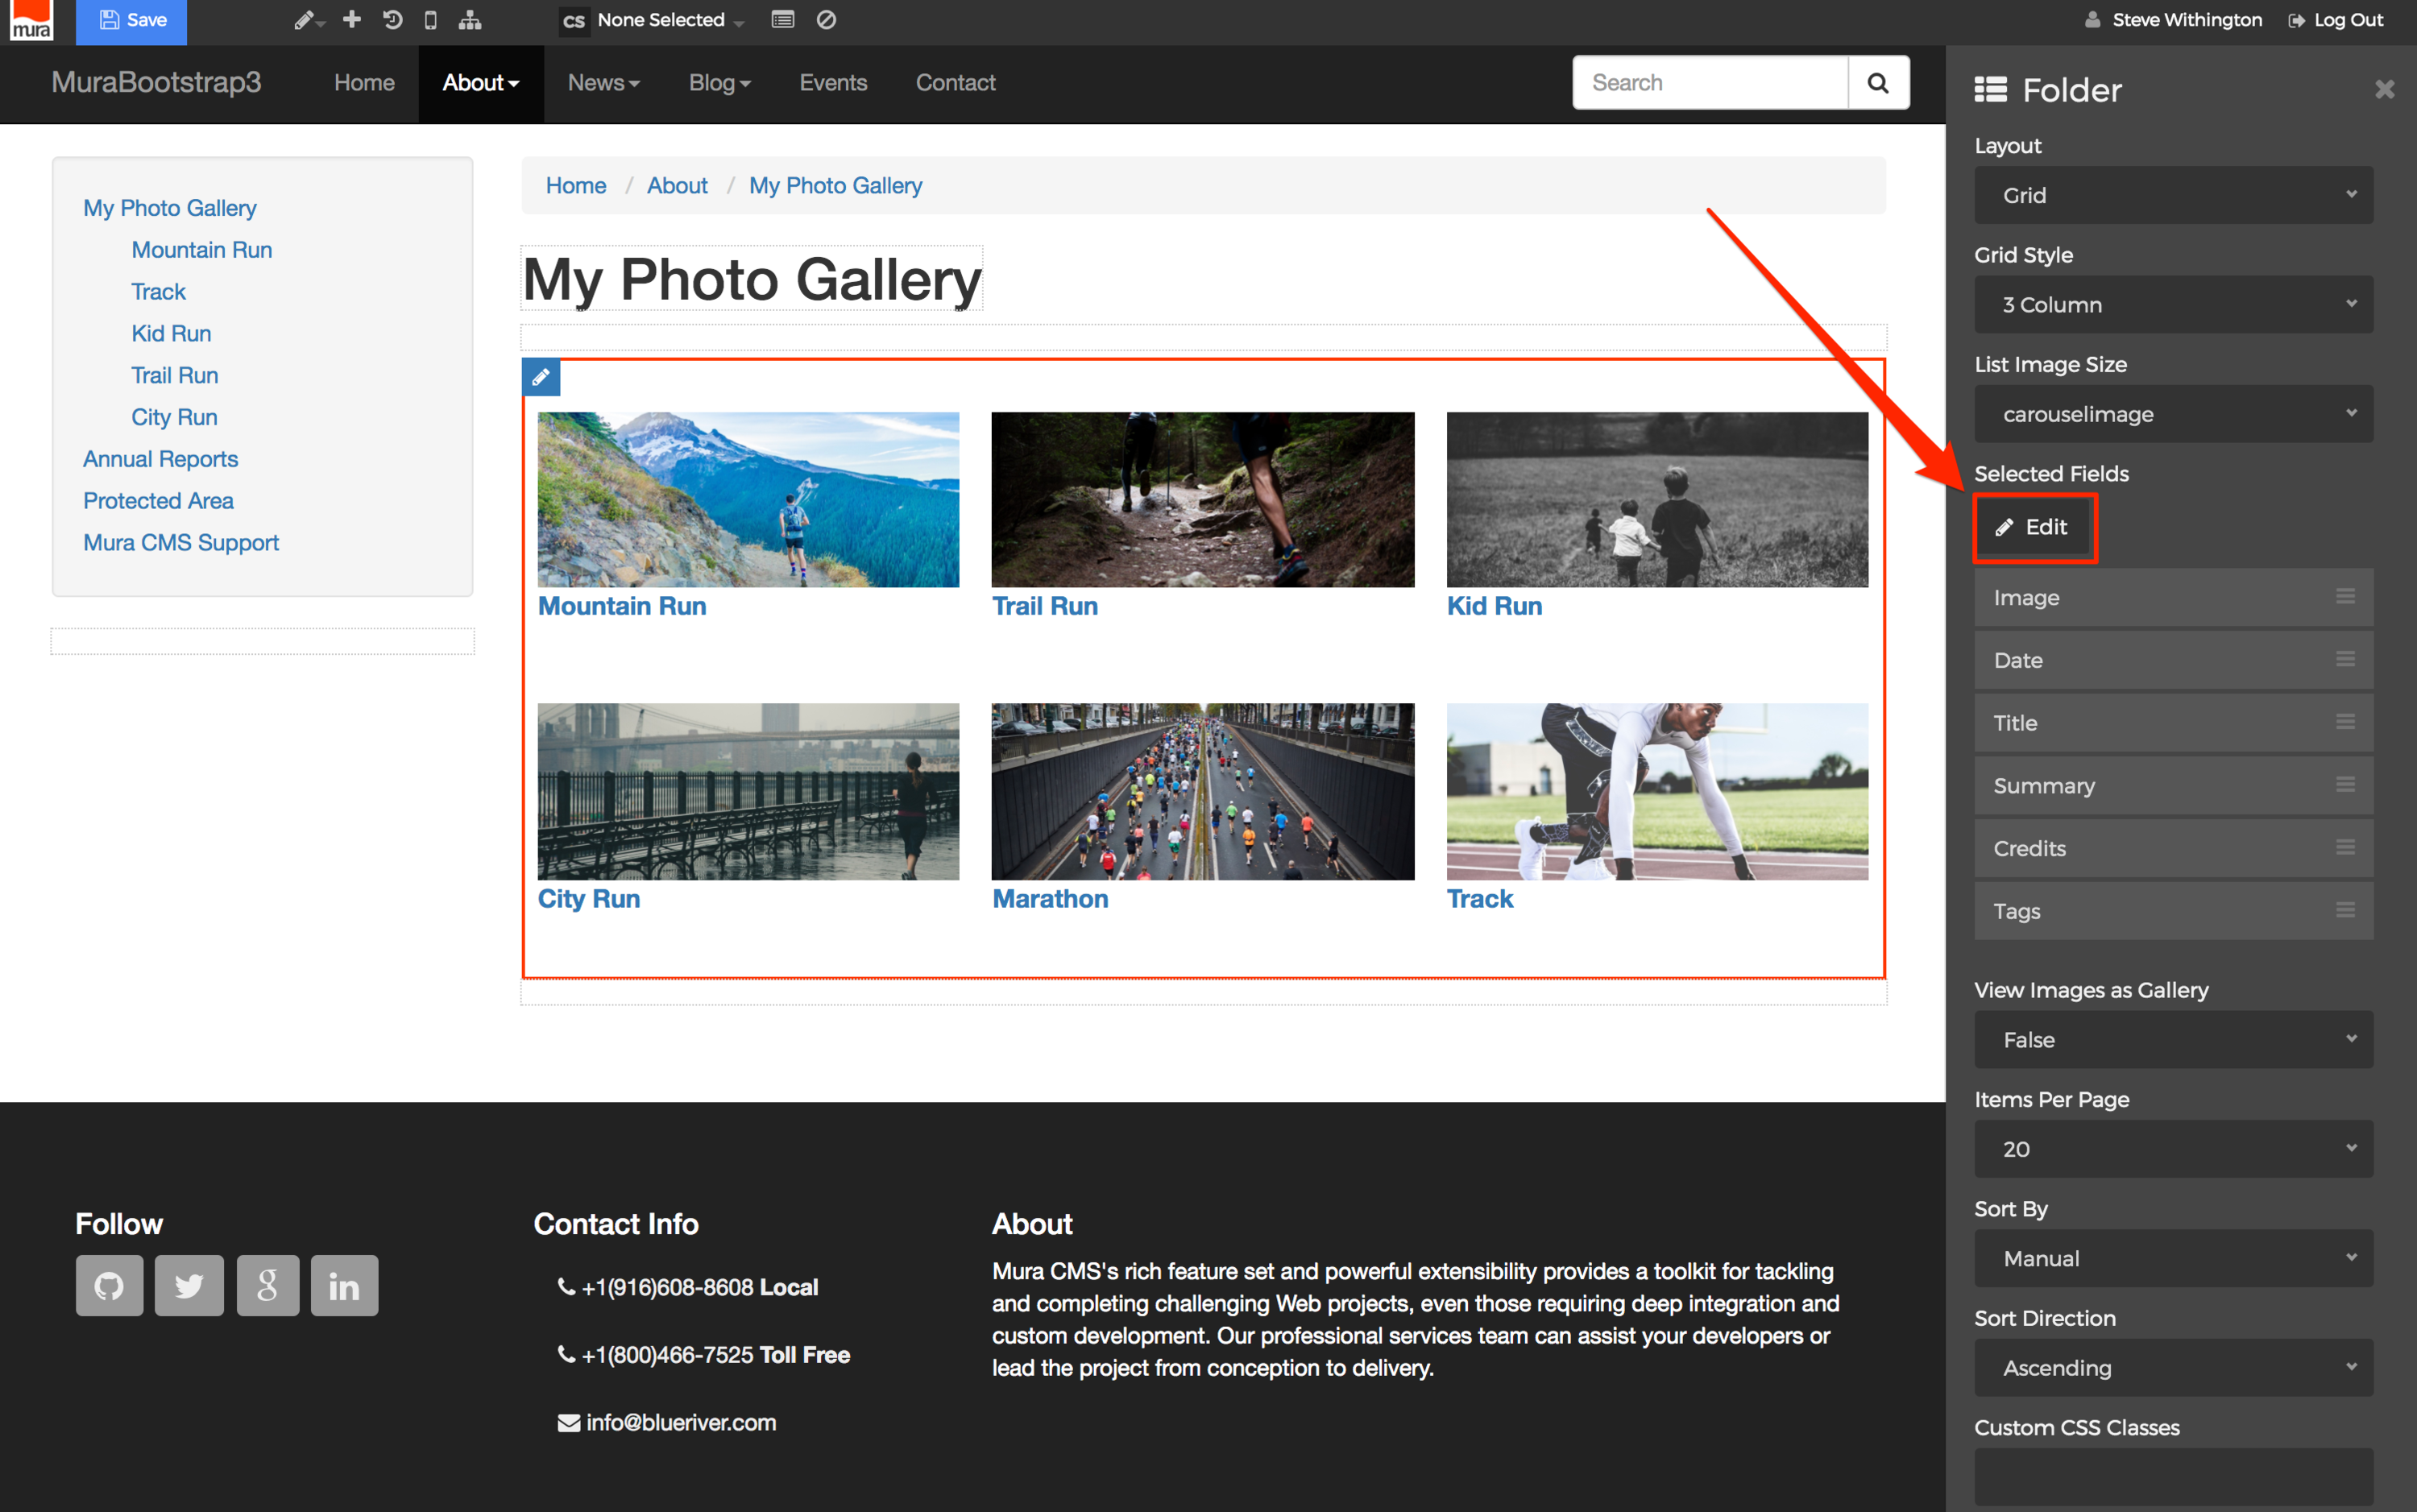
- The display object panel should now reveal the "Folder" configuration panel.
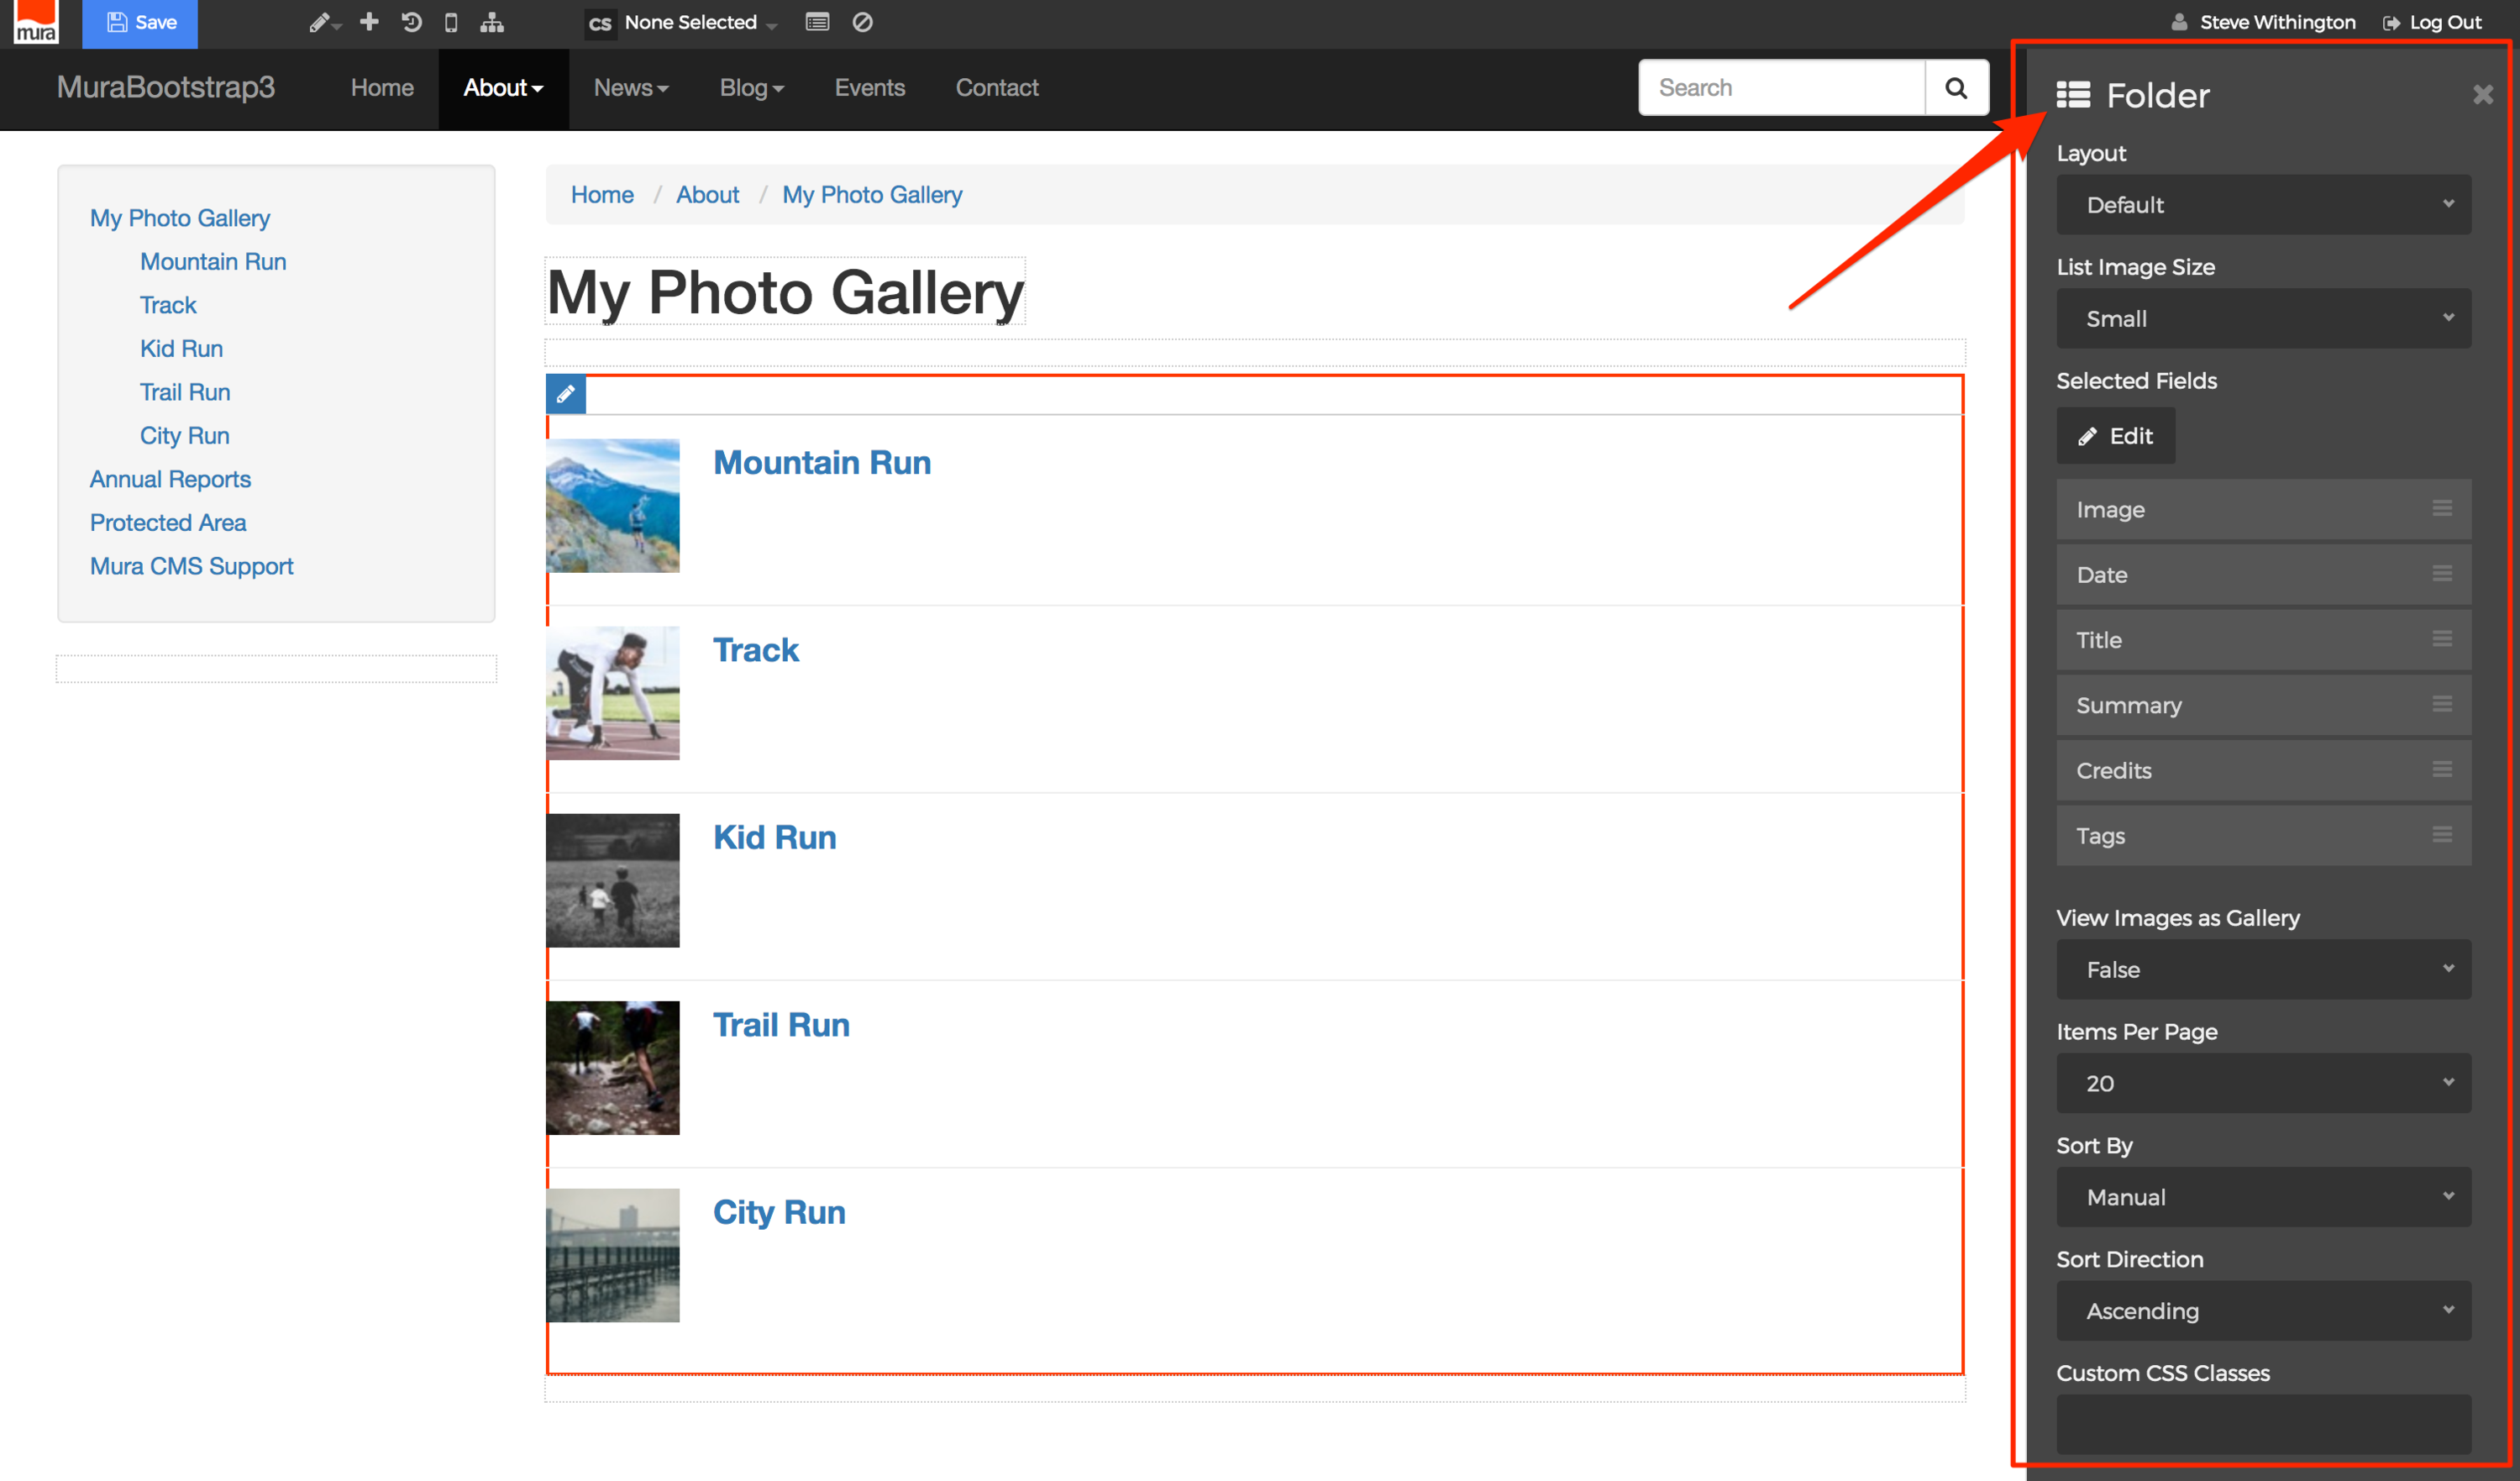
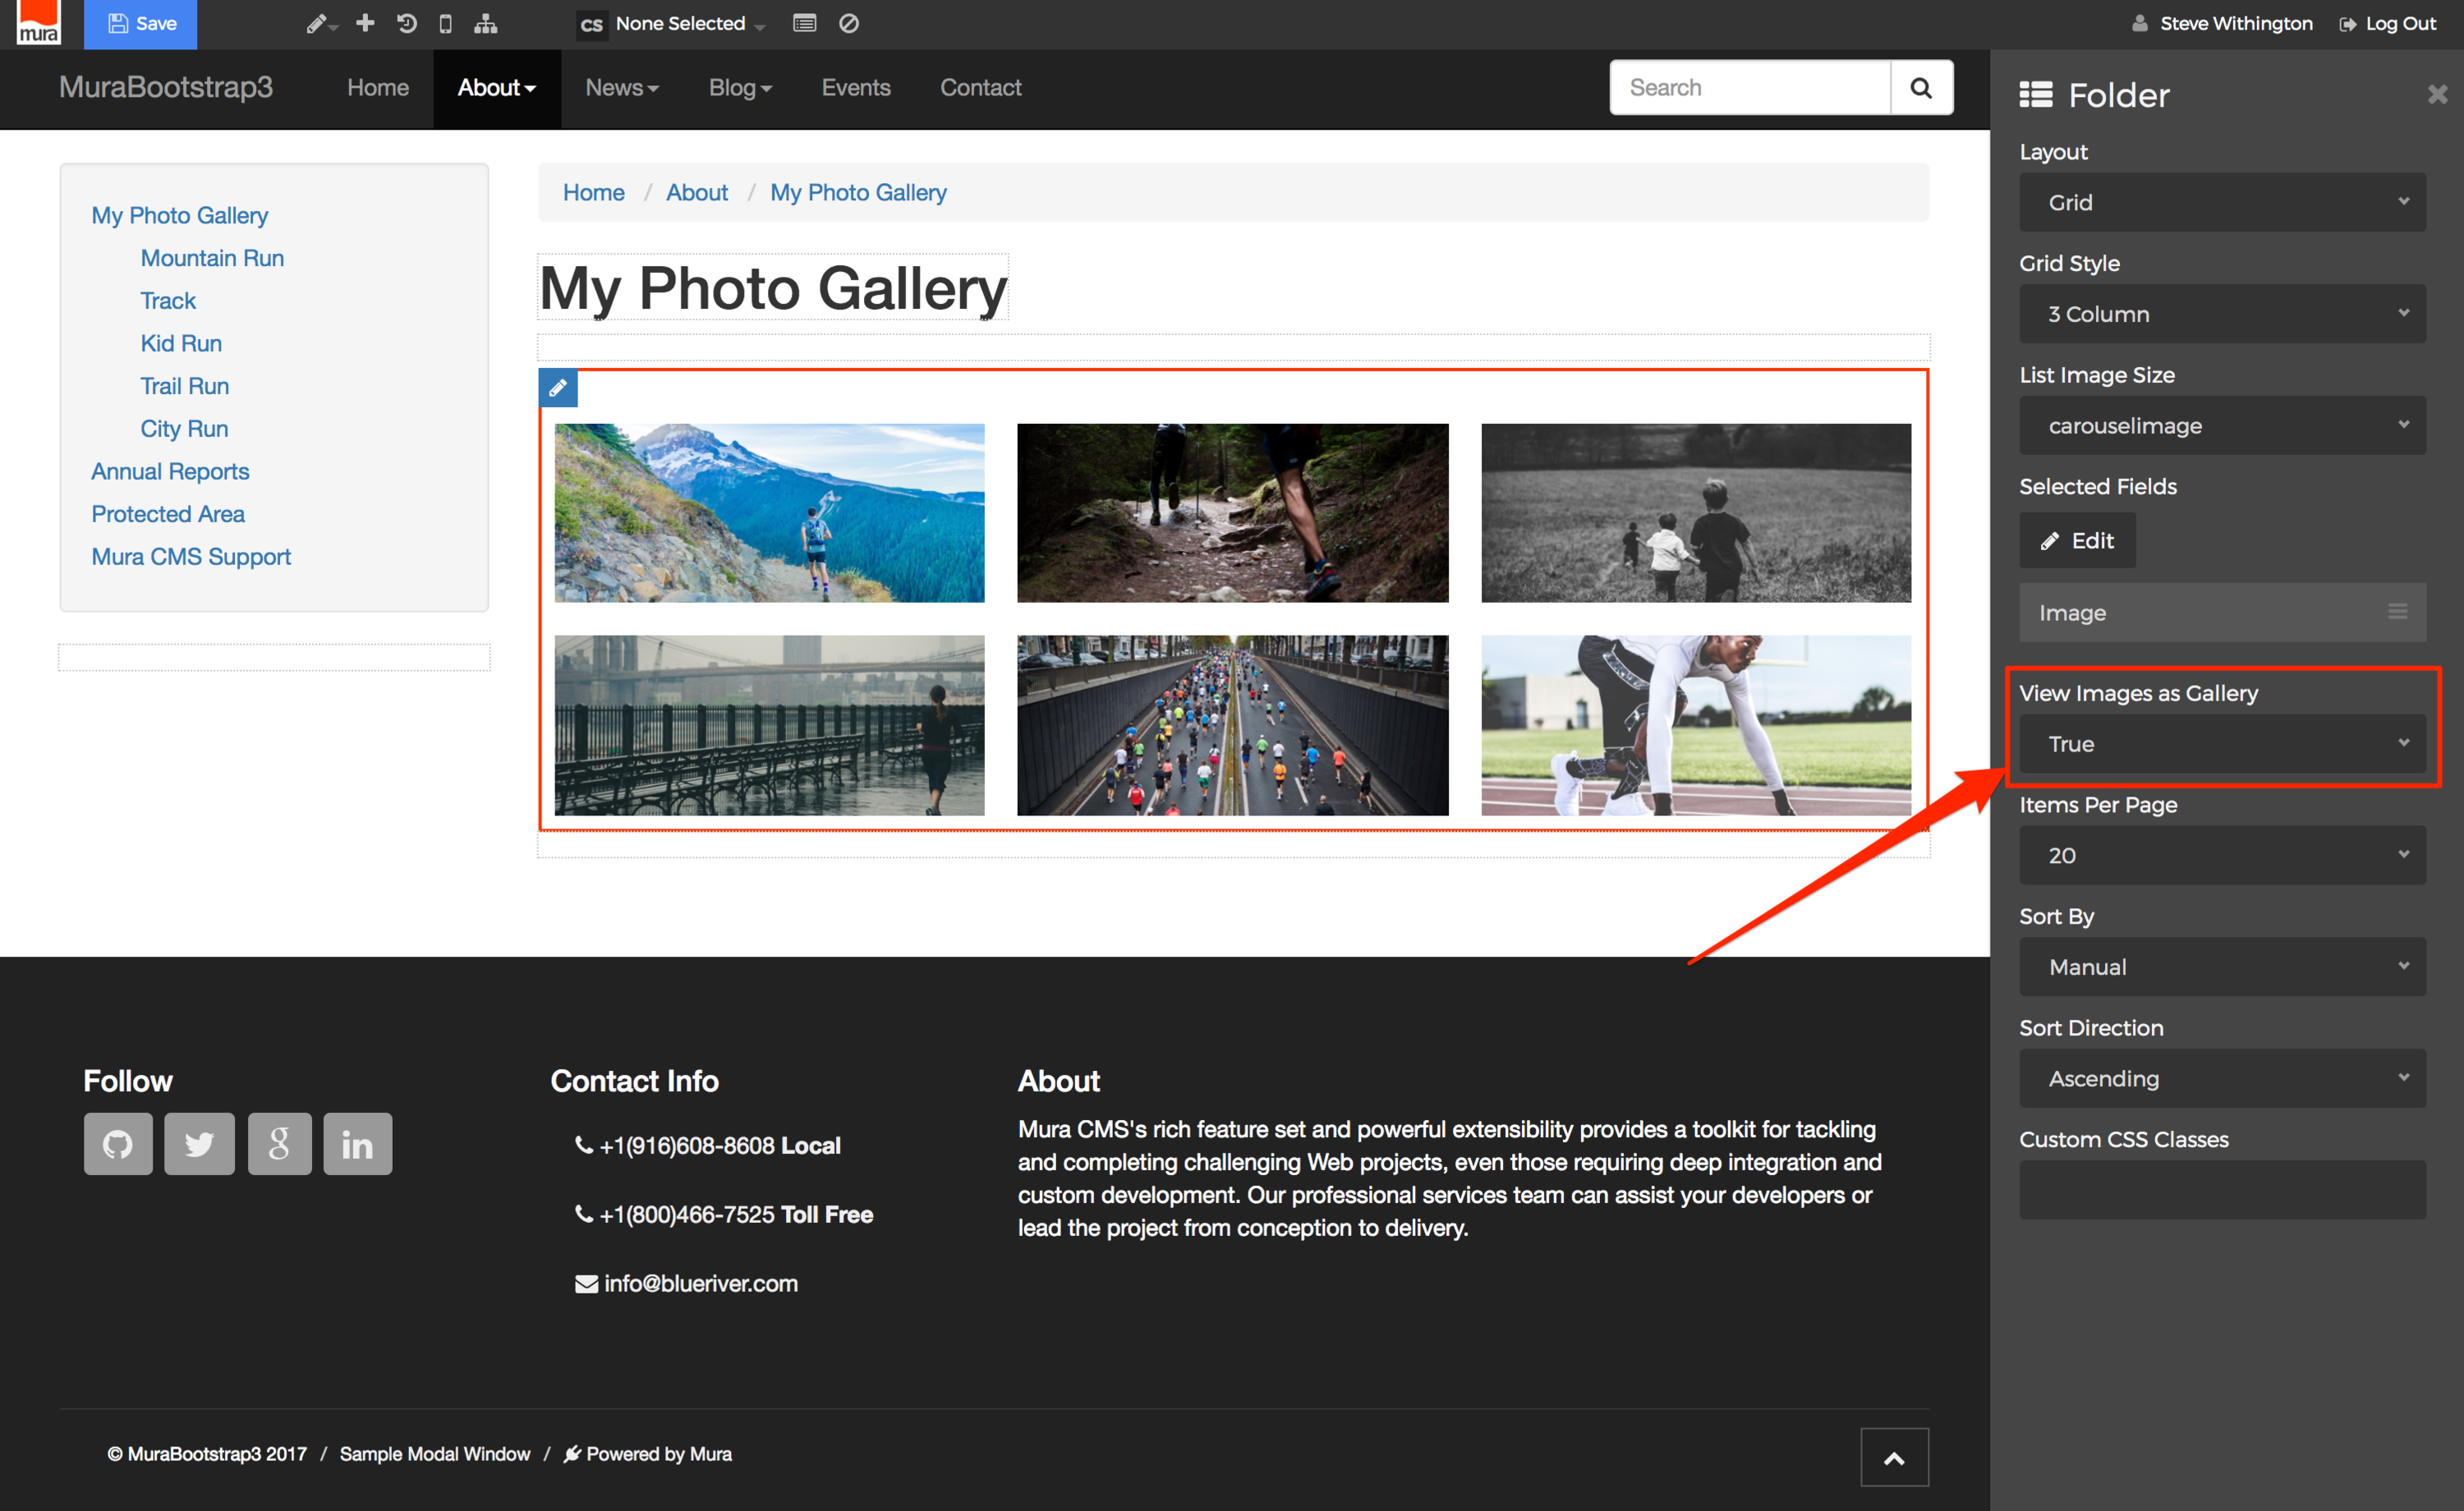
- From the "Folder" configuration panel, you may select your Layout, List Image Size, which Selected Fields you wish to display, Items Per Page, and more. For example, for the Layout, select "Grid", then select your desired "Grid Style" option and "List Image Size". You'll see the display automatically update as you make each selection, so you'll know what the gallery will look like for your site visitors.
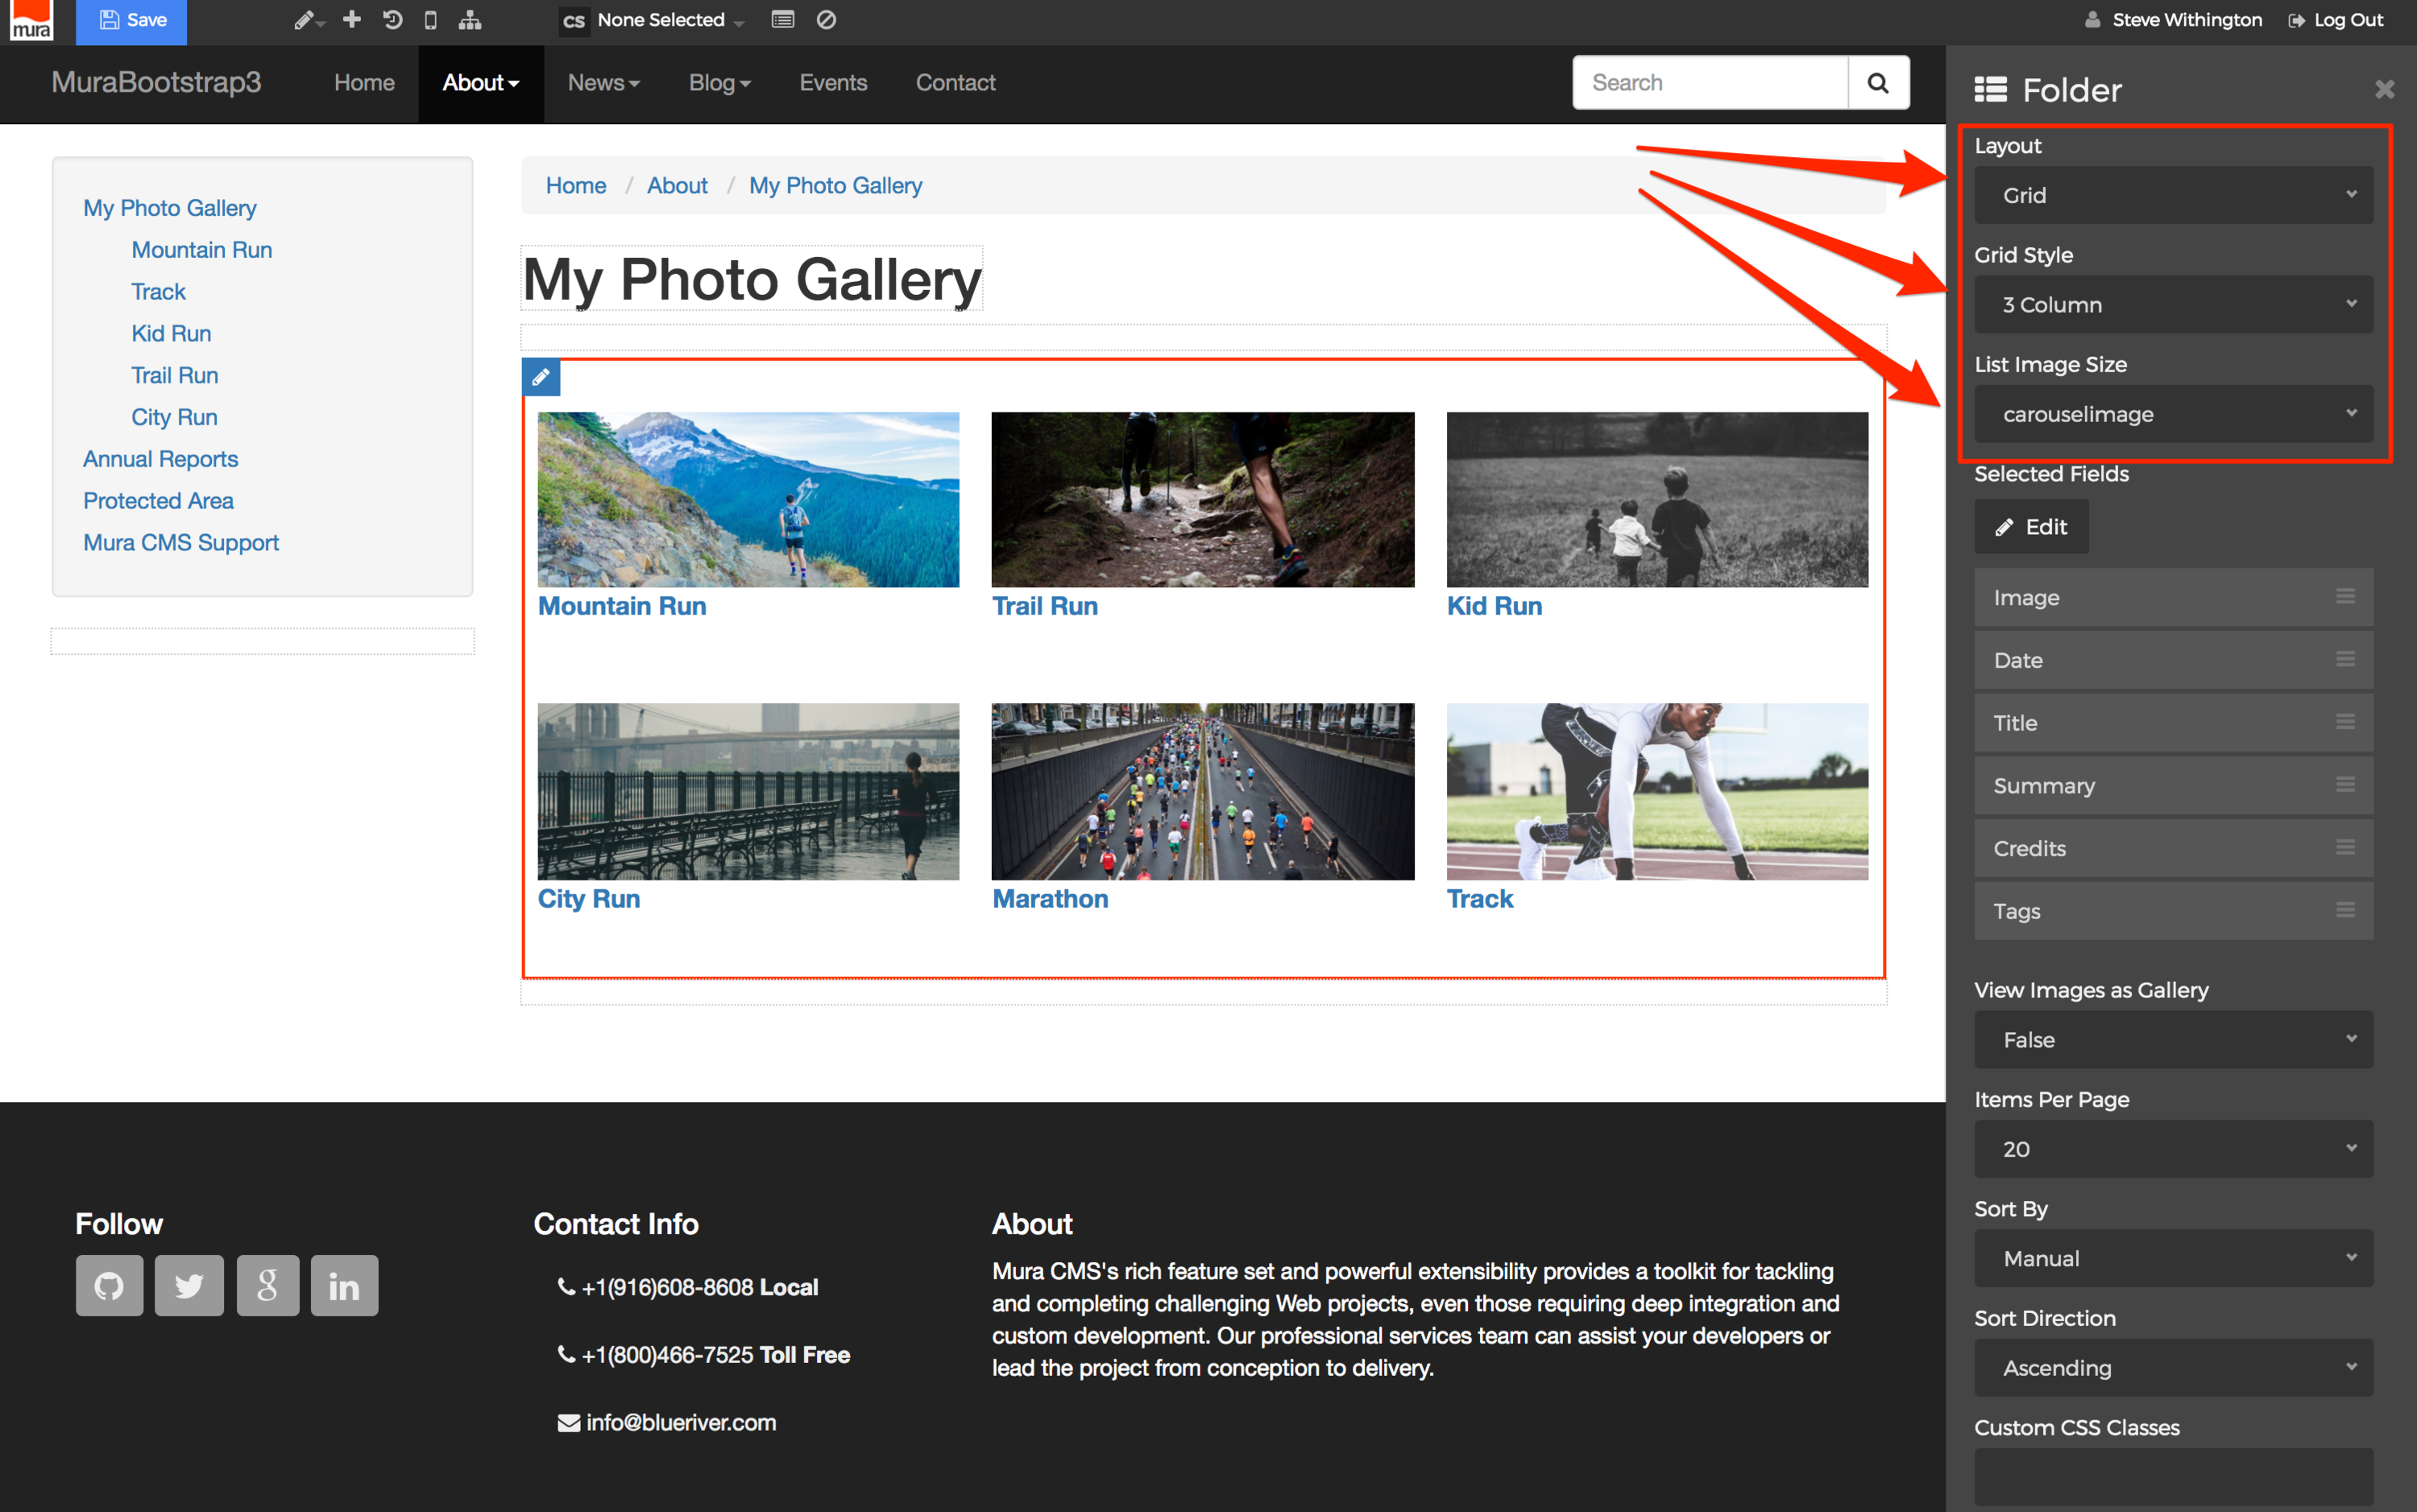
- If you don't want the Title of each image to appear, select the "Edit" button beneath the "Selected Fields" label.
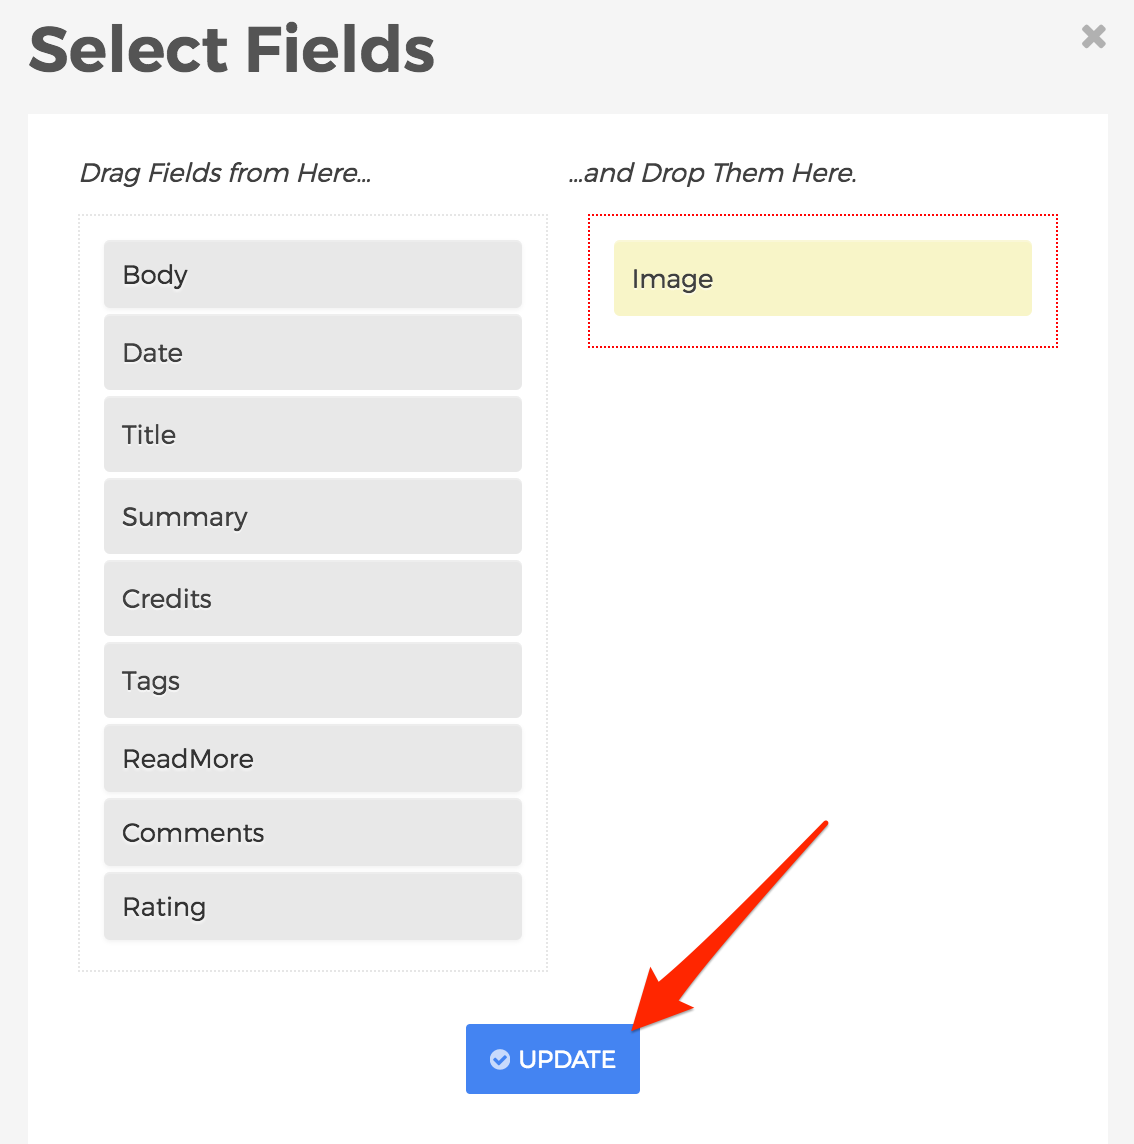
- The "Select Fields" dialog window should open. From here, you may click, drag and drop the field(s) you wish to display, or not display by moving them from one column, to the other.
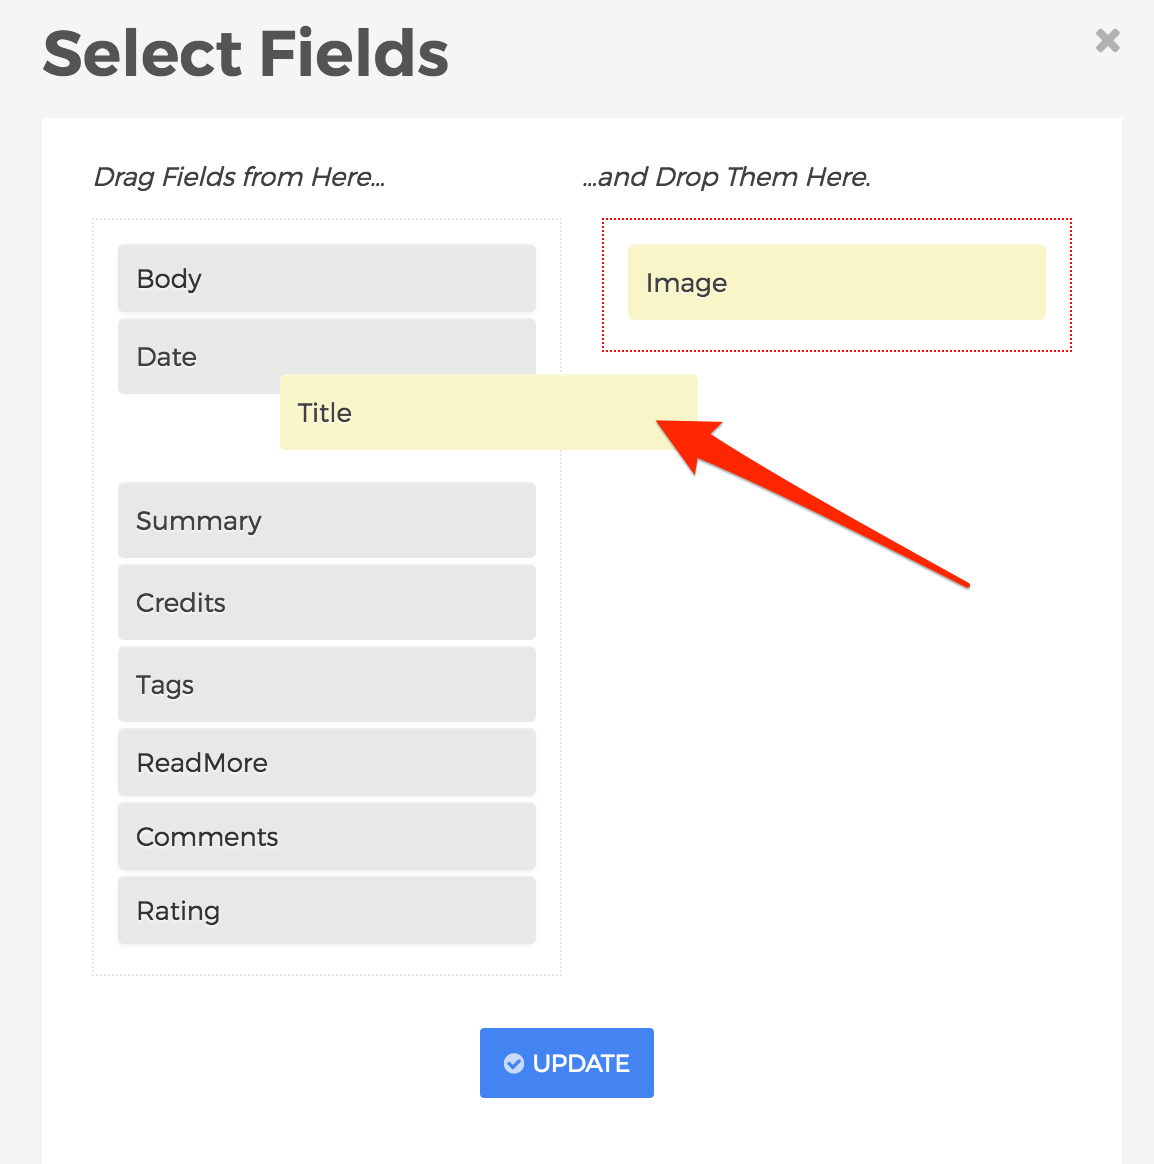
- When finished selecting your desired fields, click Update.
- The body area will update to reflect your updates.
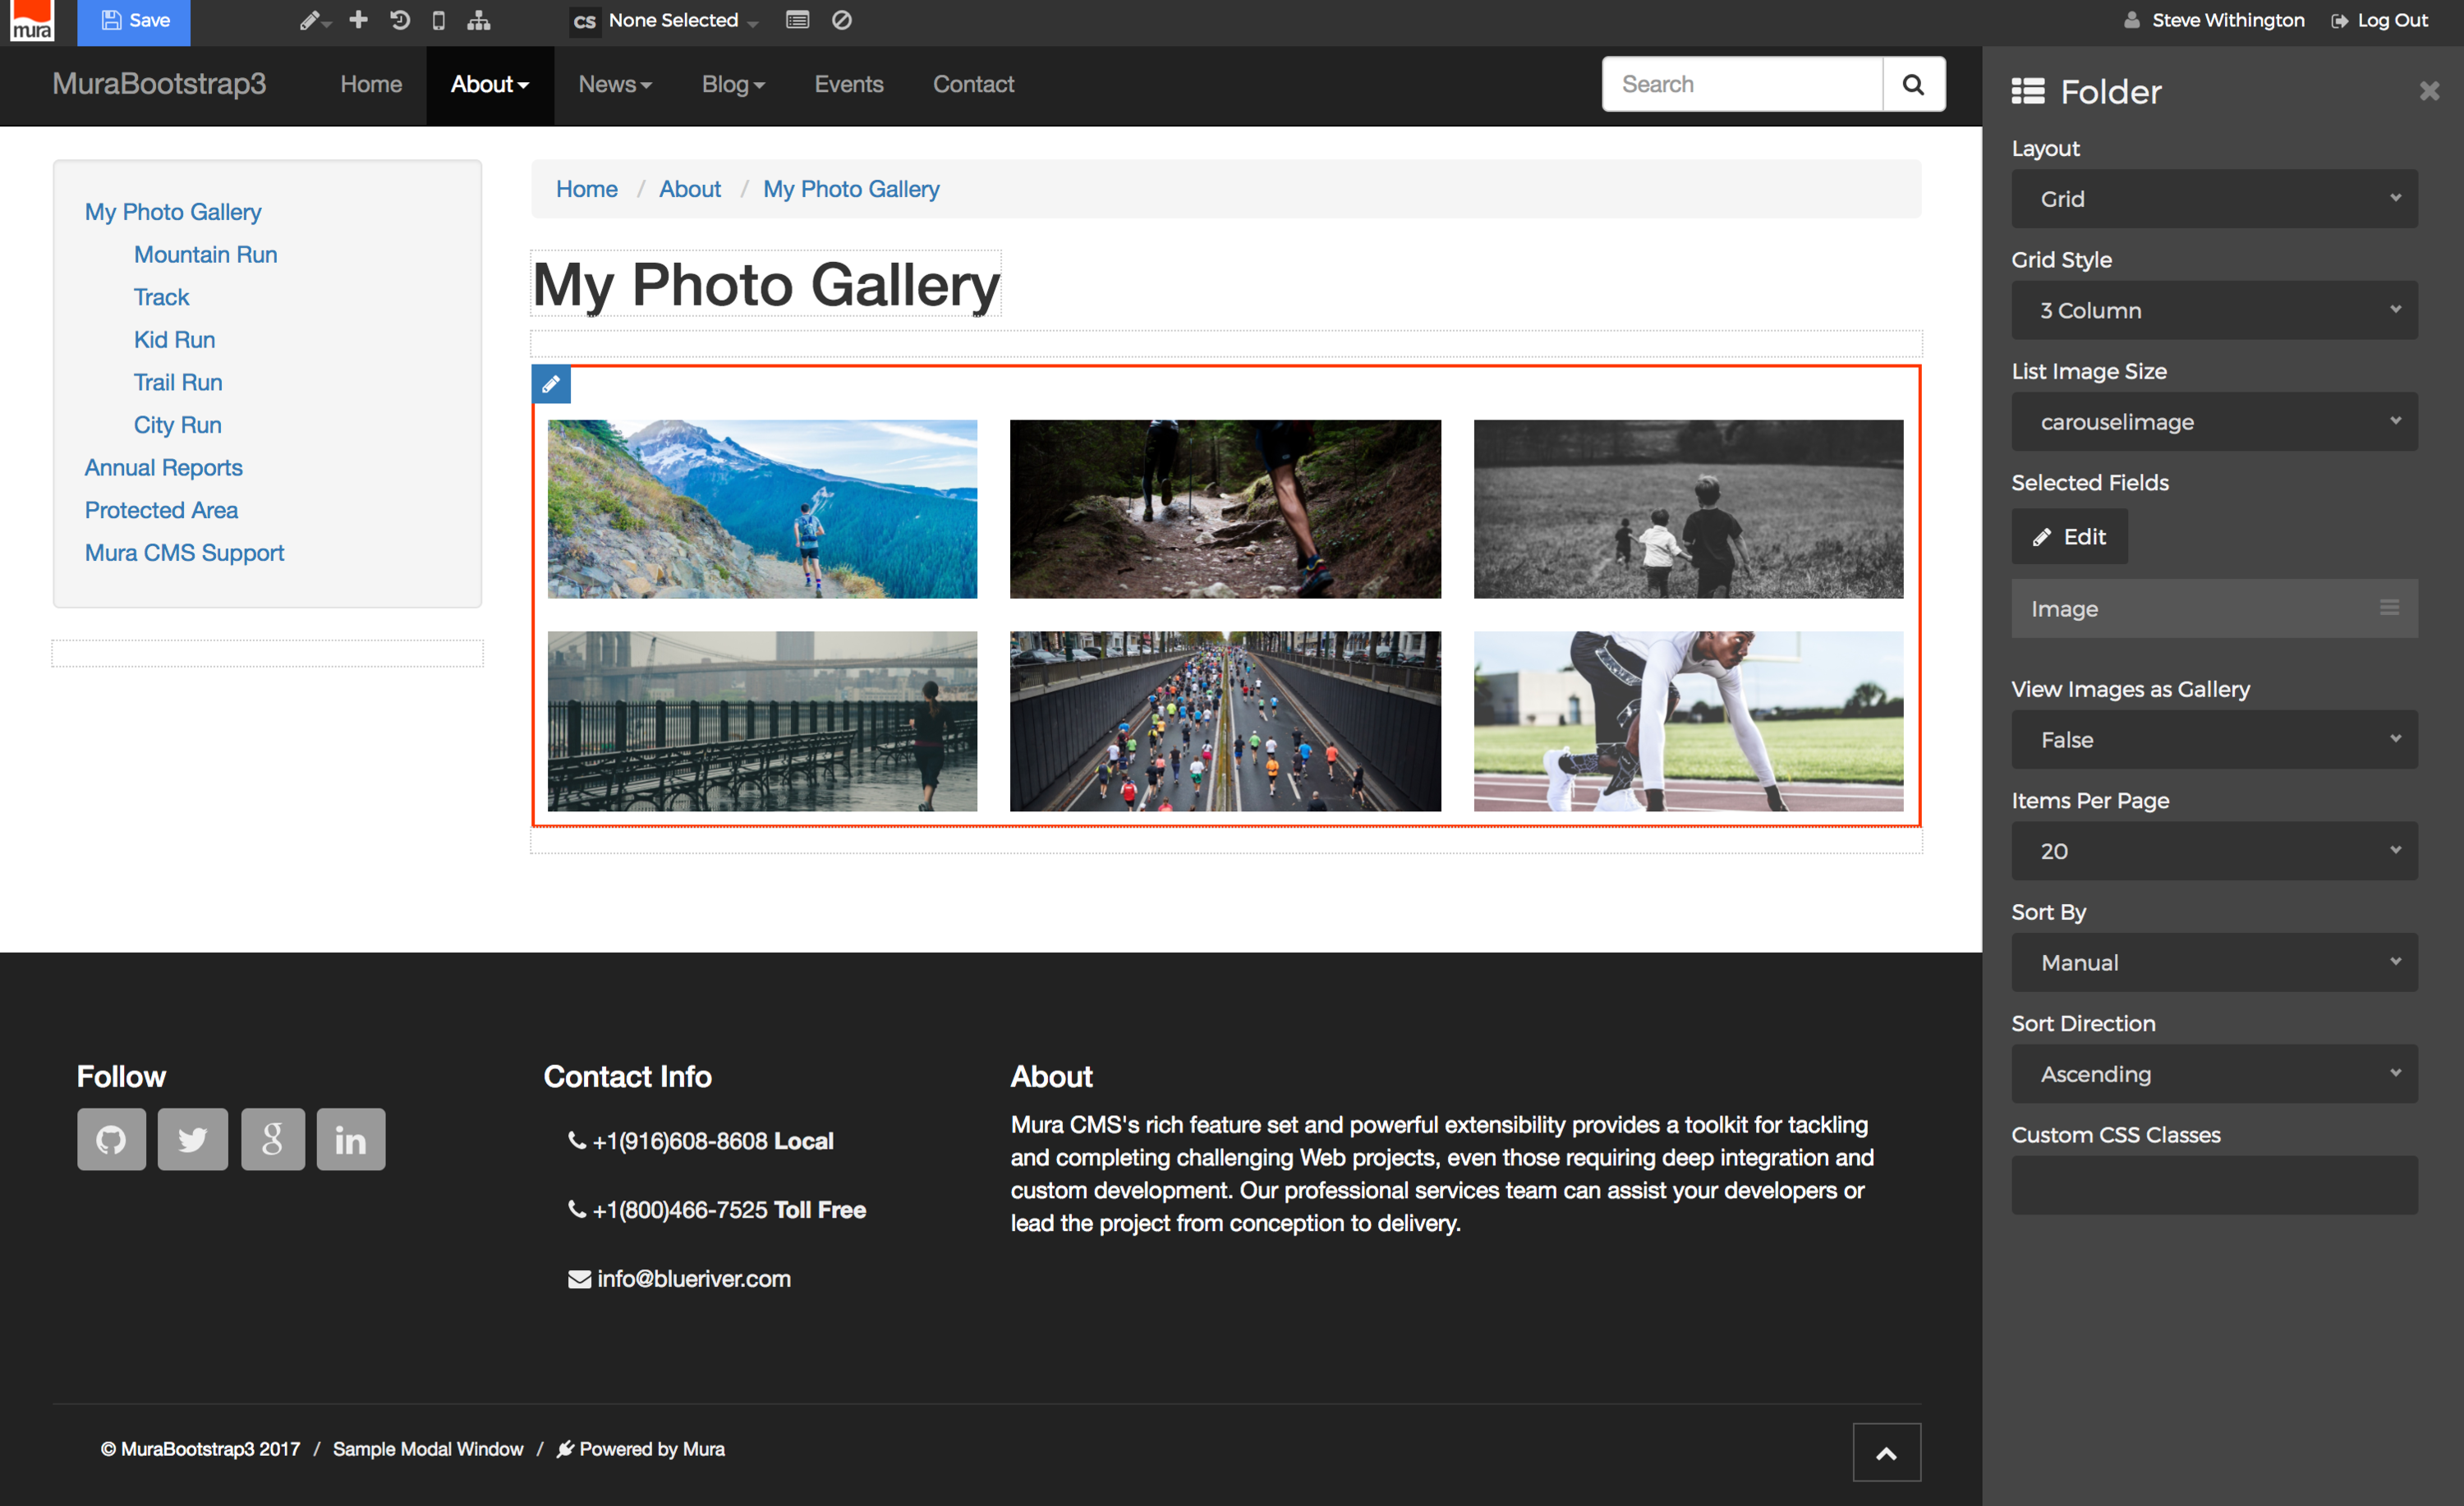
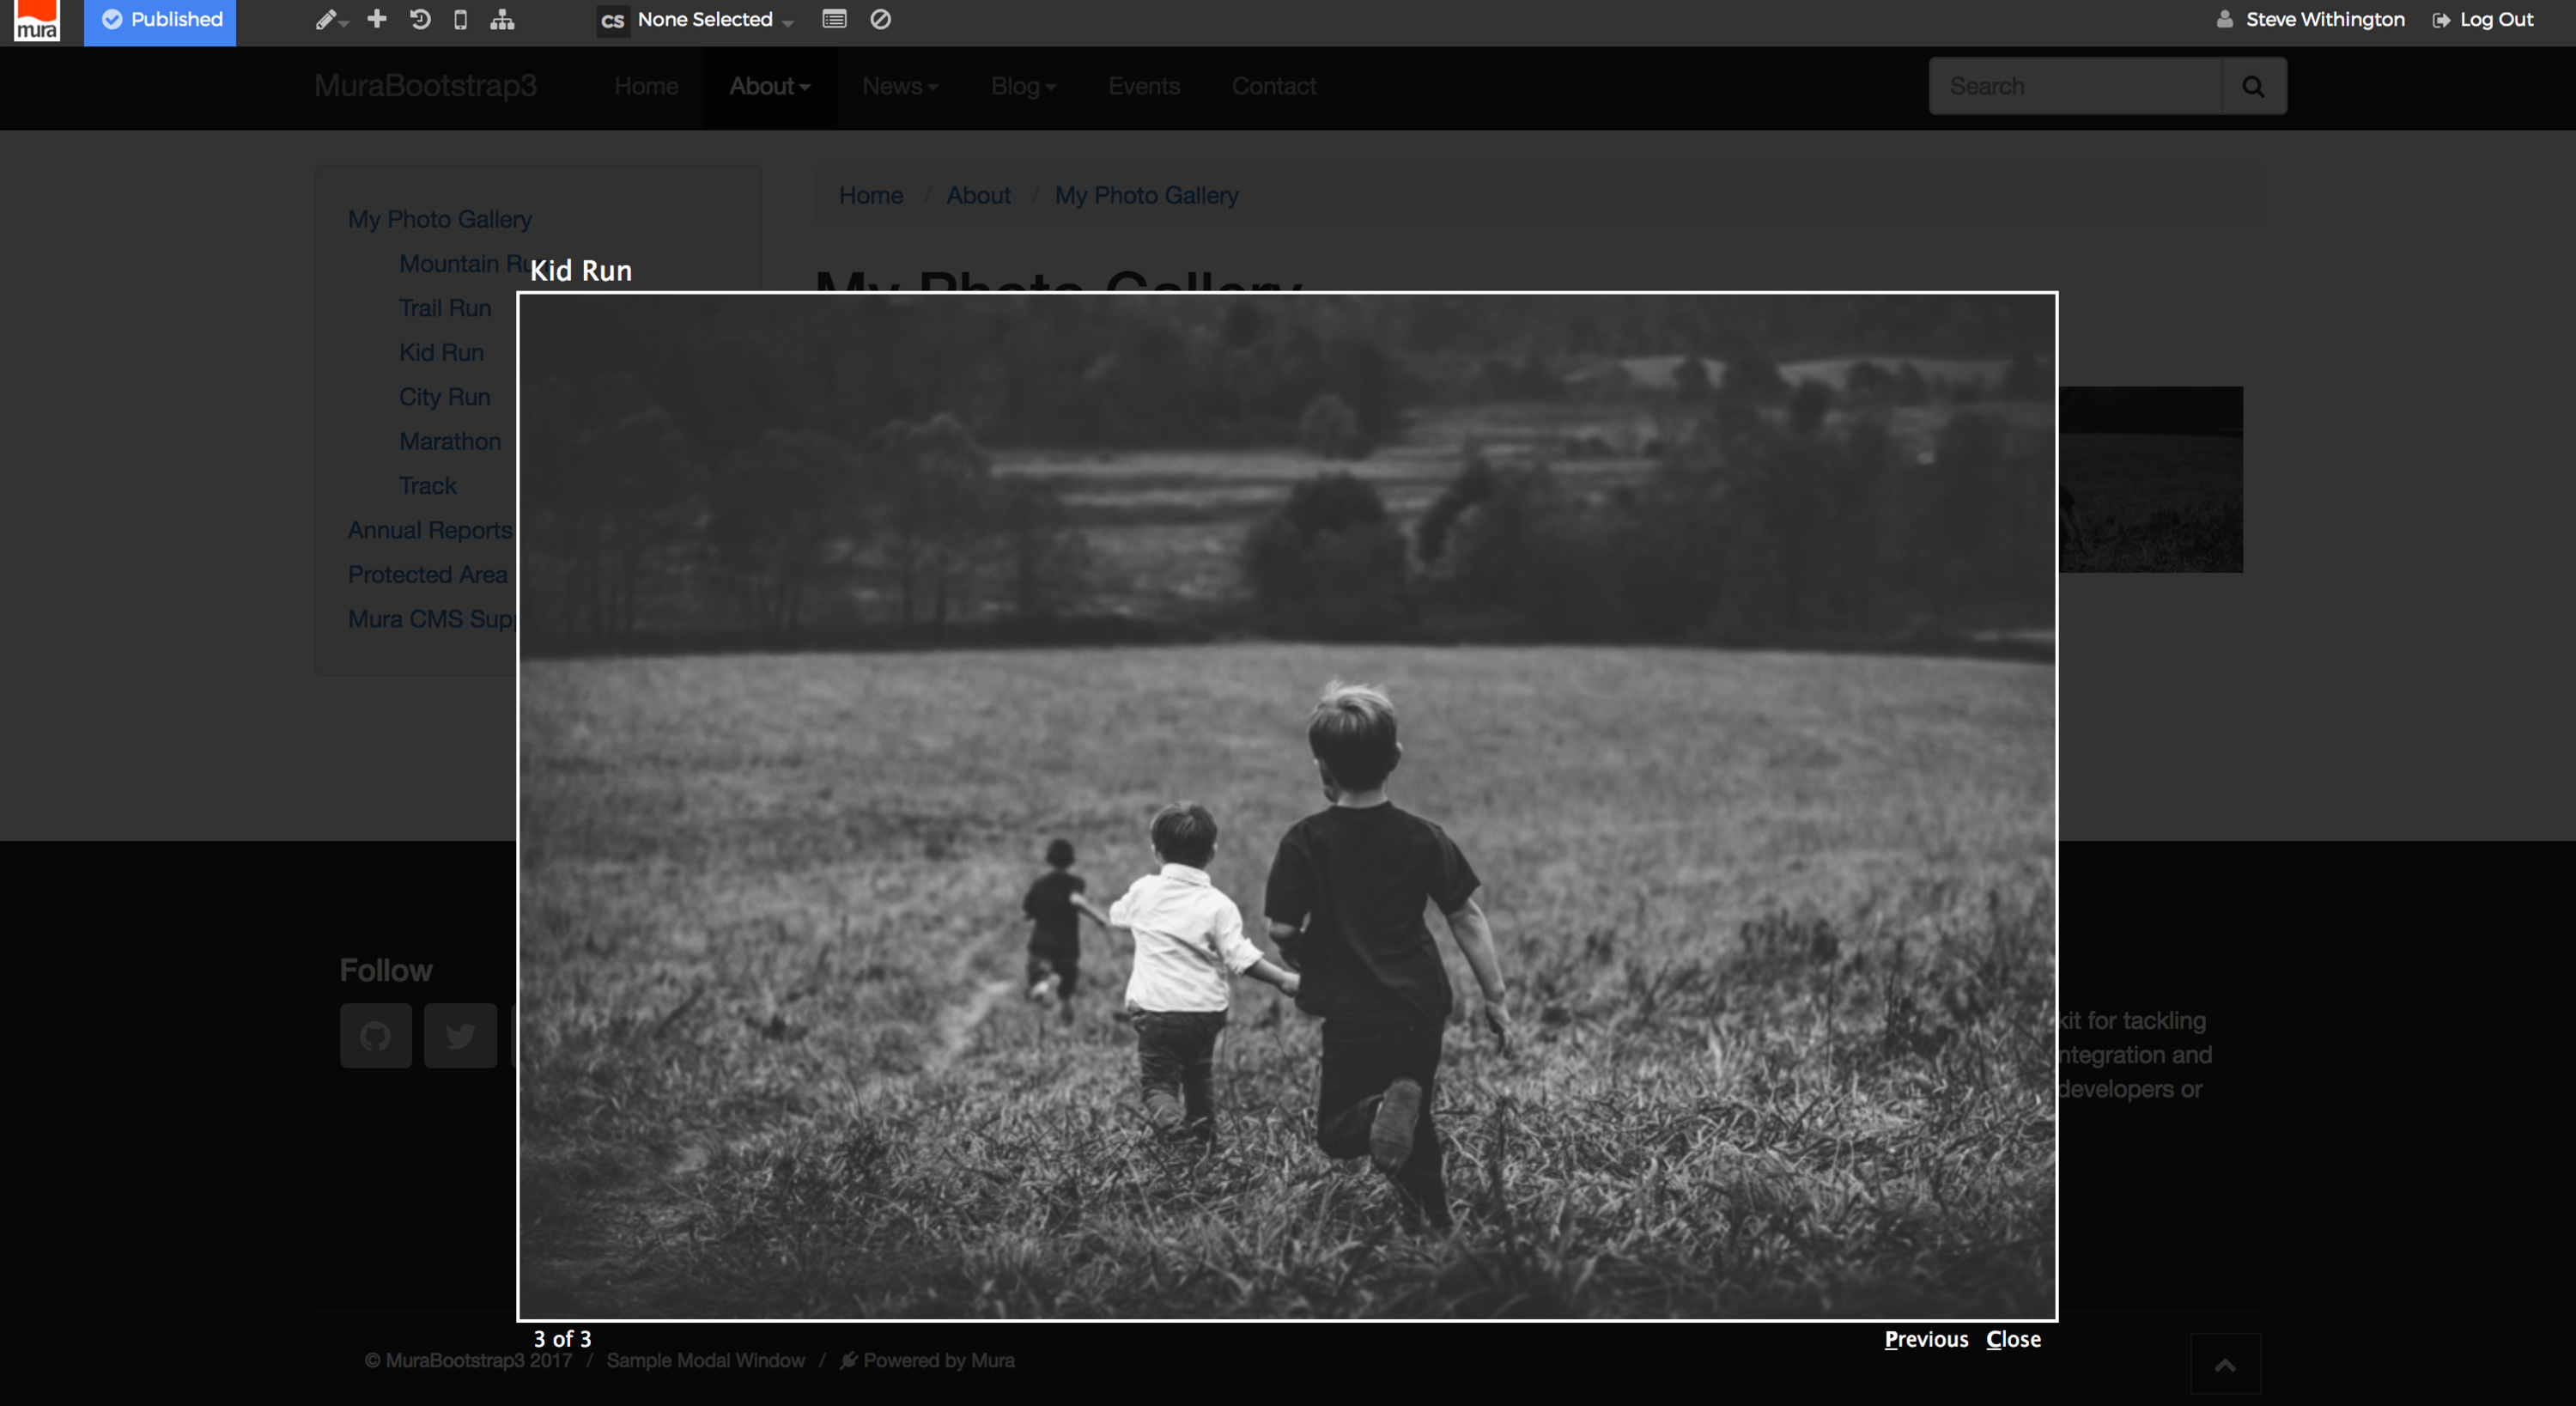
- In addition, on the "Folder" configuration panel, make sure you set "View Images as Gallery" to "True" if you want a modal window to open when a user clicks on an image.
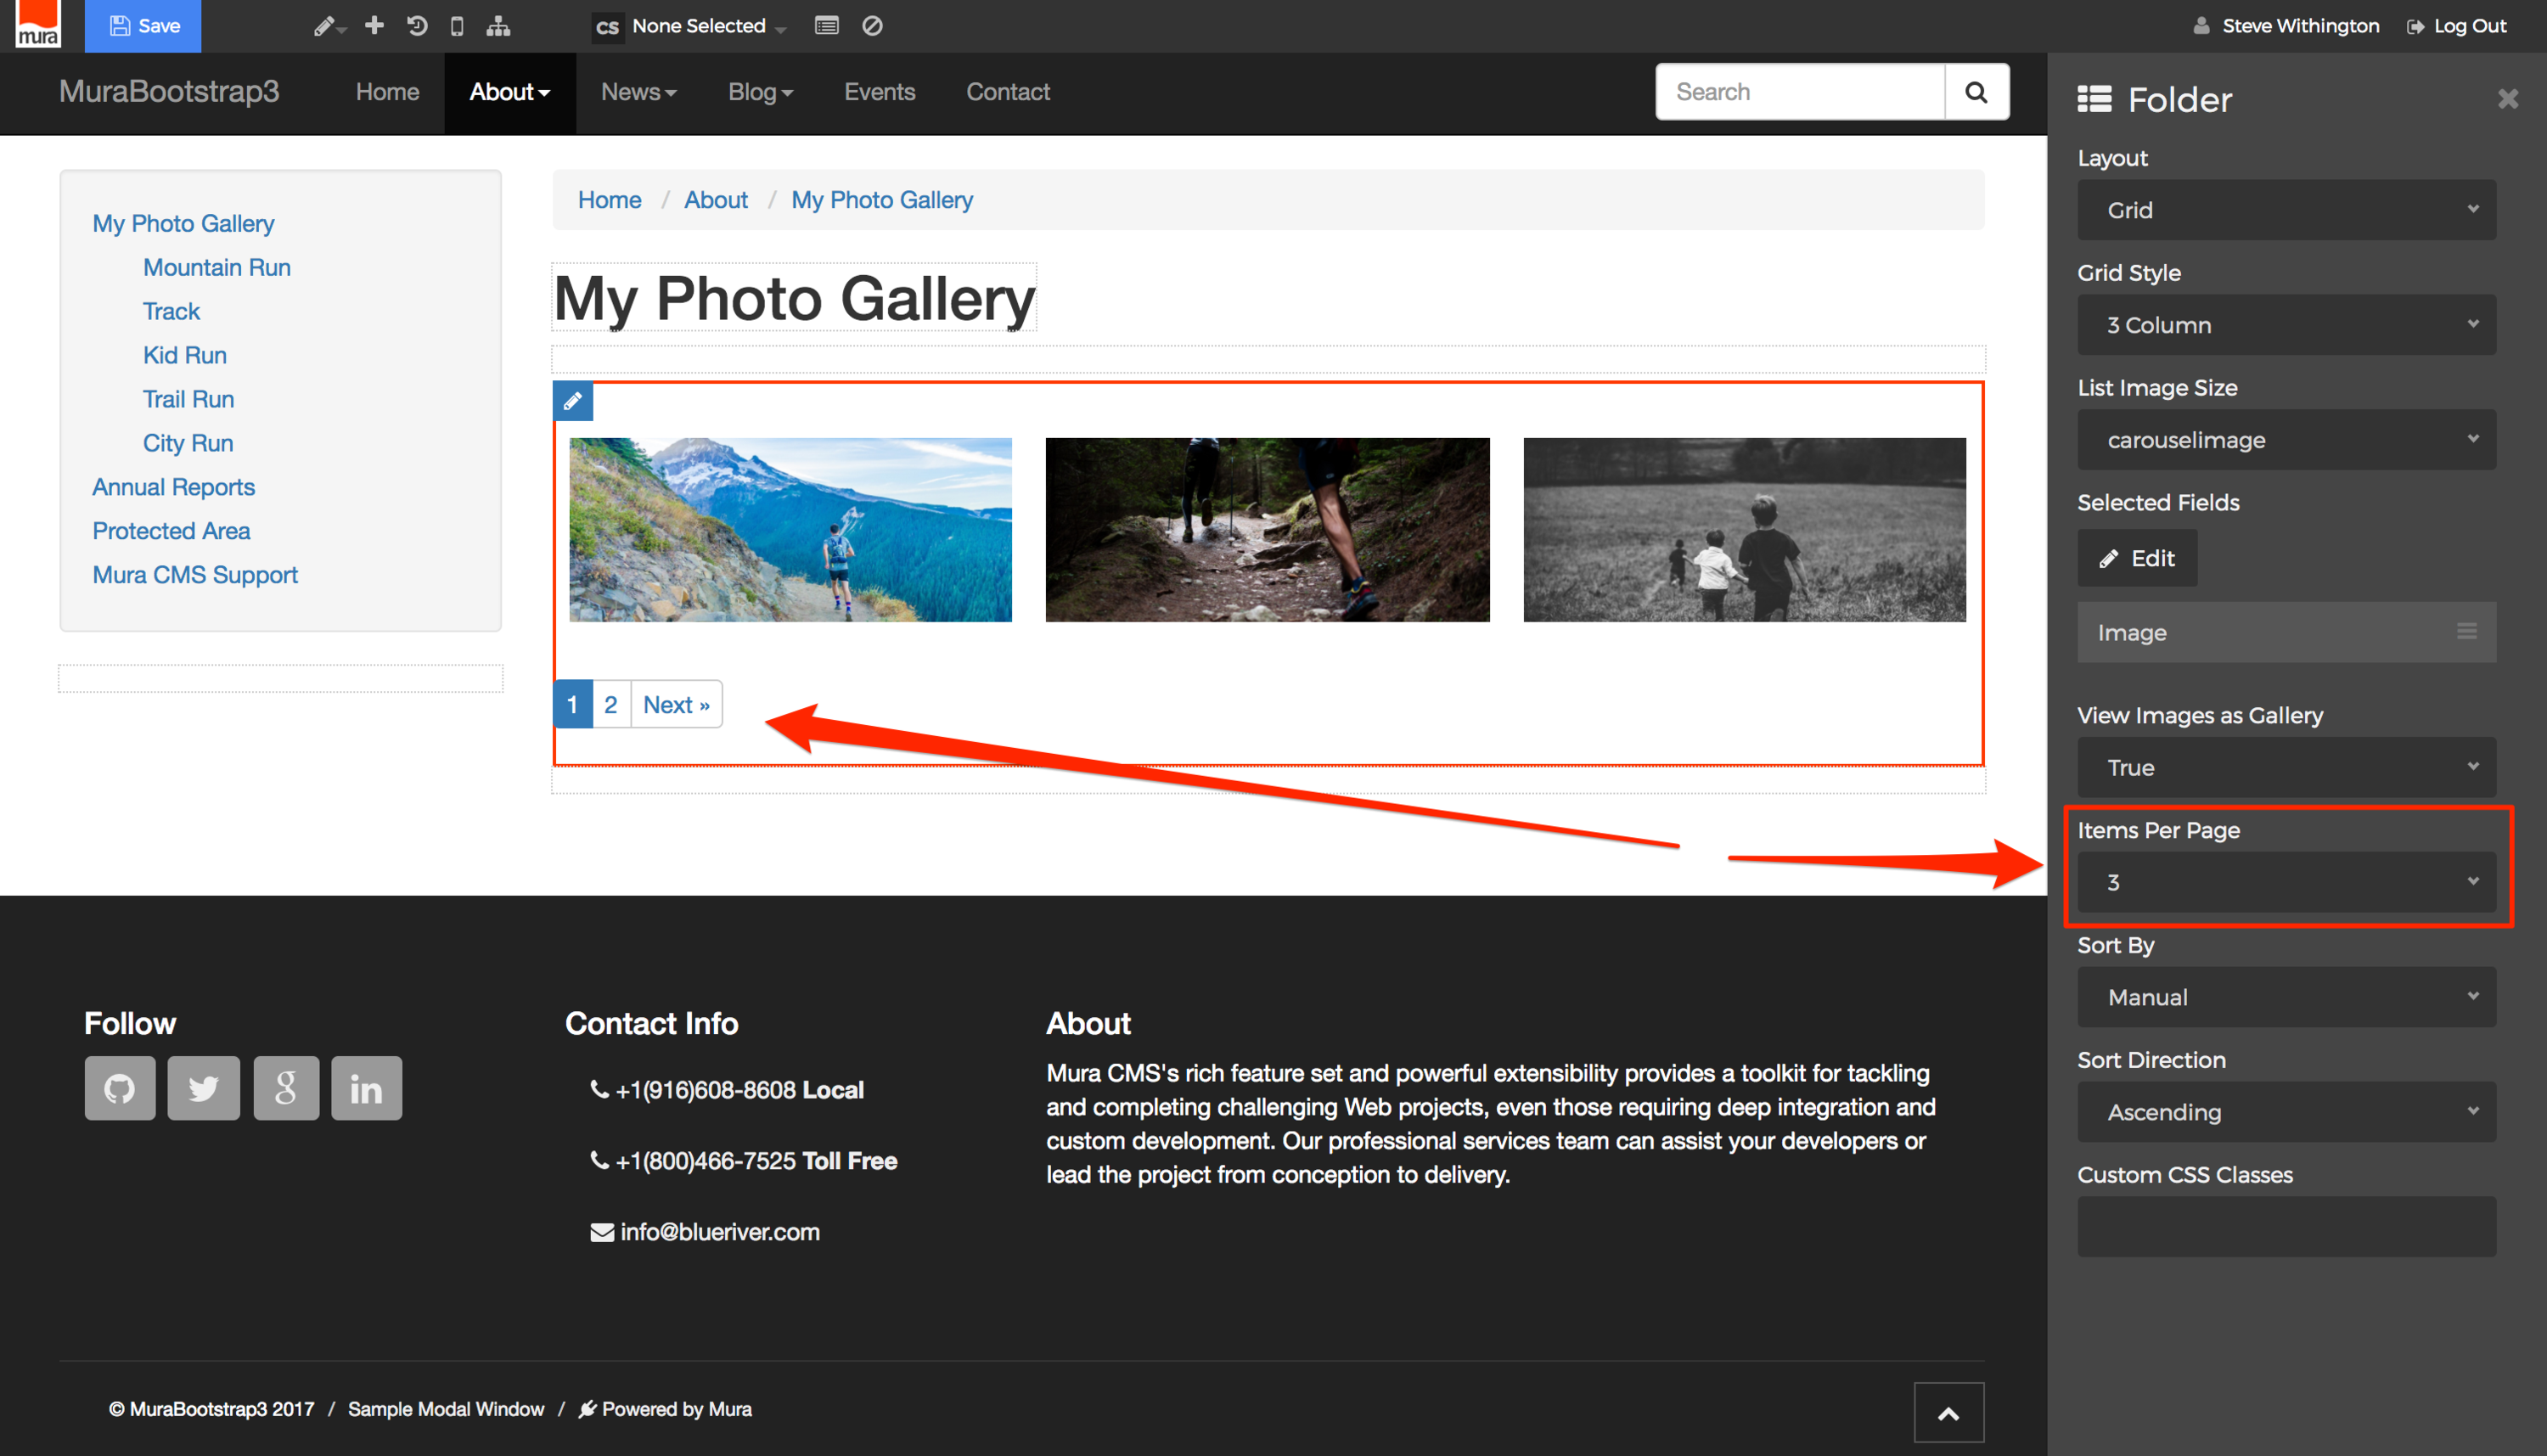
- You may also select the number of "Items Per Page", and if your Folder contains more images than the number selected, Mura will auto-generate pagination for you.
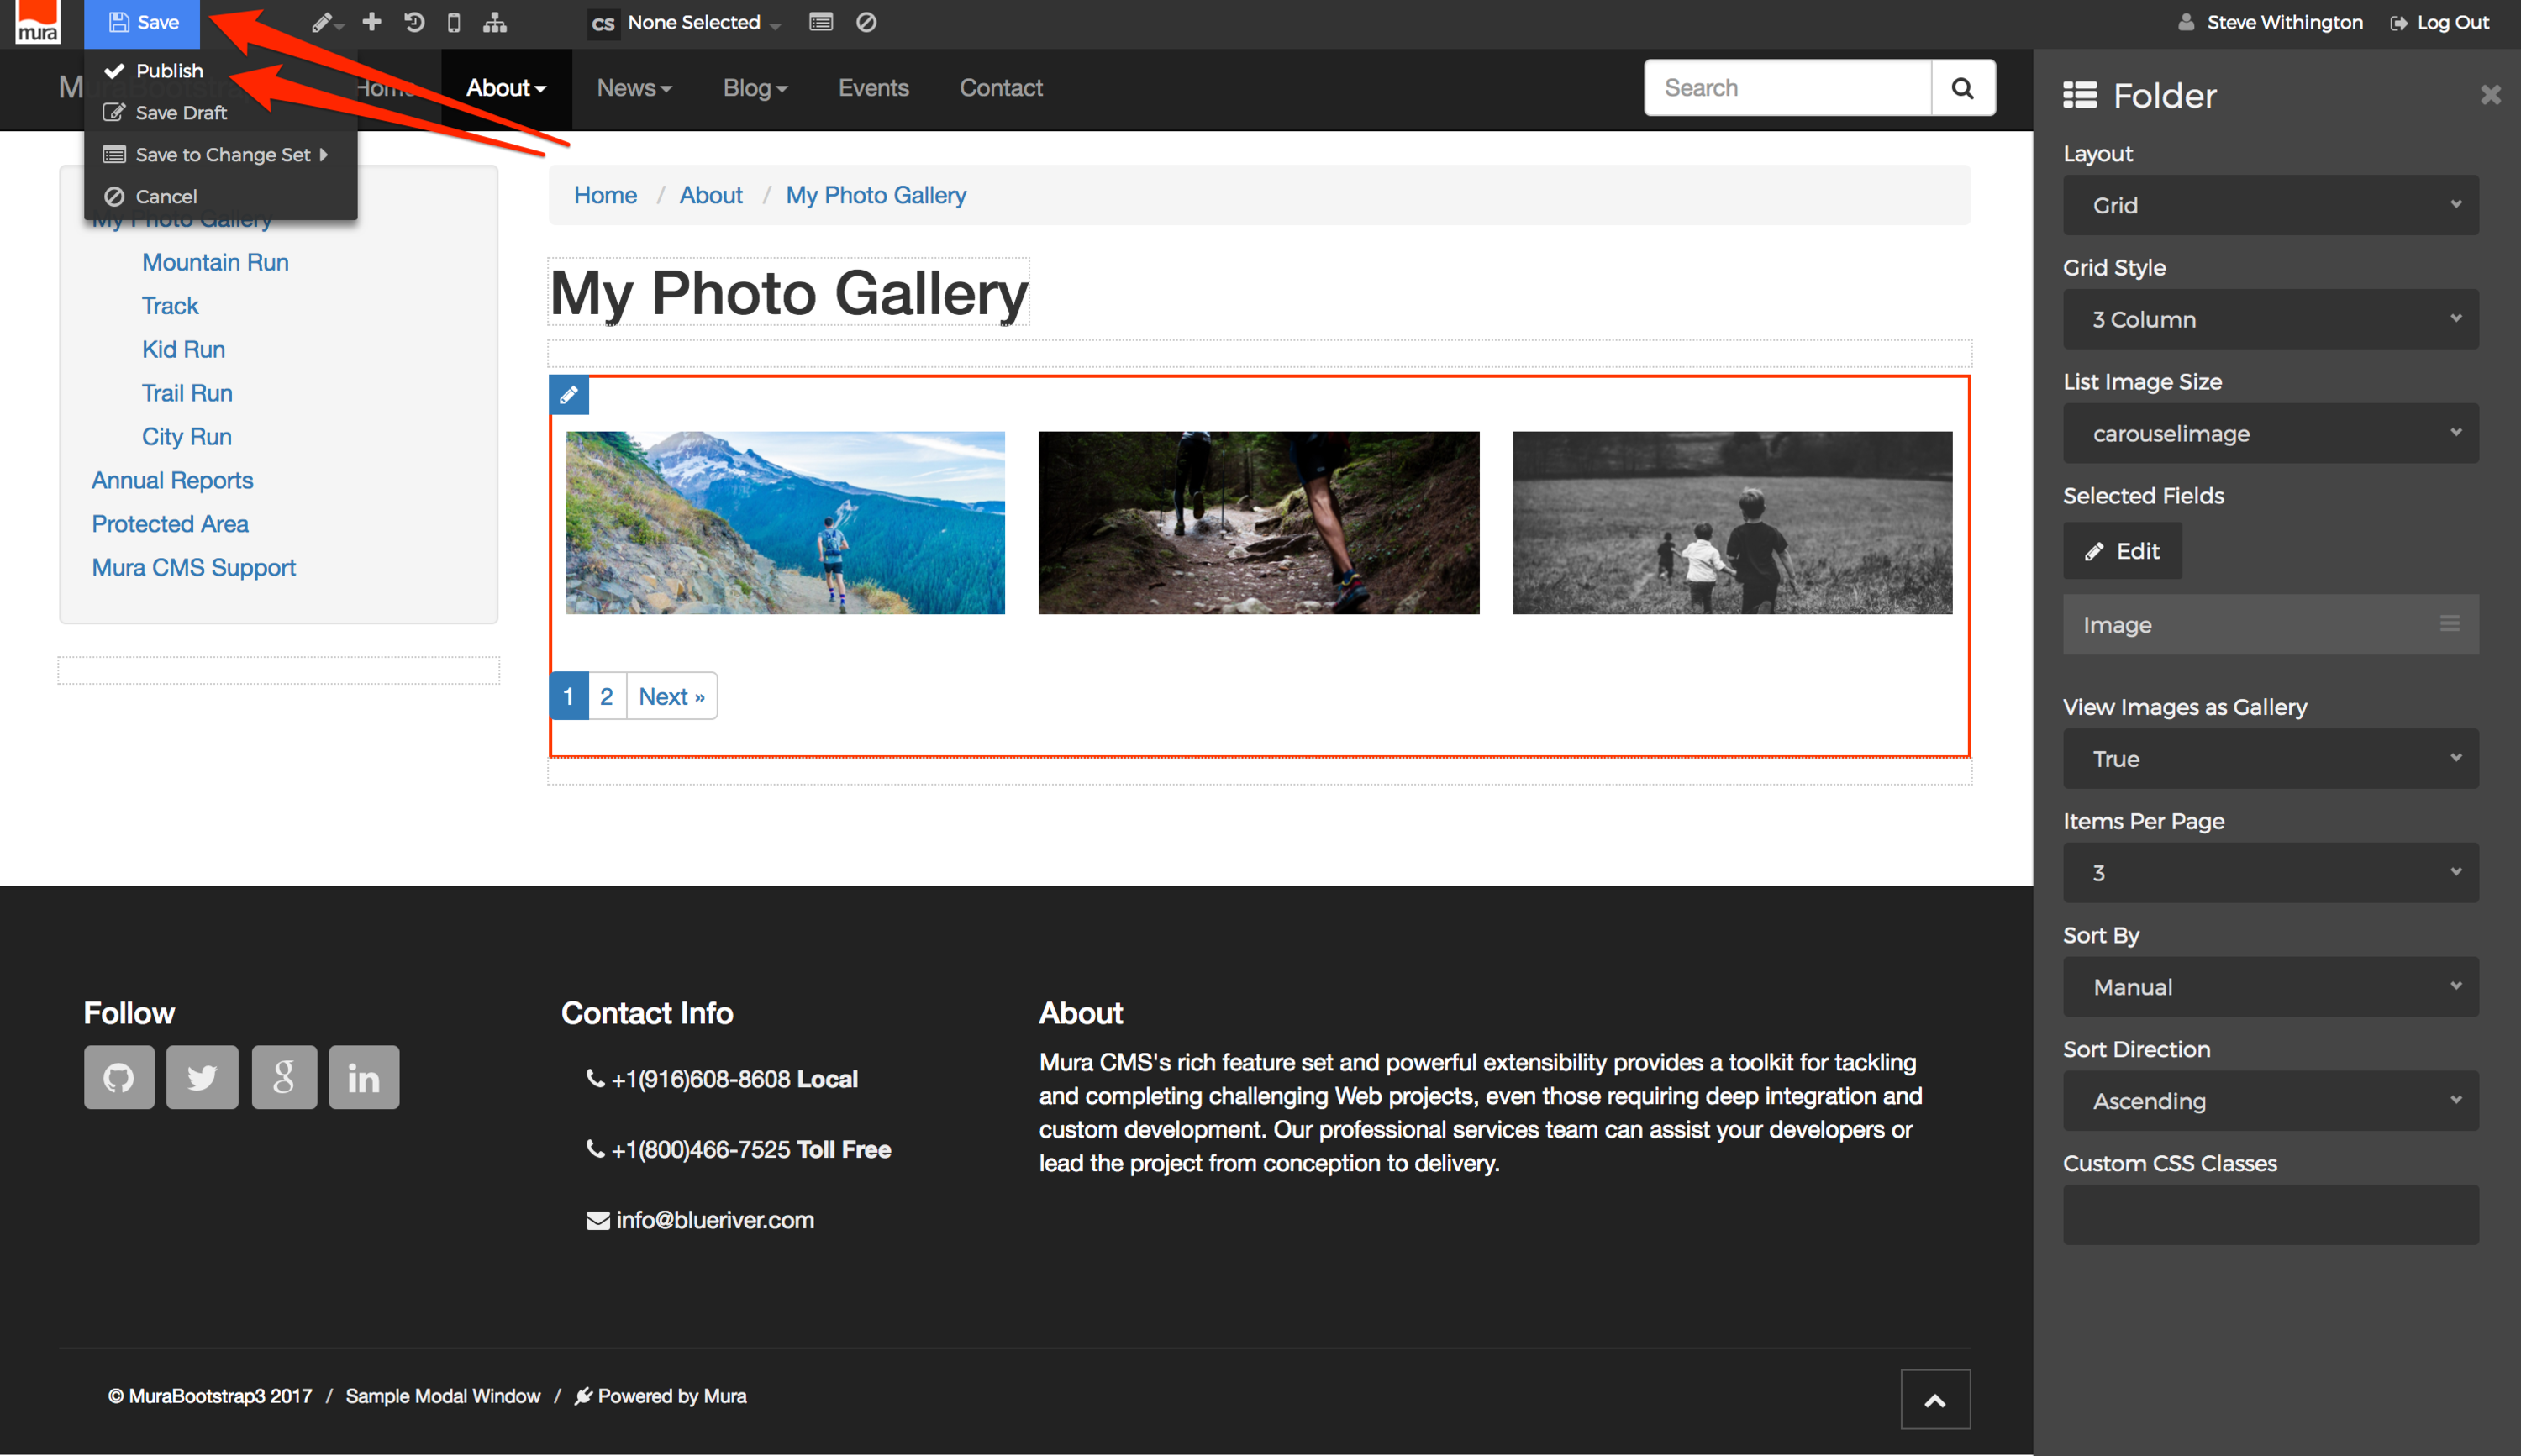
- When finished, be sure to "Save" your changes by hovering over the "Save" button, and selecting your desired publishing option.
- Your new gallery should now be ready for viewing.
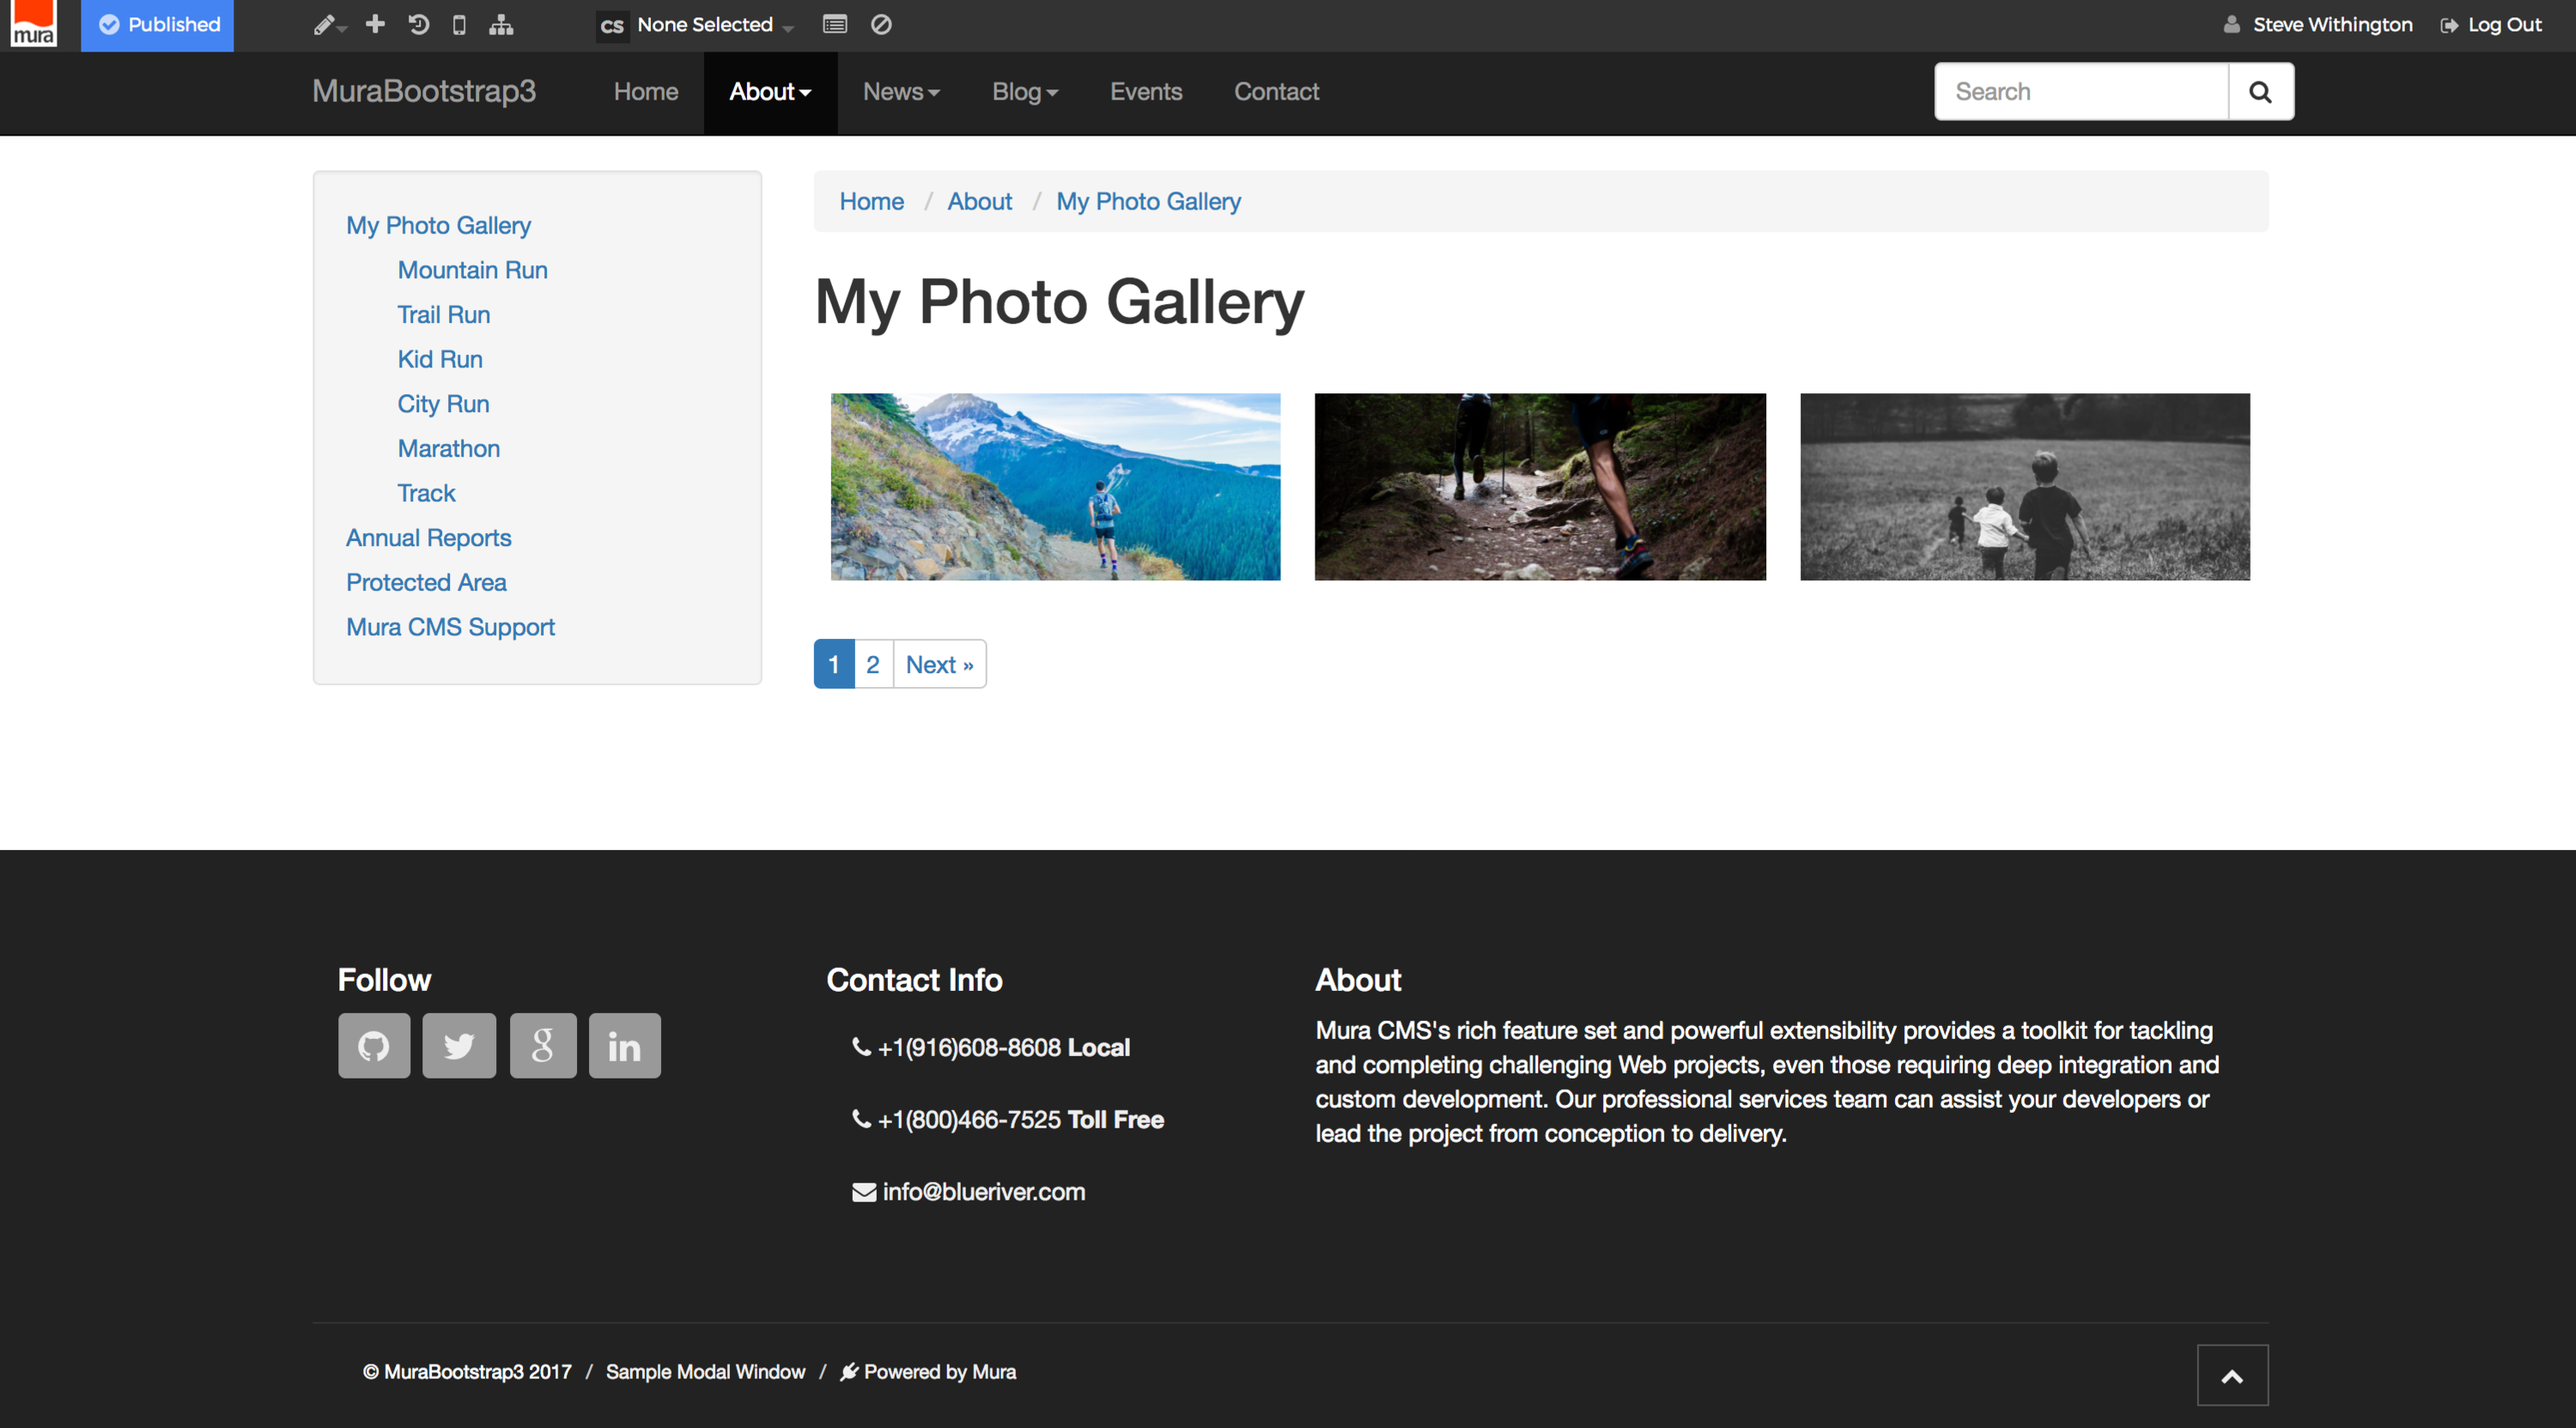
- If you set "View Images as Gallery" to "True", clicking an image will open the image in a modal window.
- If/when you wish to reorder the images, you will need to do so via the back-end administration area, just as you would any other kind of content.