Introduction
Overview
The Mura Digital Experience Platform is a web-based platform that allows delivery of content-driven experiences to your most valuable audiences across the web and mobile. It integrates with Marketing Automation, CRM, Data Management Platforms and more to leverage behavior, 1st & 3rd-party customer data to continually increase relevance over time.
In order to implement MXP and take full advantage of all it has to offer, there are a few things that need to be completed and ready to implement.
This document will walk you through the following:
- Understanding the Customer Journey
- Defining Personas
- Defining Experiences
- Mapping Content to Experiences
- Defining Integrations
- Project Roles and Responsibilities
Understanding the Customer Journey
“The buying process is a measured, deliberate journey, not a sweaty sprint. You must build your buyers’ confidence slowly. Each time they visit your site or read your content, you should be engaging in a mutual exchange of value, balancing your desire for more information with your buyers’ reluctance to share.”
- Bob Johnson, IDG Connect, Content Marketing Institute
The Customer Journey is a simplified, but important framework for content marketing strategy — but what does it look like? How are buyers getting from “Do I have a need?” to “I’m ready to buy?”
Because up to 70% of the Customer Journey can be complete before a buyer even reaches out to sales (SiriusDecisions), marketers and sales reps alike are having to adjust their strategies to cope with these changing consumer practices. But what can they do about the 70% of the Customer Journey that they’re missing out on?
“Deliver the right value, to the right audience, in their time.”
- Robert Rose (Connecting Content Marketing Experiences)
The Content Marketing Sales Funnel
Below is a description of each stage of the Customer Journey in the context of a content strategy, including buyer intent and suggested content types.
New Visitors / Generate Awareness
Demand Generation; Inferred audience (inbound) or known contact who has never visited your site (via outbound programs)
- Focused on generating traffic and increasing awareness
- No barrier to consumption
- Social media, blog posts, press releases, web pages
Top of Funnel / Generate Leads
Lead Generation; Early Stage (Known Contact)
- Focused on generating leads
- Low barrier to consumption (email opt in, download forms)
- Cheat sheets, white papers, guides, how-to’s, short videos
Middle of Funnel / Generate Prospects
Lead Nurturing; Mid Stage
- Focused on generating prospects
- Moderate barrier to consumption (Longer forms with qualifying information, webinar registrations, subscriptions)
- Longer videos, eBooks, webinars, subscriptions, case studies, assessments
Bottom of Funnel / Generate Customers
Sales Enablement; Late Stage
- Focused on generating customers
- High barrier to consumption (demo request, free trials, sales kits)
- Demos, free trials, price quotes, brochures
Customer Loyalty / Generate Engagement
Customer Experience; Satisfaction to Advocacy
- Focused on supporting or rewarding existing customers
- Requires knowing the customer
- Product offers, discounts, specials, loyalty incentives, capture feedback Defining Audiences & Personas
Personas are composite sketches of a member of your audience, designed to help inform your content strategy. Defining personas will allow you to answer basic questions that you can use to to attract new and better qualified customers, shorten buying cycles, and increase the value of each engagement. But to do so, you’ll need to ask questions such as:
- Who is my customer?
- What motivates them?
- What does success with my product mean to them?
- What kind of decision maker is my customer? Fast, slow, impatient?
- What questions are they asking at each phase of their buyer journey?
Content Audit & Scoring
Auditing and scoring content for relevant content experiences
After audiences have been defined and needs assessed, you'll need to perform a content audit to determine:
- How much content exists to support each audience and buying stage?
- What holes do you have in you existing content and what do you need to create based on audience needs?
- How will you use this content to create a content continuum that leads the customers to the next logical stage of the buyer journey?
Once you’ve audited your existing content, you’ll need to take it one step further and decide:
- How "uniquely relevant" is your content to specific audiences on a scale of 1-100? i.e. How much content do you have that is simply not relevant to any other audience, but is valuable for one audience specifically and by what relative measure?
- How much of this uniquely relevant content would someone need to consume for you to feel confident an anonymous visitor is a member of one of your audiences?
- Do you need to create content to help “smoke out” members of a specific audience?
An example of a content scoring model for a specific audience might look like the following. (Keep in mind, that scoring has to do only with the content itself and it’s unique relevance to the audience it is scored for, not the content type.)
- Blog post - 10 Points
- Whitepaper - 25 Points
- Infographic - 15 Points
- Webinar - 25 Points
- Case study - 15 Points
- Ebook - 25 Points
- Link to audience-specific portal - 75 Points
Using this model, an anonymous visitor could meet the threshold of 100 points and be delivered an audience-specific content experience by consuming the following content:
Whitepaper (25 Points) + 6 blog posts (60 Points) + Case study (15 Points) + Webinar (25 Points) = 125 Points
Defining Experiences
Once we know which content exists, or needs to be created to support our strategy we’ll define the Experiences.
Experiences are the culmination of content, navigation, user interface features, visual design or specific functionality delivered to an audience and triggered by specific behavior, known data points or a combination thereof.
MXP will allow you to create experiences for each persona and stage in your Customer Journey. This phase is usually handled by the implementation and content strategy teams. When planning experiences, it is important to consider the following:
- Who is the experience for?
- What will it consist of?
- Specific content, including narrative shifts or content tilts
- Visual changes
- New offers or incentives
- Functionality changes
- When should we deliver it?
- What needs to happen in order to trigger this experience?
- Lead score change
- Specific behavior such as download, opt-in, information request, email response, PPC event, change of status in CRM, site visit from specific locale
- …and More
Mapping Content to Experiences
Once you define the experiences you’ll be delivering, you can begin mapping content to them. This process includes the following steps:
- Identify which content will support each experience
- Mapping existing content to the appropriate experience and identifying holes that need to filled
- Define what triggers will move customers to the next stage in the Customer Journey and create a content continuum
Defining Triggers
Once all content and features of an experience have been mapped, we’ll need to determine what events will ultimately trigger the delivery of each experience to each audience.
Inferred (Anonymous or known, if via outbound)
In this stage, we’ll use targeted and uniquely valuable content to infer that someone is a member of an audience by assigning “Persona Points” to content within MXP (see “Current Content Strategy Audit” above). When a visitor has consumed enough content to meet the 100 point threshold, we can trigger an experience.
Early (Known)
Transitioning leads from “Inferred” to “Early” is one of the easiest because it usually involves a form submission and official contact creation within the marketing database. In addition, existing early stage leads can be “smoked out” with email if they are known, but not yet known to MXP.
Mid
Mid stage leads are more difficult because we have to measure engagement via behavior across at least a couple of channels (web, email). Lead scoring (usually within marketing automation platforms) play a big role in the transition to and out of this stage.
Late
Like the Mid Stage, transitioning a lead into the Late Stage will need to use lead scoring to measure interest and engagement. When possible, the sales team should update lead data to further inform our understanding of prospects at this stage.
Customer
Just like the Early Stage, knowing someone is a customer can be easy with integration to your CRM. Since they’re our customer and have a customer record in our CRM, we should have access to which products and services they’ve purchased, among other information. We can use this data to continue to deliver value, create opportunities to upset and cross-sell, while nurturing advocacy.
Integrations
MXP can leverage 3rd party data about customers in order to trigger an experience on the web site. During the discovery phase, we will want to understand and define which 3rd party data sources will we integrate with. Once they’ve been defined, we’ll need to determine integration points.
While not all of these are currently supported, if there’s a requirement and the platform provides the data needed via an API, we can look into adding it for your project.
Marketing Automation
- Marketo
- Mautic
- Eloqua
- Pardot
- Silverpop
- Act-On
- Hubspot
- Engagio (ABM)
CRM
Data Management Platforms
IP Lookup
- MaxMind
- D&B
- DemandBase
- KickFire
Analytics
- Google Analytics
- Kiss Metrics
- Adobe Analytics
Resources
Persona Development
Mapping Content to the Customer Journey
User Guide
Experiences
Experiences are the culmination of content, navigation, user interface features, visual design or specific functionality delivered to an audience and triggered by specific behavior, known data points or a combination thereof.
MXP will allow you to create experiences for each persona and stage in your Customer Journey, as well as other data-driven experiences. This phase is usually handled by the implementation and content strategy teams. When planning experiences, it is important to consider the following:
- Who is the experience for?
- What will it consist of?
- Specific content, including narrative shifts or content tilts
- Visual changes
- New offers or incentives
- Functionality changes
- When should we deliver it?
- What needs to happen in order to trigger this experience?
- Lead score change
- On collection of specific data points (City, State, Organization, Industry)
- Specific behavior such as download, opt-in, information request, email response, PPC event, change of status in CRM, site visit from specific locale
- …and More
Creating Experiences
Now that you have your Personas, Stages & Change Sets developed, you are ready to create the actual Experiences in MXP. Experiences are the logic that tells MXP what triggers each experience, and what content should be displayed once triggered.
To create a new Experience:
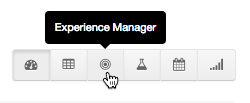
- From the Dashboard, click on Experience Manager.
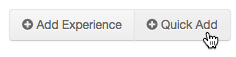
- Select Quick Add.
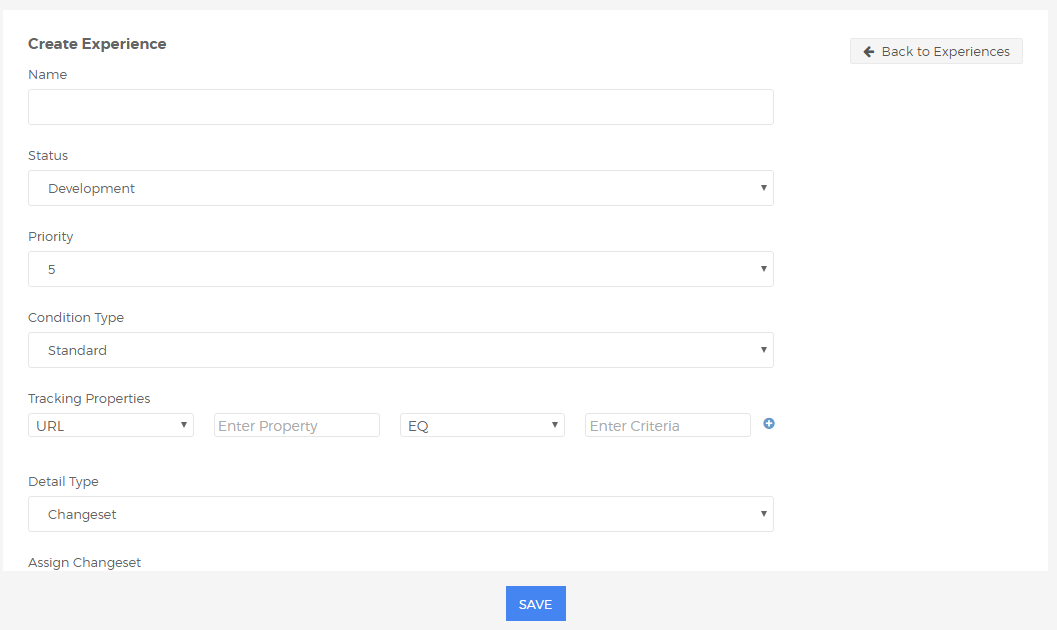
- Enter in the details of your Experience:
- Name: As a best practice, keep your Experience-naming conventions in line with the Persona/Stage that the Experience will apply to.
- Description: Optional, but can be helpful to document for reference.
- Status: If you’re just beginning to create your experience, set this to Development, so the Experience won’t be accidentally triggered by your users
- Priority: It is possible that multiple Experiences can be active for the same user, layering in multiple versions of content. If there is a conflict where a node appears in more than one Experience, Priority will determine which version of the conflicting content will be shown.
- Condition Type: This is what will trigger the Experience. This could be if a lead matches certain criteria in their lead record, or based off inferred data such as geographic location based off IP address.
- Detail Type: A detail is what will actually happen once an Experience is triggered.
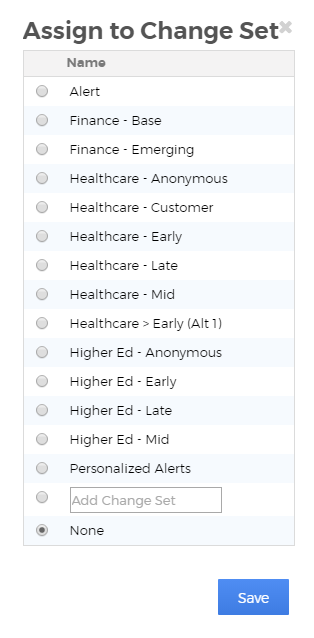
- Change Set: Will display a specified Change Set (collection of content changes—see below) to the user
- Test: Will initiate an Experience Test
- Persona: This will assign the user to a specific Persona & Stage
4. Click Save.
An Experience can have multiple Triggers and multiple Details, so if you want to add additional Triggers or Details, just click on the Experience to edit it.
Change Sets
MXP delivers customized experiences by storing different versions of the CMS content into Change Sets and then displaying the Change Set version of the content in place of the default content once the experience is triggered. Change Sets are a great way to organize all of your experience content in one place, rather than having to keep track of every version of every item individually.
The following types of content can be added to Change Sets:
Edits can include any detail of the content. Examples include the layout template, any display objects added to the page, headlines, body copy, images, videos, forms, dynamic content, navigation and more.
Adding items to Change Sets
- To add a new version of a node to a Change Set, start by selecting the node for which you want to create an alternate version.
- When you’ve made all the changes you want, click “Add to Changeset” at the bottom.

- If you have an existing Change Set you’d like to add this version to, select it from the list. Otherwise you can create a new Change Set on the fly by entering a new name in the box provided.Continue adding as many content nodes to your Changesets as you please. They will be stored and ready to deliver as part of any Experiences you create.
Triggers
Each Experience will need to have at least one trigger defined in order to be able to deliver it to your audience, but an Experience can have as many Triggers as needed. It’s best to think of a Trigger as a bucket for any conditions that need to be met to fire the Trigger.
For example, we may want to trigger our Experience for members of our Healthcare audience when we’ve inferred through content consumption or another method that they are from the Healthcare industry.
Conditions
Conditions are the data points that must be met for the trigger to be fired and the Experience delivered.
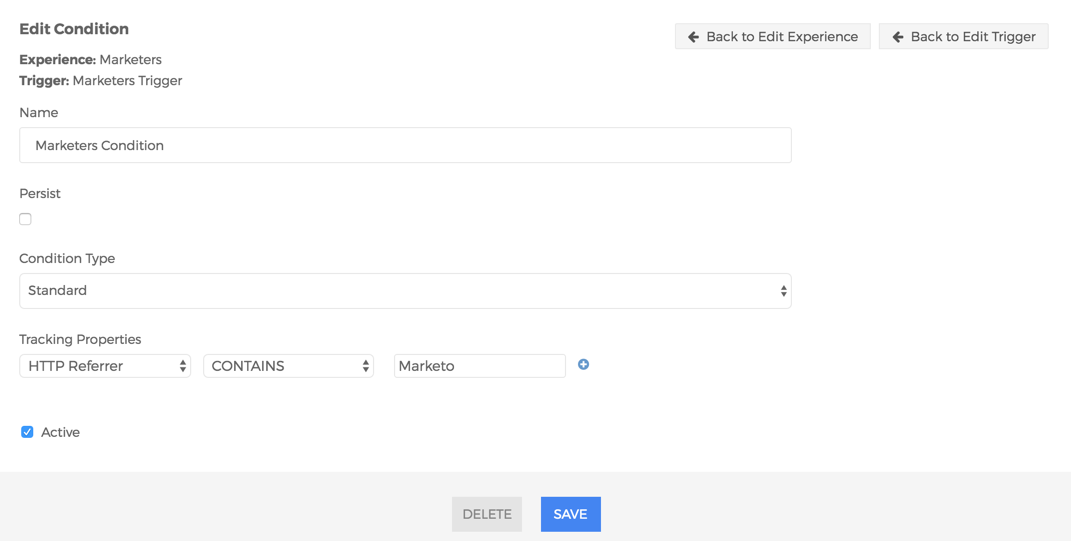
Condition Fields
- Name: A name for the condition
- Persist: Allows Conditions to maintain an active state regardless of whether or not data is received from another source, such as Marketing Automation.
- Condition Type: Can be either standard (based on tracking properties) or custom.
- Tracking Properties: A dropdown list that includes all of the currently available data points
- Active: Toggles the condition on or off
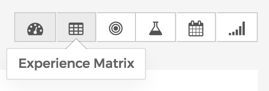
Experience Matrix
When you log into the Mura Experience Platform, you’ll see six small boxes in the top right corner above the trends graph. This, along with the left-hand navigation bar and the grey box in the Buyer Journey Performance section (further down the main Dashboard page), is the main way to access the Experience Matrix.
Before we get into the functionality and information within the matrix, let’s take it from the top. What is the Experience Matrix, and how does it benefit you? Essentially, the Experience Matrix is the core tool within MXP that shows you how your different audience types are doing and reacting to the content experiences you create.
The odds are good that all of your customers are not the same. They don’t have the same business models, strategies, customers, employees or even goals. So your content experiences need to be different too, to be tailor-made to each type of potential customer.
For example, if you’re selling manufacturing software, you’d probably need to have content for both end-users, their bosses, the accountants and the C-suite. The Experience Matrix provides you with an easy way to determine how each of your various audience types are reacting to your content and the site overall, and where each individual is in their unique buyer journey.
Experience Matrix Dashboard
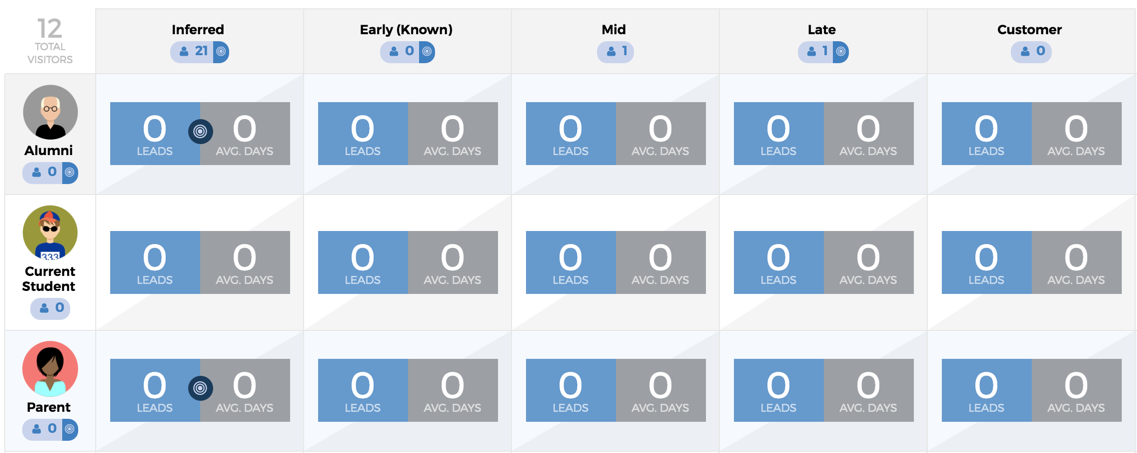
When you first click to the Experience Matrix page, you’ll see a series of boxes arranged like a spreadsheet of sorts. Each row corresponds to a persona or audience, and the columns show you how many of each type of customer are in specific stages of the buyer journey, from inferred to bona-fide customer. Stages are completely customizable for your specific organization or sales and marketing funnel.
The buttons just above the main matrix toward the left of the screen are for adding new personas and buyer journey stages, and you can have as many or as few as you want in this matrix. The third box here is the Webhook, which is used to sync MXP with your marketing automation solution (or other lead management system) of choice.

- Right above all of the customer types and to the left of the buyer journey labels, in the top left corner of the matrix, is a number that lists your total number of site visitors.
- For data on total number of site visitors per audience type, check the little number under the pictures on the left-hand column.
- The numbers under the column headers note how many site visitors over the selected time period reside in each stage of the buyer journey.

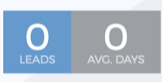
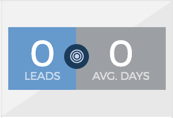
With each matrix place are two boxes, one blue and one grey. The blue box notes the number of leads coming in per audience and buyer journey stage, while the grey box shows the numbers of days they’ve been in the specific stage. At the sides of these two boxes are arrows that shows you how things have been trending over the selected time period.
The Target icon in between the boxes indicates whether an experience exists for that specific buyer type and journey stage. A Beaker icon, on the other hand, indicates that a test for that experience is running.
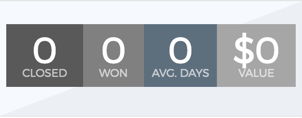
The boxes on the far right of the page provide you with more concrete ROI information for every audience. These four boxes, from left to right, tell you how many opportunities come in, how many of those opportunities you won, how long it took you to close the opportunity and how much money you made from each audience or persona.
Benefits of the Experience Matrix
The benefits of the Experience Matrix are two-fold. In the dashboard view, it provides an overview of metrics that show how each content experience is helping to guide each audience through the buyer journey, while allowing you to see which persona/stage intersections have experiences defined and which do not. In addition, it allows us to see the revenue we can attribute to each audience, illustrating the bottom line results of the context-driven experiences you’re creating.
In the Strategy View, the Experience Matrix allows you to have a documented strategy for each persona/stage while providing a way to audit your site for holes in your content strategy for each experience.
Strategy Dashboard
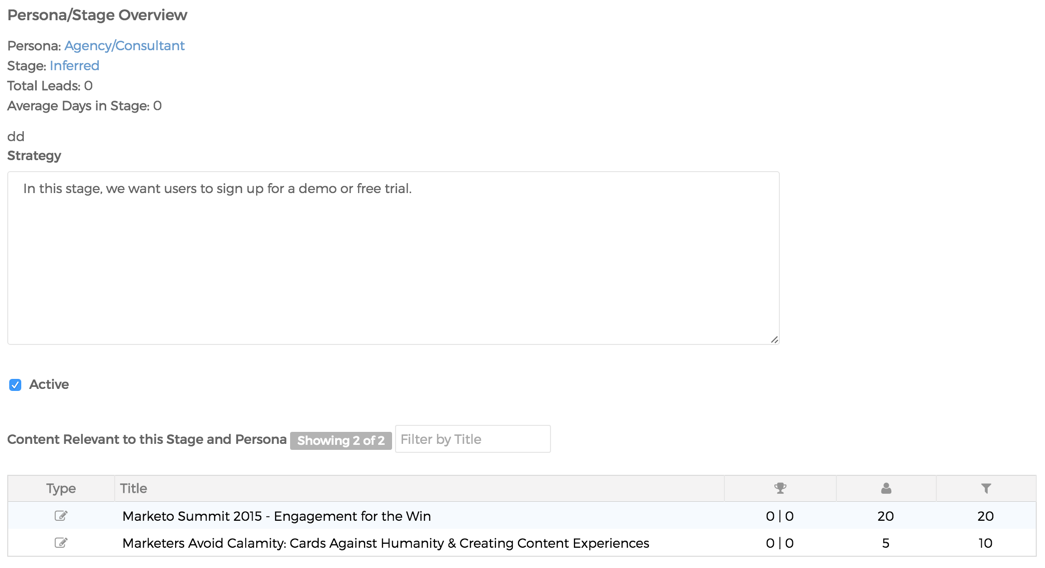
Right above the matrix on the right-hand side are two horizontal grey bars. On the left side of these bars is a switch that lets you toggle to the Strategy view. Once in Strategy View, you’ll still see the same audience types and stops on the buyer journey. The main difference is what’s in the matrix boxes.
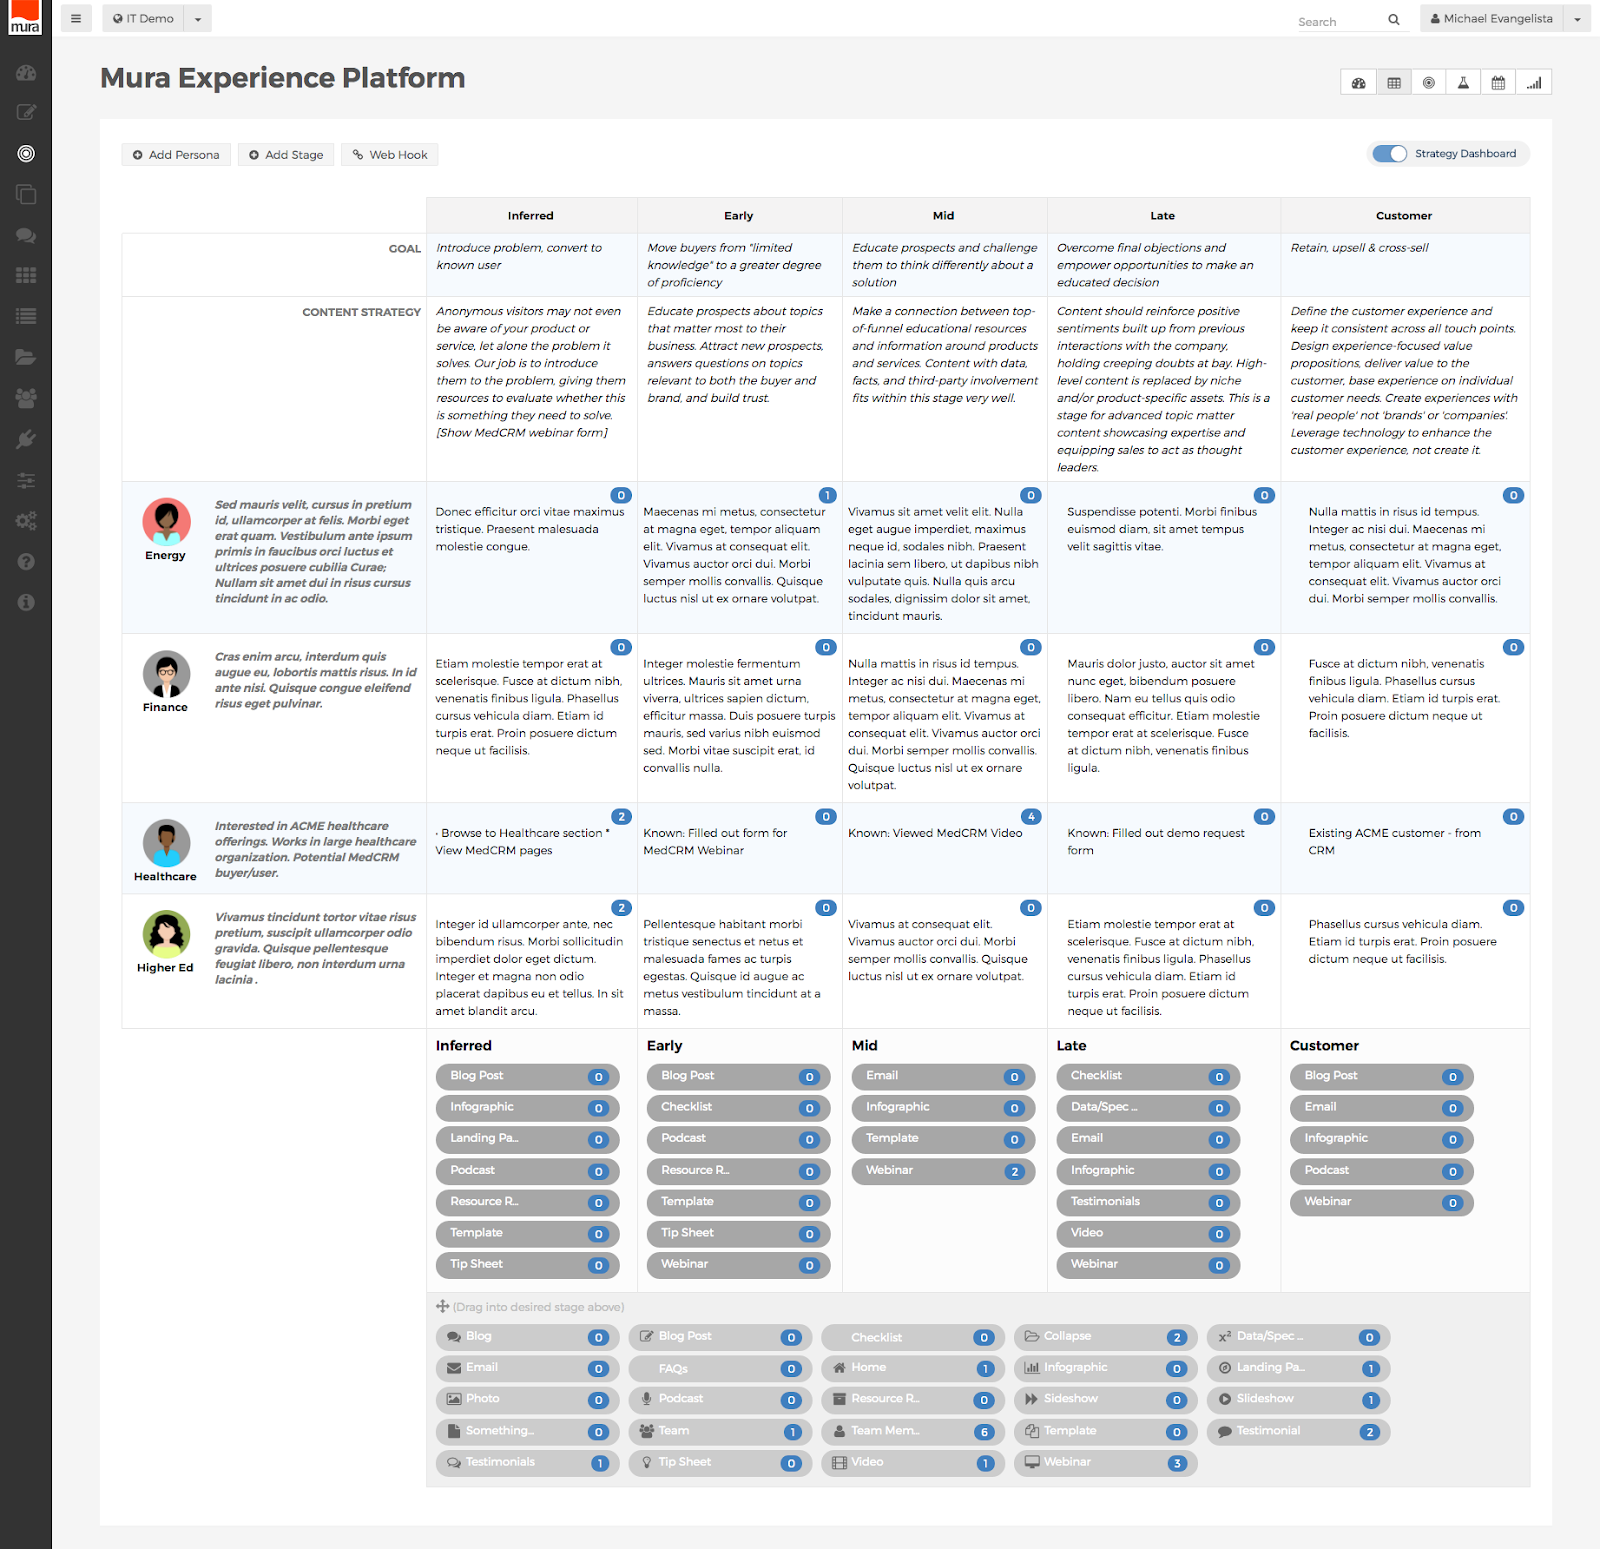
This view can play a crucial role in planning, allowing you to preemptively determine what content should go into each slot and what you need to still create. The small blue circle in the top-right corner of each matrix square shows you how much content has already been assigned to that particular buyer journey stage, and audience type.
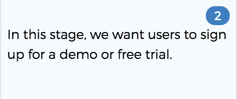
You just click into each box, and then you’ll see a new screen where you can type in strategy notes and other useful information. If you have many different people creating content for you and helping to fine-tune your strategy, then this feature is incredibly handy for collaboration and keeping everyone on the same page.
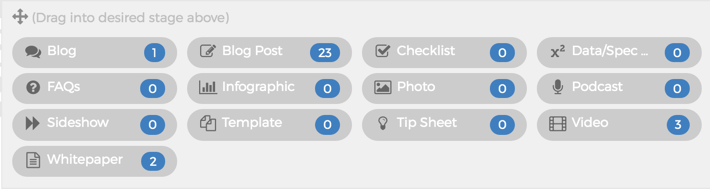
At the very bottom in the page in Strategy View are rounded grey buttons noting different content types. This way, instead of typing in the general kinds of content (think blog posts, white papers, video testimonials, infographics, and so on) you’re looking to create, you can just drag and drop the buttons onto each square.
Each of these buttons also feature that little blue counter to tell you how many press releases, animations, and so on that you have already in place, so you’ll never be left guessing how much content you have and what its purpose is on the site.
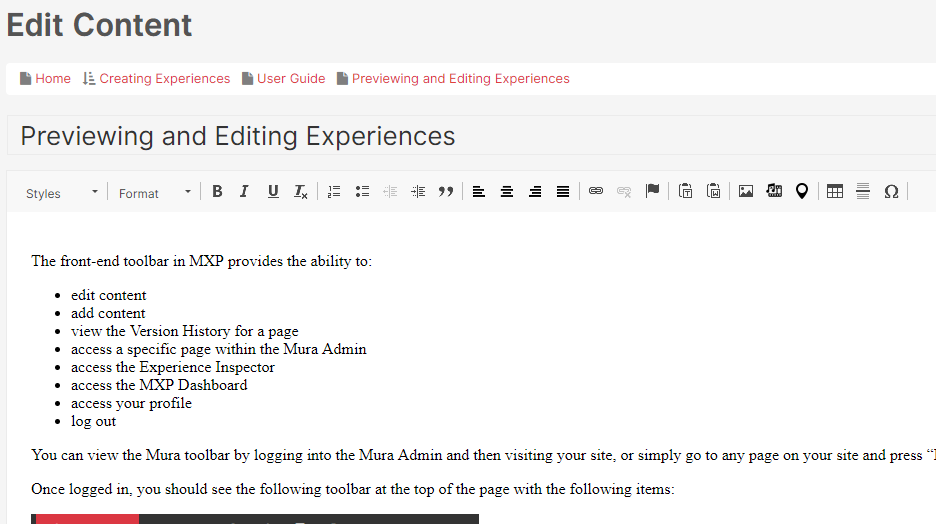
Previewing and Editing Experiences
The front-end toolbar in MXP provides the ability to:
- edit content
- add content
- view the Version History for a page
- access a specific page within the Mura Admin
- access the Experience Inspector
- access the MXP Dashboard
- access your profile
- log out
You can view the Mura toolbar by logging into the Mura Admin and then visiting your site, or simply go to any page on your site and press “ESC-L” on your keyboard. This will provide a Log In form you can use to login.
Once logged in, you should see the following toolbar at the top of the page with the following items:
Clicking on the Mura Logo toggles the front-end toolbar on and off. This can be useful if you’d like to temporarily disable the toolbar.
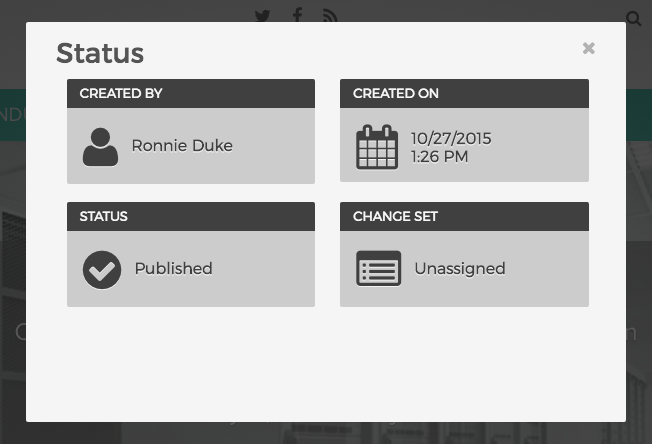
Status
The Status button shows the current state of the page/version you’re viewing, while clicking the button brings up a modal window that provides further detail, including whether or not it is awaiting approval.
Edit

Beneath the Edit icon are two options: Edit Layout and Edit Content.
Edit Layout
Edit Layout, when enabled, allows editing directly on the page.
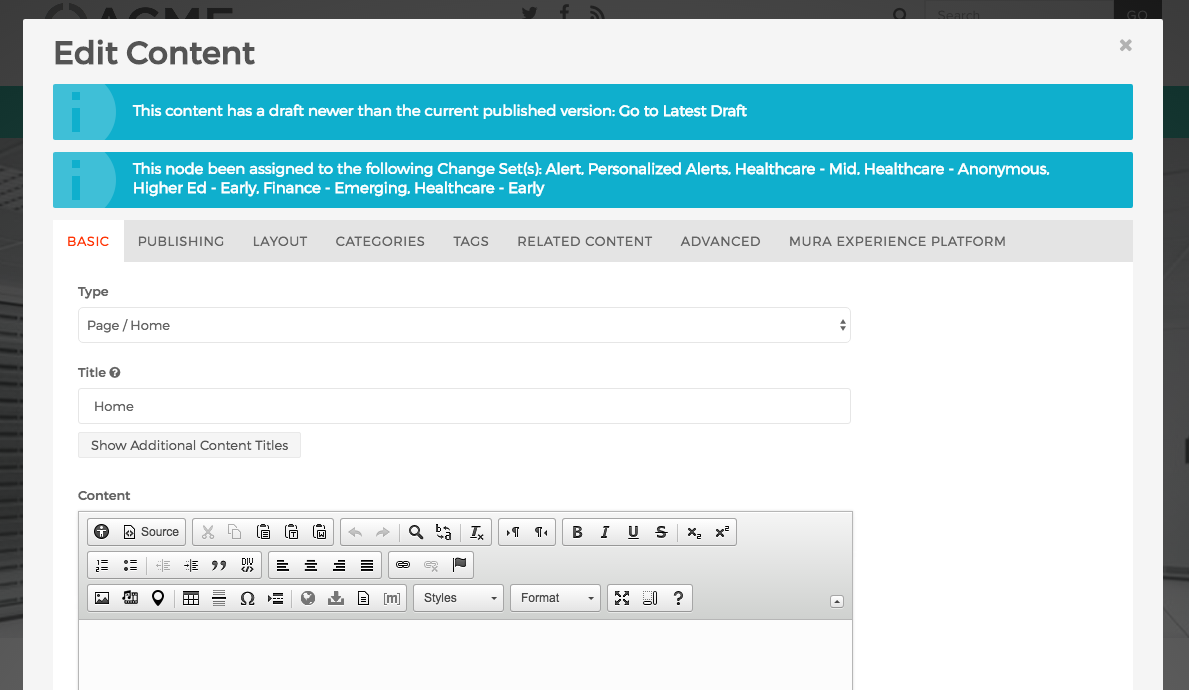
Edit Content
Edit Content provides access to the other details of the page, such as template, metadata and other details.
Add Content (MXP Native only)
If you’re using MXP Native, you have the option of adding content to the section you’re currently browsing via the Add Content button.
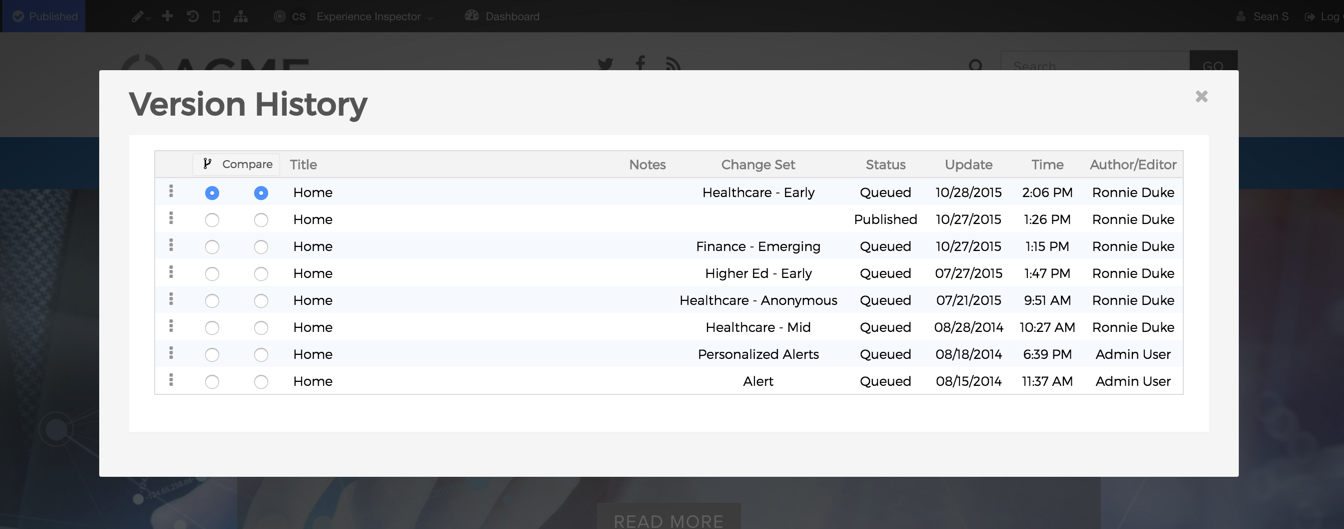
Version History
Clicking the Version History button brings up a history of the page you’re currently viewing. From here you can view the status of each version, compare versions and roll-back or assign content to available Changesets.
Device Preview (MXP Native only)
Using the Device Preview button allows you to see what the page will look like on different devices and with different orientations. Options are Desktop, Tablet, Tablet Landscape, Phone, Phone Landscape.

View in Mura Admin
The Site Tree button allows you to view the page in the Mura Admin, zoomed in on the specific node you’re currently viewing.

Experience Inspector
The Experience Inspector provides a way to preview any Experiences you’ve created, including the applied changesets and assigned content of the experience you’re currently viewing.
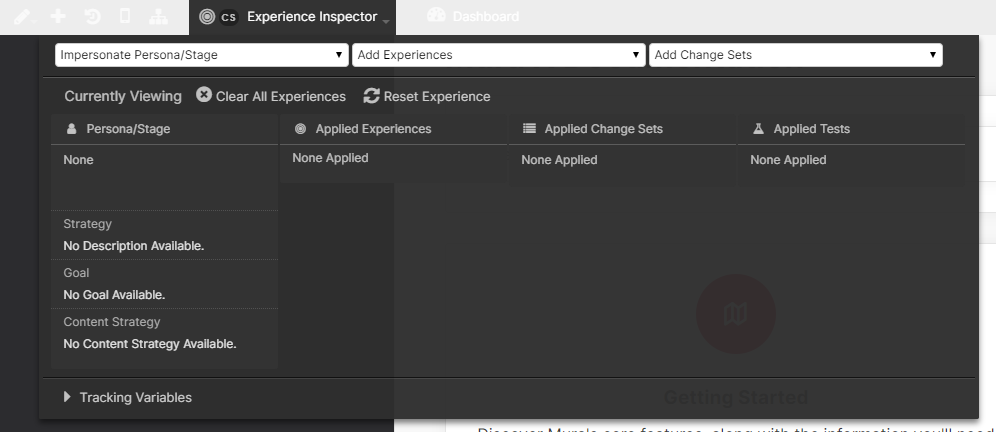
In addition, it provides a brief overview of the audience and buying stage the experience has been created for.
Clear All Experiences
This feature deletes all locally-stored tracking variables in the MXP cookie. Note: If you are a known user in your Marketing Automation system, MXP will re-sync you with your system and experiences may be re-applied.
Reset Experience
Reset Experience allows you to purge any additional experiences you’ve added to your profile while testing or previewing experiences.
Opt-In/Out
Allows you to opt-in/out of any MXP Experiences that may be applied.
Dashboard
The Dashboard button takes you to the Mura Dashboard where you can view various metrics associated with your site.

Profile
The Profile button allows you to view and edit your profile, including Username and Password.
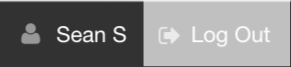
Log Out
The Log Out button logs you out of Mura, and the Mura Toolbar will no longer be available while browsing your site.
Managing Content
The Mura Experience Platform is all about making the most of content, from planning, to creation to tracking performance. But all of those great features won’t help you very much without actual content.
Managing Content
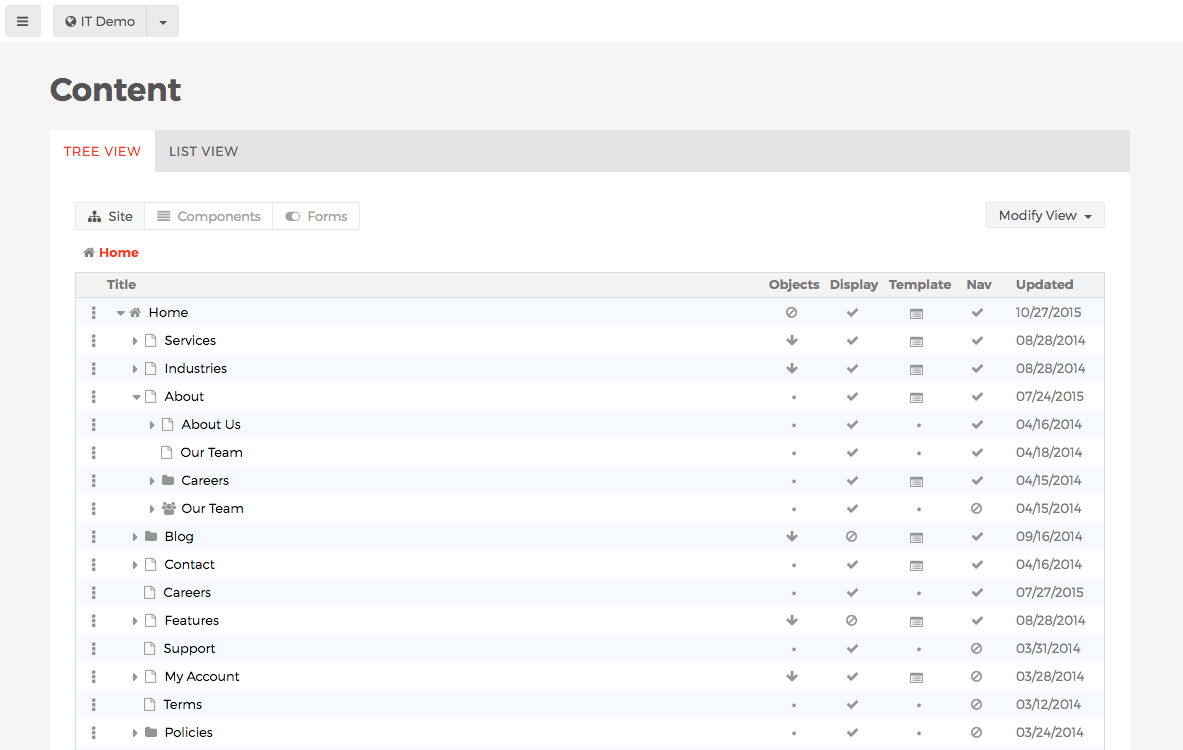
To access content, just click on the second option from the top in the left navigation. You’ll then see a list of associated titles, as the default view is “Tree View.” There’s a List View option here as well if you’d like to search or filter by specific metadata such as content type, publish date, and so on..
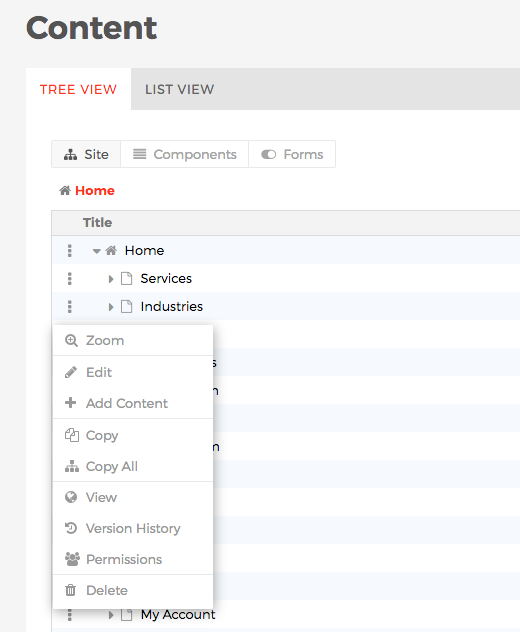
To edit, just click on any of the titles you see or use the dropdown menu shown above.
Editing Content
Editing content in MXP is easy and straightforward. Simply fill out the desired fields and get started.
MXP Content Options
The MXP option that’ll then be on the far right is where you can determine its intended audience, how many points that title should be worth to a particular audience.
Persona & Stage Scoring
By assigning a particular value to any content, you’re helping to give it objective value within your overall content marketing goals. Ideally, part of your content strategy involves creating or adapting content so specific to one audience, it’s simply not relevant to others.
And because of this highly-focused and strategic approach, we’re able to infer that someone is a member of a specific audience based on content-consumption alone — before we’re able to know definitively via conversion to a known user.
The same goes for stage points. It’s hard to know what stage of the buying journey someone is in before they’ve spent much time on our site. However, if they come to your site and start consuming mostly mid-stage content, we can infer where they are in their buyer journey and deliver a content experience accordingly.
For example, let’s say you assign mid-stage content a value of five points, and then you say that someone moves to the next stage at 100 points, going from someone who’s just interested in identifying a problem to someone actively learning about how to solve that problem. In this scenario, once someone has read 20 early stage content items, whether they’re blog posts, infographics, listicles or whatever, MXP can jump into action, delivering the answers to the next set of questions in the buyer journey.
Now, every subsequent time this person comes back to your site, she’ll be shown more mid-funnel content as opposed to top-of-funnel content, all thanks to cookies and scoring. When done right, persona and stage scoring is a great mechanism for serving the needs of your audience and telling your story over time, making sure they keep moving through their buyer journey.
This is a deceptively powerful feature. Without this kind of scoring, you’re really only making guesses about your audience. You may think that readers of a particular blog are ready to download a white paper, but it’s possible that the blog reader already has this gated asset or they need more preliminary information before they’re ready to further engage. Persona and stage scoring take a lot of the guesswork out of content marketing, making the whole process both more scientific and more fruitful.
Experience Testing
There’s a lot you can do in the Mura Experience Platform to hone in on your audiences and deliver meaningful experiences, but how can you be sure your strategy is working? How can you know what the sum total of your efforts is for every stage of the buyer journey? Testing.
Testing is crucial in any good content marketing strategy, which is why MXP has testing features baked right in. If you’ve ever conducted any A/B tests with an email marketing campaign, for example, then you’re already intimately familiar with this concept and its benefits. When it comes to the content-driven experiences you create, continuous improvement is imperative.
Testing is unique in MXP, especially compared to the marketing tests you’ve probably used in the past. Traditional marketing testing — think the aforementioned A/B tests — aim to single out a very particular detail like a word in a headline or the color of a call to action.
Instead, MXP Experience Testing is all about the overarching experience, and figuring out if the sum of the parts is truly greater than the whole. Both are valuable in ensuring you consistently meet all of your marketing goals, but be sure to keep this key difference in mind.
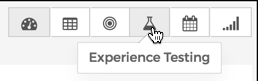
Accessing Experience Testing
To access Experience Testing, you can use the toolbar found at the top of any MXP module or use the primary navigation on the left of the Mura Admin.

Creating an Experience Test
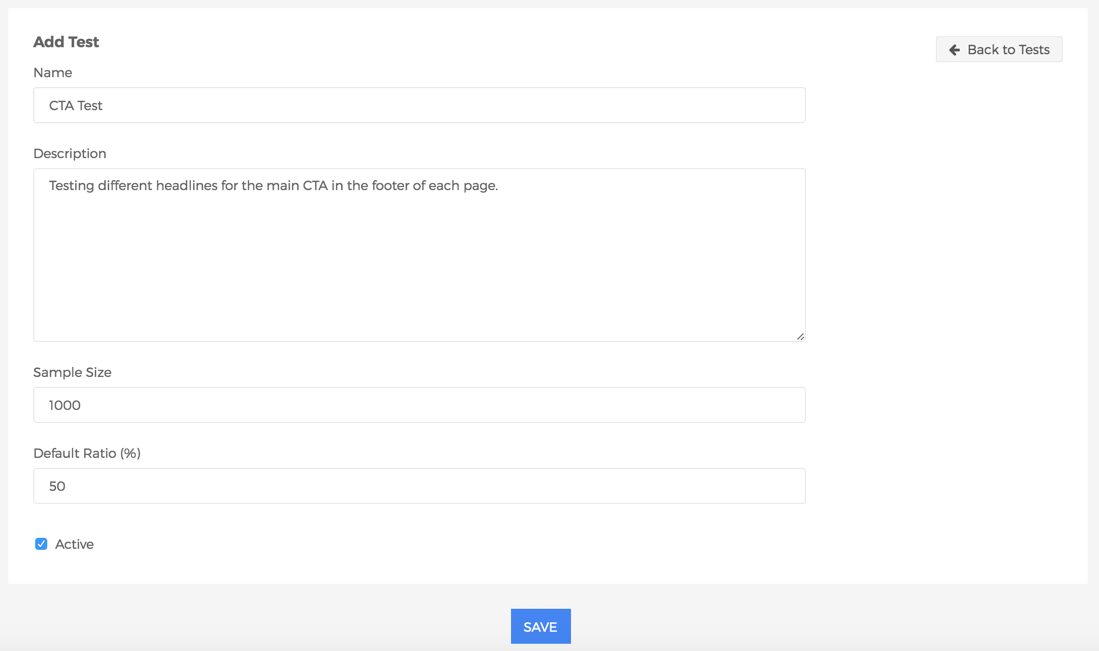
To create an Experience Test, click the “Add Test” button andsimply fill out the following fields:
- Name
- Description (Optional)
- Sample Size (Number of Users to include in the test)
- Default Ratio % (What percentage of visitors you would like to be included in this test)
Assigning Candidates

To assign a Candidate to a test, click the “Add Candidate” button. On the next screen you’ll be able to assign a Candidate from a list of Experiences whose status has been set to “Candidate.”

Once you’ve added your candidates, make sure your test is set to “active”, check the “Start New Test Run” box, and click Save.
Publishing Calendar
The Publishing Calendar can be accessed from the sixth box in the right corner of the main Dashboard page, as well as from the side navigation and the very bottom of the main screen.
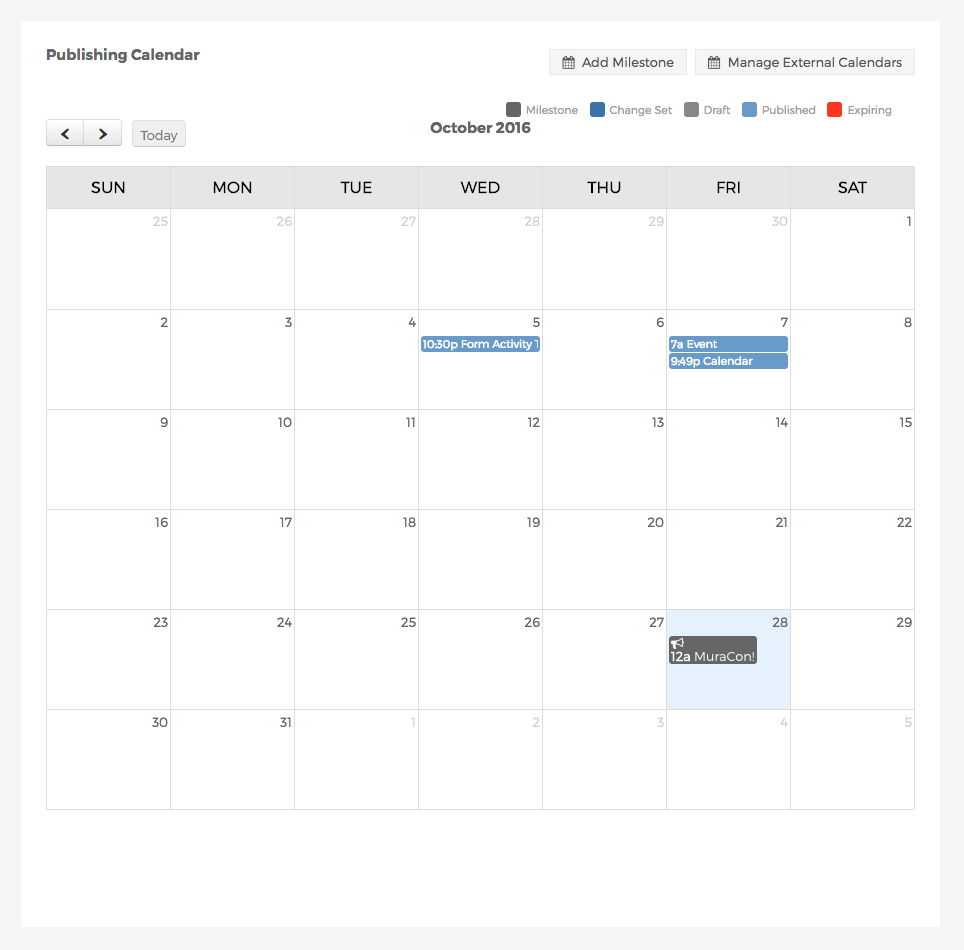
Hopefully you don’t need us to explain to you what a calendar looks like and why it’s helpful. If you’ve ever missed a critical deadline or failed to get the right materials from a colleague right before a big campaign, then you know exactly why a good calendar is your best friend. But, the Publishing Calendar in MXP is especially useful in that its built-in color guide shows you what’s currently a draft, what’s been published, what’s expiring, and so on. In addition, Mura provides the ability to create milestones, or free-form placeholders you can use for planning purposes.