Create a Class Extension
For this example, we'll extend the base Page type by adding a new subType with new attributes. Our example will include the creation of a "Product" subType.
To create a custom class extension, follow these steps:
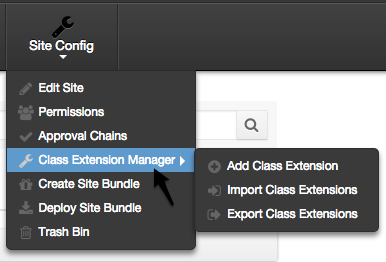
- From the admin pane, and select Site Config > Class Extension Manager.
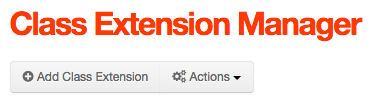
- You should now see the Class Extension Manager screen.

- Click Add Class Extension.
- This should take you to the Add Class Extension screen.
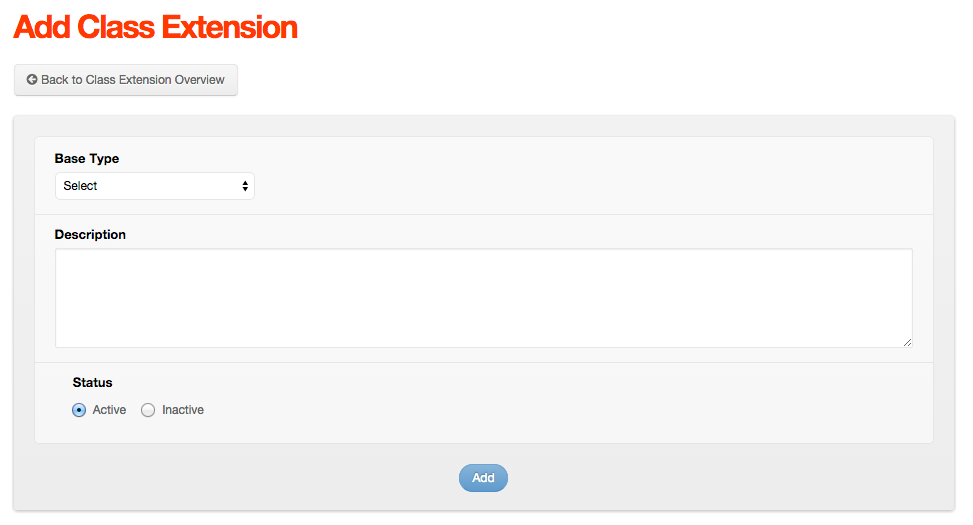
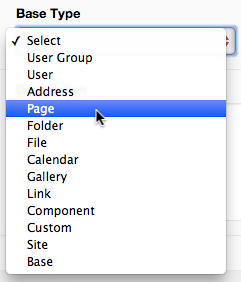
- Base Type: These are the standard Mura CMS content /data types that are "extendable." Each data type serves a unique purpose in Mura CMS, both on a data and rendering level. To add attributes globally, use the "Base" option from the Base Type select menu.
- Select Page from the Base Type select menu.
- Additional form fields should appear. The fields will vary based on the Base Type selected.
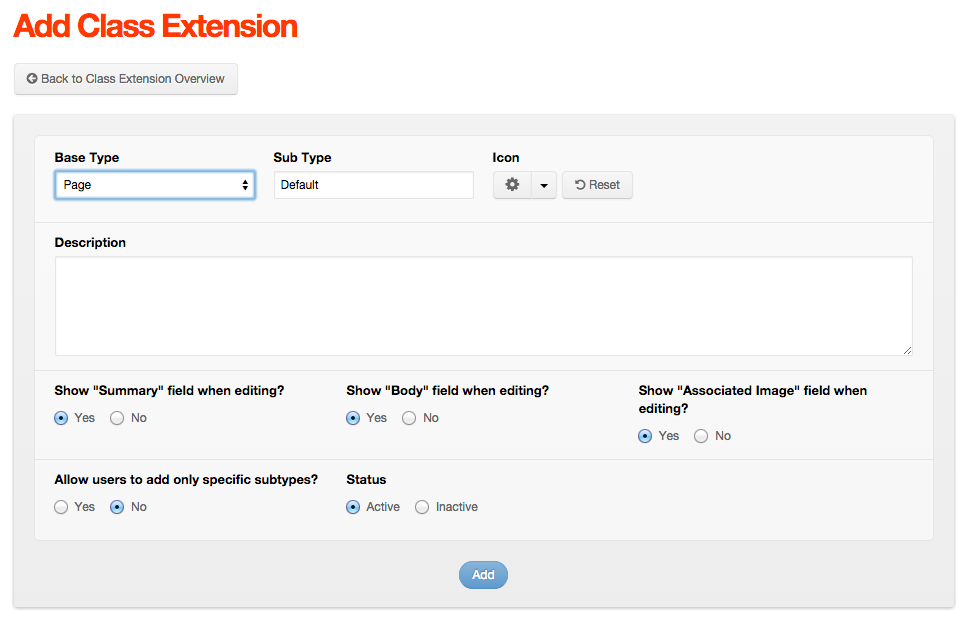
- Sub Type: This is "name" of the subType that you will create. For example, if we selected Page as the Base Type and enter "Product" as the subType, content managers will be able to select this new, custom type from the "Type" select menu when adding or editing content. Then any of the additional fields/attributes you create will also appear on the form.
Remember, keep your naming convention strict (like a variable). It's important to note that if you build a subType labeled "Default" this will cause EVERY instance of that Type (user, page, etc.) to automatically have its associated attributes added to it. It's a way of giving you the ability to add global fields to use in Mura CMS.
Tip: If you create a subType of "Default" this will cause EVERY instance of that Type (User, Page, etc.) to automatically have its associated attributes added to it. It's a way of giving you the ability to add global fields to use in Mura CMS.
- Sub Type: This is "name" of the subType that you will create. For example, if we selected Page as the Base Type and enter "Product" as the subType, content managers will be able to select this new, custom type from the "Type" select menu when adding or editing content. Then any of the additional fields/attributes you create will also appear on the form.
- Enter Product in the Sub Type form field.

- Click Add.
- You should be taken to the Class Extension Overview screen.
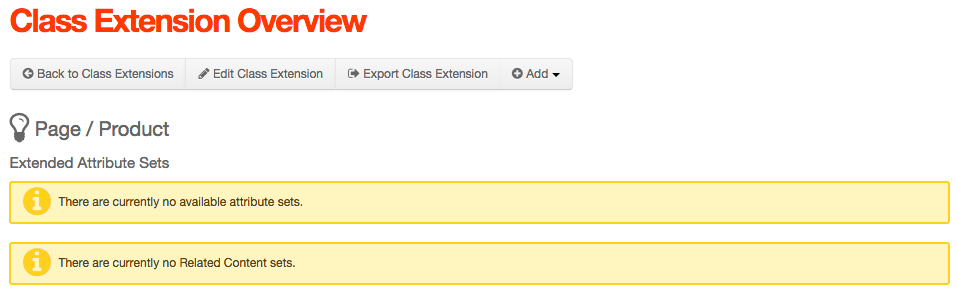
- A few buttons should appear at the top of the page:
- Back to Class Extensions: Takes you back to the listing of subTypes.
- Edit Class Extension: Allows you change the subType name. Here you will also be able to delete the subType itself.
- Export Class Extension: Allows you to export the class extension as XML.
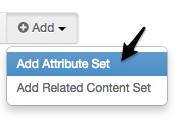
- Add includes the following options:
- Add Attribute Set: Allows you to create an Attribute Set.
- Add Related Content Set: Allows you to create a Related Content Set.
- Select Add > Add Attribute Set.
- You should be taken to the Add Attribute Set screen. Attribute Sets are merely groups of form fields, much like a "fieldset" when creating a form in HTML. They are simply groups of attributes that associate to a specific subType. Each subType can have none, one, or more Attribute Sets.
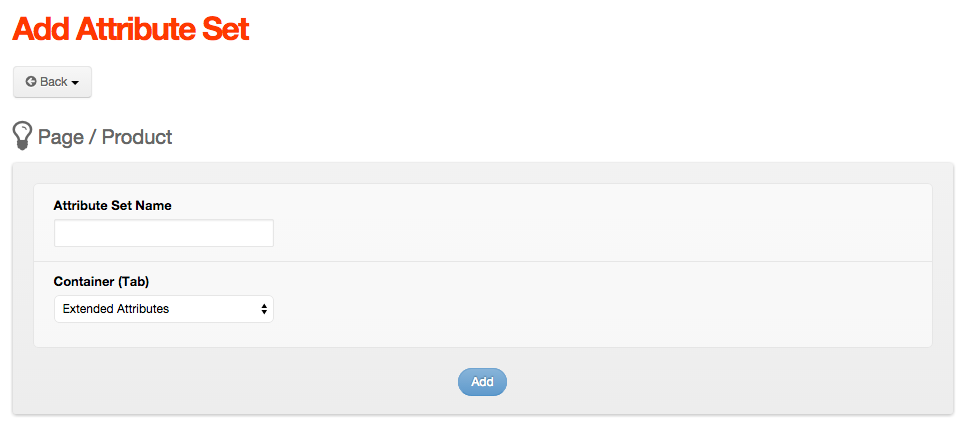
- Attribute Set Name: The value entered here will appear above the grouping of attributes you create in the user interface (like a legend in HTML).
- Container (Tab): This setting allows you to specify which content item tab this specific group of attributes (form fields) appear on the user interface.
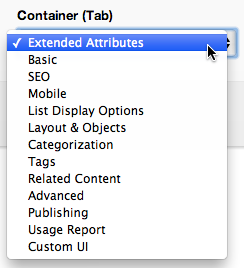
- Extended Attributes Tab: This is the default setting. Displays the Attribute Set displayed on the Extended Attributes tab when adding/editing content.
- Custom UI: Mura CMS will not display the Attribute Set anywhere automatically. This allows developers the option of creating a customized user interface for collecting the data.
- Enter Product Info in the Attribute Set Name form field, leave the Container (Tabs) on the default setting of Extended Attributes, and click Add.
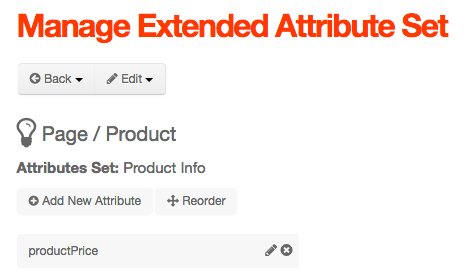
- You should be taken to the Manage Extended Attribute Set screen.
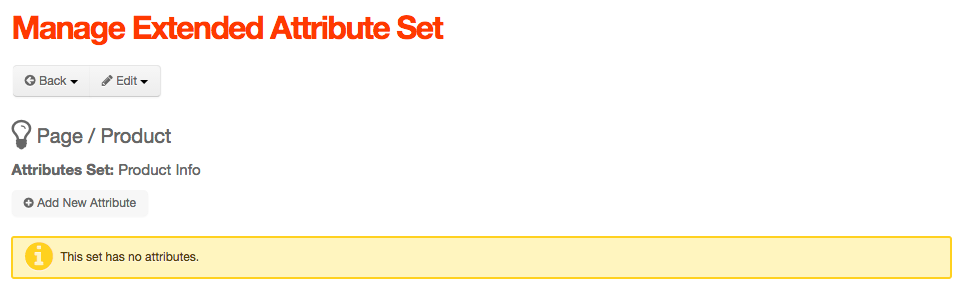
- Click the Add New Attribute button in the middle of the screen.
- This should reveal a form to create a new attribute. Again, attributes are the new form "fields" for the specified Attribute Set and subType.
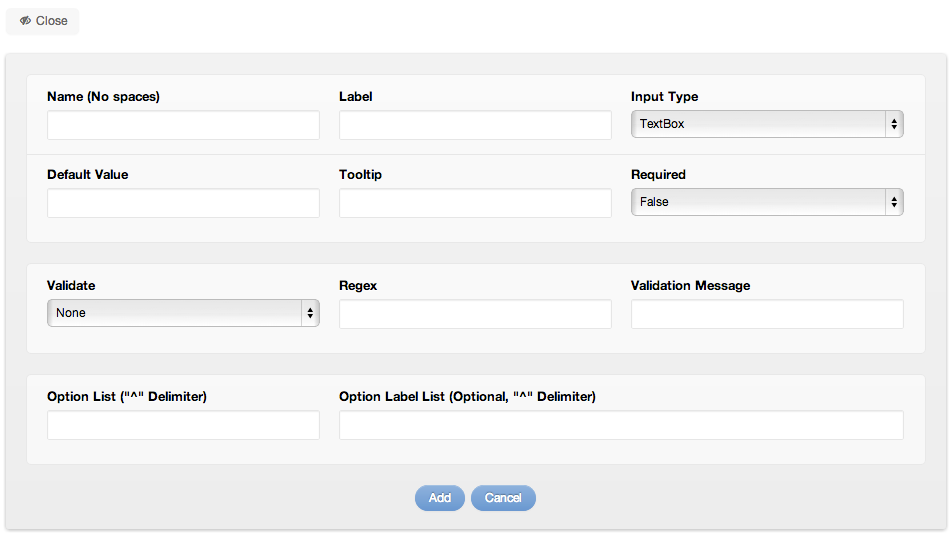
Listed below are descriptions of each form field:- Label: This is the friendly label that appears with the form field itself on the user interface. If one is not supplied, then the Name field is used in its place.
- Name: This is the "variable" name for the attribute. This is another case where you need to keep your naming convention strict.
It is also important to namespace the variable based on its subType and Attribute's name. For example, if the subType is 'Product' and the attribute you wish to add is 'title,' then use 'productTitle' as the actual 'name' for the attribute instead. If you have several custom extended attributes for your site, you could easily and accidentally build two (or more) extended attributes with the same name. Don't do this! In addition, avoid using any of Mura's standard form field names. This is to avoid form field name collisions, otherwise you could unintentionally end up with two form fields with 'Title' for the name attribute, one from Mura, the other from your extended attribute. - Input Type: This field dictates form field type that will be rendered on the user interface (TextBox, TextArea, HTMLEditor, SelectBox, MultiSelect, RadioGroup, File or Hidden).
- Default Value: This field holds a default value if one is not selected by the user.
- Tooltip: Next to each field within the "Extended Attributes" tab for each type you have the option to provide a tooltip "pop-up" that will help the user understand what that field is meant for in the admin view of that subType.
- Required: This field ensures that a user supplies an entry for the attribute. If an entry is not supplied then the "Validation Message" error pop-up message appears for them and halts the process from going any further.
- Validate: This option allows you to select whether or not you wish to validate the data entered into the form field.
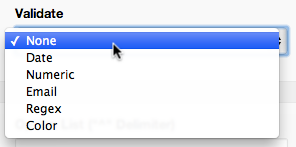
- None: Select this option if you do not wish to use validation.
- Date: Validates the data entered is a valid date.
- Numeric: Validates the data entered is a valid integer.
- Email: Validates the data entered matches standard email formats.
- Regex: Validate data against the JavaScript regular expression entered in the following Regex field.
- Color: Set the Input Type to TextBox along with this option and a "color picker" will appear in the user interface.
- Regex: A "regex" is a "regular expression." You can enter a JavaScript regular expression here to validate data entered into the specific form field.
- Validation Message: This field holds the error message you would like to have displayed if you have validation turned to "true".
- Option List: The is a carat (^) delimited list of "option values" that would be used if you choose an input type of selectBox, multiSelect or radioButton (e.g., option1^option2^option3).
- Option Label List: This is a carat (^) delimited list of labels for each option you would provide to the above option list. The positioning of the entry within the list correlates to the option list (e.g., Option 1^Option 2^Option 3).
Tip: The Mura tag can be used in the Default Value, Option List, and Option Label List attribute values (e.g., [mura]$.myPlugin.getMyOptionList()[/mura]).
- Enter productPrice in the Name field.
- Enter Product Price in the Label field.
- Click Add.
- The newly created attribute should be displayed within the Product Info Attribute Set.
- Repeat the process to add another new attribute using the following settings:
- Name: enter productSKU
- Label: enter Product SKU
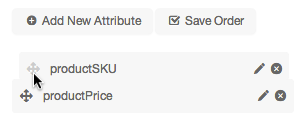
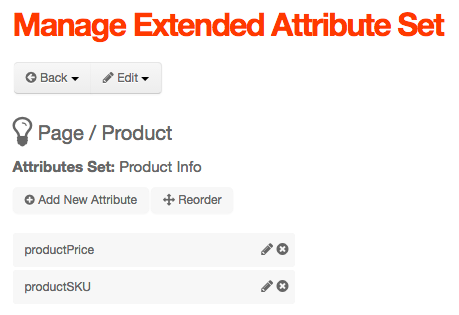
- The attribute set should look like the following:
- To alter the order of the attributes, simply click the Reorder button, then click, drag and drop each item to your desired display order, then click the Save Order button.