Custom Navigation
Often times you'll need to output custom navigation based on the content of a specific Local Content Index (Feed), but need to have very specific markup. To do this, you'll need to access Mura's Iterator.
In this example, we'll use the iterator to loop through a Local Content Index, giving us the attributes we want to pull out. Make sure you've created a Local Content Index and verify that it's working by clicking the RSS icon before proceeding.
The markup we'd like to use is:
<ul class="nav nav-list">
<li class="nav-header">Custom Nav</li>
<li><a href="">Title 1</a></li>
<li><a href="">Title 2</a></li>
...
<ul>
If you've ever used Twitter Bootstrap, it probably looks familiar (http://twitter.github.com/bootstrap/components.html).
- Go to your Content Collections to verify you have a Local Content Index called Slideshow.
-
Add a file called custom-nav.cfm to:
{SiteID}/includes/display_objects/custom/custom-nav.cfm -
Paste the following into custom-nav.cfm. While this may look like a lot of code to worry about, the only thing you need to make sure you do is point the iterator at your feed by setting the "name" attribute to "Latest News."
<cfset feed=$.getBean('feed').loadBy(name='Slideshow')> <cfset iterator=feed.getIterator()> <cfif iterator.hasNext()> - Add your markup and the items you'd like to output using the Mura Scope
- Next, use the iterator to loop through your Local Index, pulling out attributes as necessary. Note that since we are creating a single unordered list, we make sure we put the
<ul>'s outside the opening and closing<cfloop>tags. -
Inside the
<cfloop>tags and after the<cfset item=iterator.next()>, we'll add a single<li>with the attributes we want. We use the simple "Mura Scope" syntax to pull out the attributes. Note, since we're in the iterator, we'll useiteminstead of other scopes such ascontentoruser.<cfset feed=$.getBean('feed').loadBy(name='Slideshow')> <cfset iterator=feed.getIterator()> <cfif iterator.hasNext()> <cfoutput> <div class="well"> <ul class="nav nav-list"> <li class="nav-header">Custom Nav</li> <cfloop condition="iterator.hasNext()"> <cfset item=iterator.next()> <li> <a href="#item.getURL()#"> #HTMLEditFormat(item.getMenuTitle())# </a> </li> </cfloop> </ul> </div> </cfoutput> </cfif> -
Create a Component in the Mura Admin that includes the custom-nav.cfm file we've created using the [mura] tag. This enables portability within your site, allowing you to place your custom nav as an object within Mura itself.
<nav>[mura]$.dspInclude('display_objects/custom/custom-nav.cfm')[/mura]</nav>Note that when using the dspInclude method, the path begins at
"/{SiteID}/includes/" and all files will be called relative to that. - Save your component.
- Create a Folder called Labs.
- Create a Page called Custom Nav
- Assign the three_column.cfm layout template to it.
- Place your component in the left column.
- Publish and then preview your page.
-
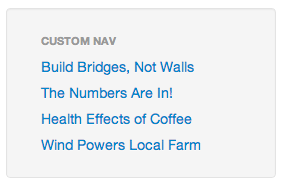
Your navigation should look similar to the following: