Theme Layout Templates
In The "themes" Directory section, you learned each site in Mura has a "themes" directory, and is located under {context}/{SiteID}/includes/themes/.

Mura scans this directory for any subdirectories. If Mura discovers any subdirectories, it uses the name of the directory as the "Theme Name" and will list it as an option for authorized administrators to apply as a theme to their site. So, the path to any site's themes is {context}/{SiteID}/includes/themes/{ThemeName}.
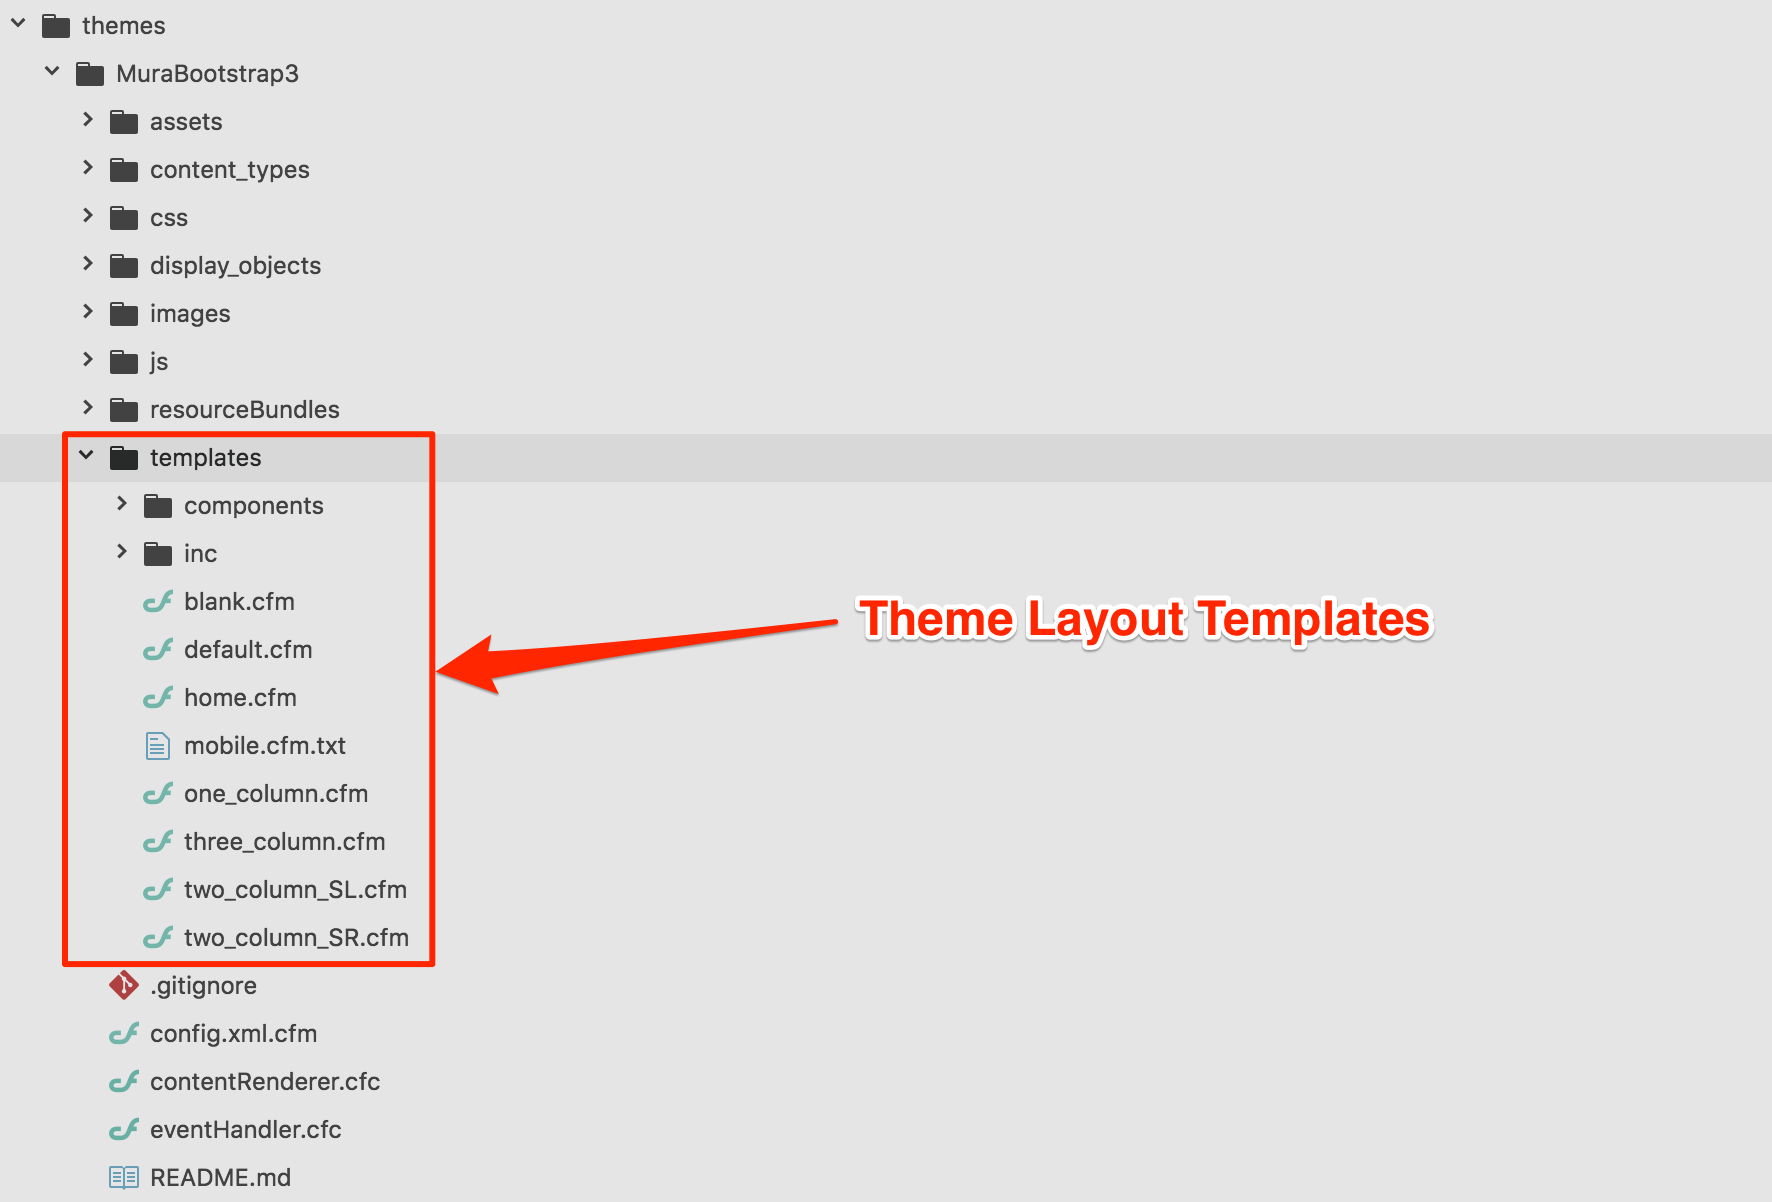
../{ThemeName}/templates/
As discussed in the Directory Structure of a Mura Theme section, we learned Mura has a required "templates" directory. Technically, this is the only "required" directory for a theme. This is also the directory where you create and manage your theme-specific layout templates.
How Do I Create Layout Templates?
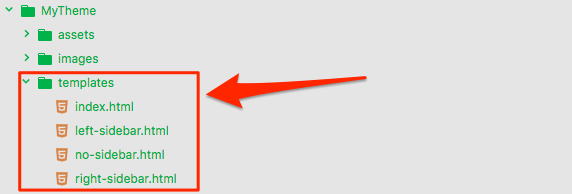
You can start off by creating layout templates just like you always have. Many theme developers begin by creating custom layouts using vanilla HTML, CSS, and JavaScript. Or, some theme developers begin by purchasing and/or downloading free templates from the web. The end result is typically a directory of HTML files, and subdirectories of the assets, images, and other related files.
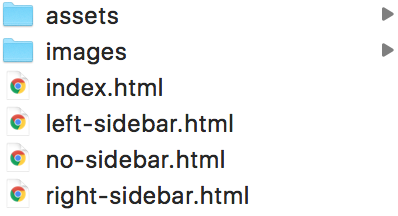
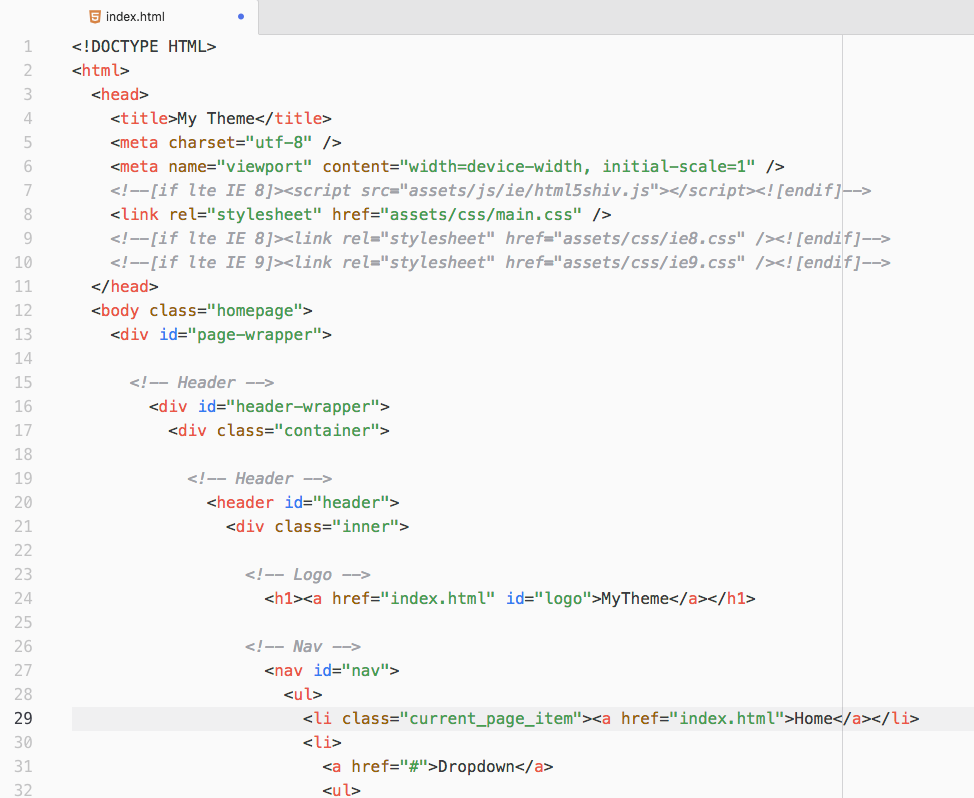
If we were to open one of the files from the example listed above, you would see that it's straight vanilla HTML.
So, there's no reason to change anything about the initial part of your theme development process.
1. Move Your Theme to the "themes" Directory
Place your theme under the "themes" directory. For example, {context}/{SiteID}/includes/themes/{ThemeName}.
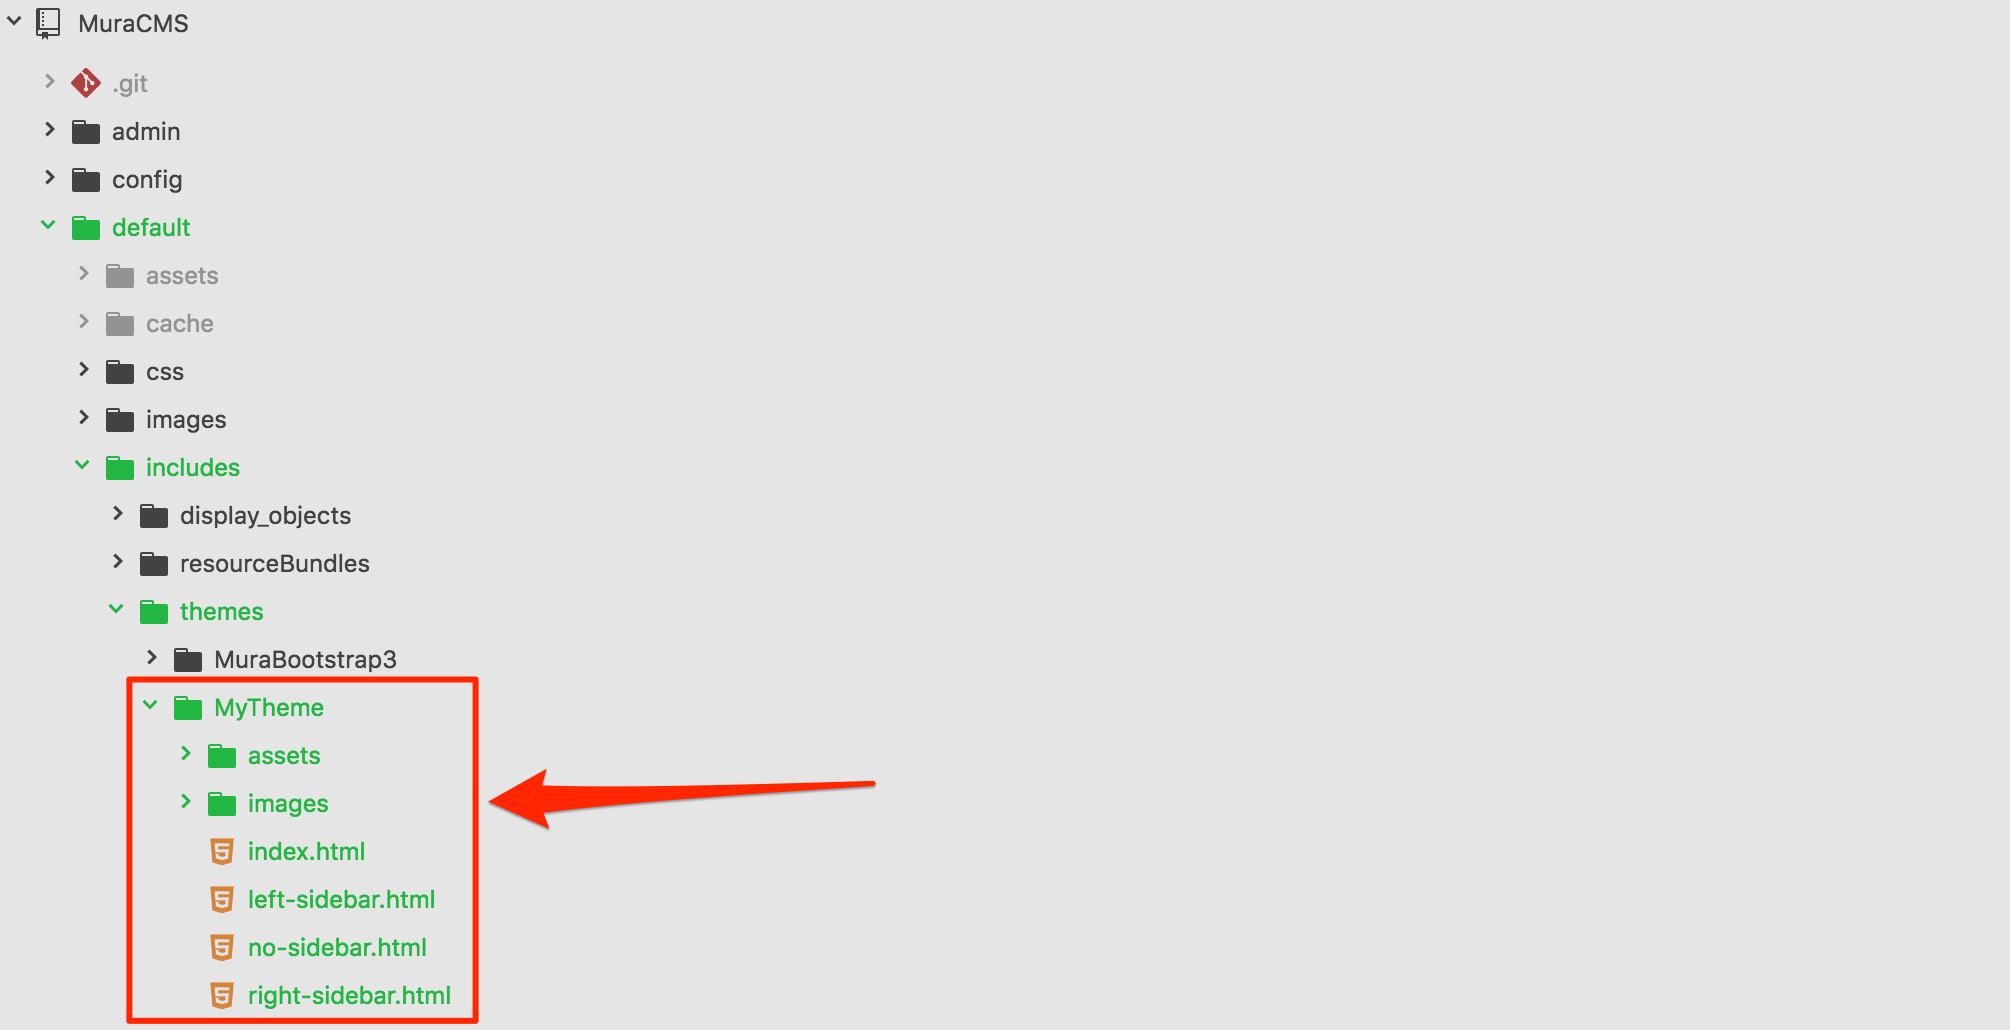
2. Create a "templates" Directory
The only required directory of a Mura theme is a "templates" directory. So, we'll need to create it, and then move our layout templates into it.
3. Rename ".html" Files to ".cfm"
Rename all of your layout templates from the ".html" file extension, to the ".cfm" file extension. As indicated by the ".cfm" file extensions, Mura uses ColdFusion Markup Language (CFML) as its server-side scripting language. Like many other web scripting languages, CFML augments standard HTML files with database commands, conditional operators, high-level formatting functions, and other elements to produce web applications. If you're interested in learning more about CFML, checkout https://helpx.adobe.com/support/coldfusion.html or http://learncfinaweek.com.
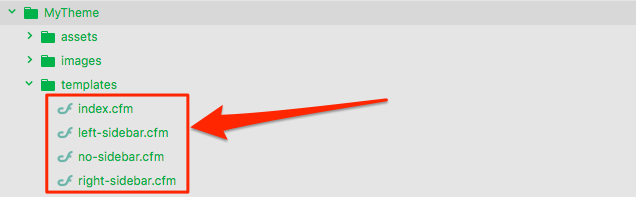
So, using our existing example files, our directory structure might look like the following illustration.
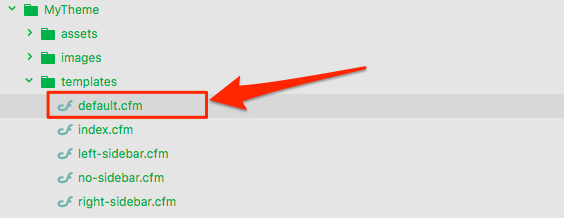
4. Create a "default.cfm" Layout Template
Remember, if Mura is unable to locate a currently assigned layout template, it will "fall back" to using the "default.cfm" layout template. So, it's good practice to simply have one created.
5. Use Commonly Used Layout Template Names
Listed below are the most commonly used layout templates in Mura. If you plan on distributing your theme, you might consider using this naming convention. This way, if an administrator swaps a theme, they won't necessarily have to go back through their entire website, and reapply new layouts to all of the pages and sections of their site.
- default.cfm
- This is the "default" layout template. If Mura is unable to locate a layout that has been assigned to a content item (e.g., the layout has been renamed, or removed), Mura will "fall back" to this layout. Using a simple line of code, you can easily "include" one of your other layouts to be used. For example,
<cfinclude template="two_column_SL.cfm">
- This is the "default" layout template. If Mura is unable to locate a layout that has been assigned to a content item (e.g., the layout has been renamed, or removed), Mura will "fall back" to this layout. Using a simple line of code, you can easily "include" one of your other layouts to be used. For example,
- home.cfm
- The "home" layout is traditionally applied only to the "Home" page of the website.
- one_column.cfm
- This layout is used when you don't need any "sidebars" or other columns other than the main "body/content" area.
- three_column.cfm
- This layout accommodates a centered main "body/content" region, as well as a left sidebar, and a right sidebar.
- two_column_SL.cfm
- This layout has a main "body/content" region, and its sidebar to the left.
- two_column_SR.cfm
- This layout has a main "body/content" region, and its sidebar to the right.
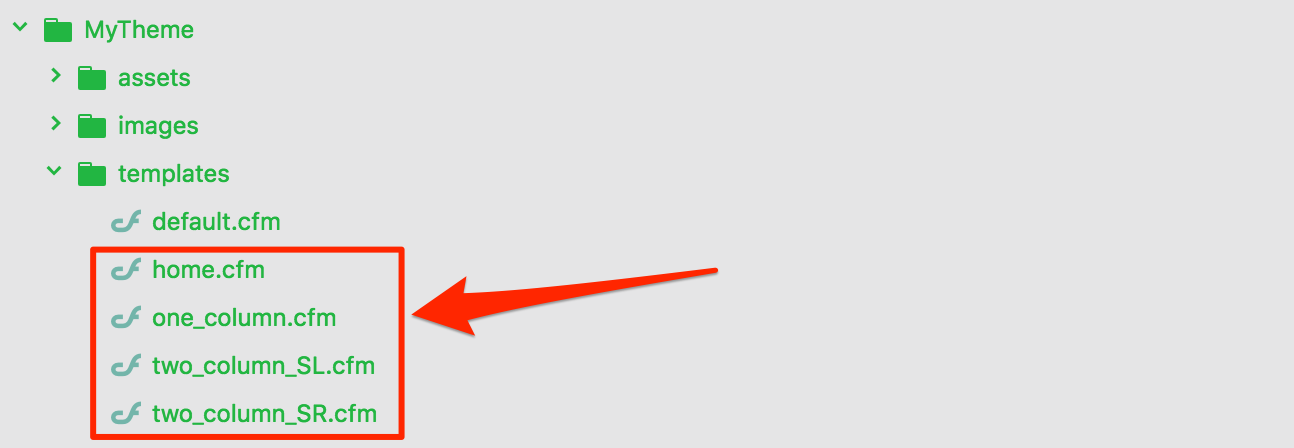
So, reviewing our example files, we should be able to rename example templates as follows:
| Original Name | New Name |
|---|---|
| index.cfm | home.cfm |
| left-sidebar.cfm | two_column_SL.cfm |
| no-sidebar.cfm | one_column.cfm |
| right-sidebar.cfm | two_column_SR.cfm |
Since we have a "default.cfm" layout template, if the prior theme assignment was using a layout template that our new theme doesn't include, we could either make a new one, or just allow the "fall back" to occur, and rely on "default.cfm" to be used instead.
A common method used with the default.cfm layout template is to "include" your desired "default" layout template. For example, maybe you want the two_column_SL.cfm layout to be your default. The following illustration shows how you could do that.

Visit https://helpx.adobe.com/coldfusion/cfml-reference/coldfusion-tags/tags-i/cfinclude.html for more information about the <cfinclude> tag.
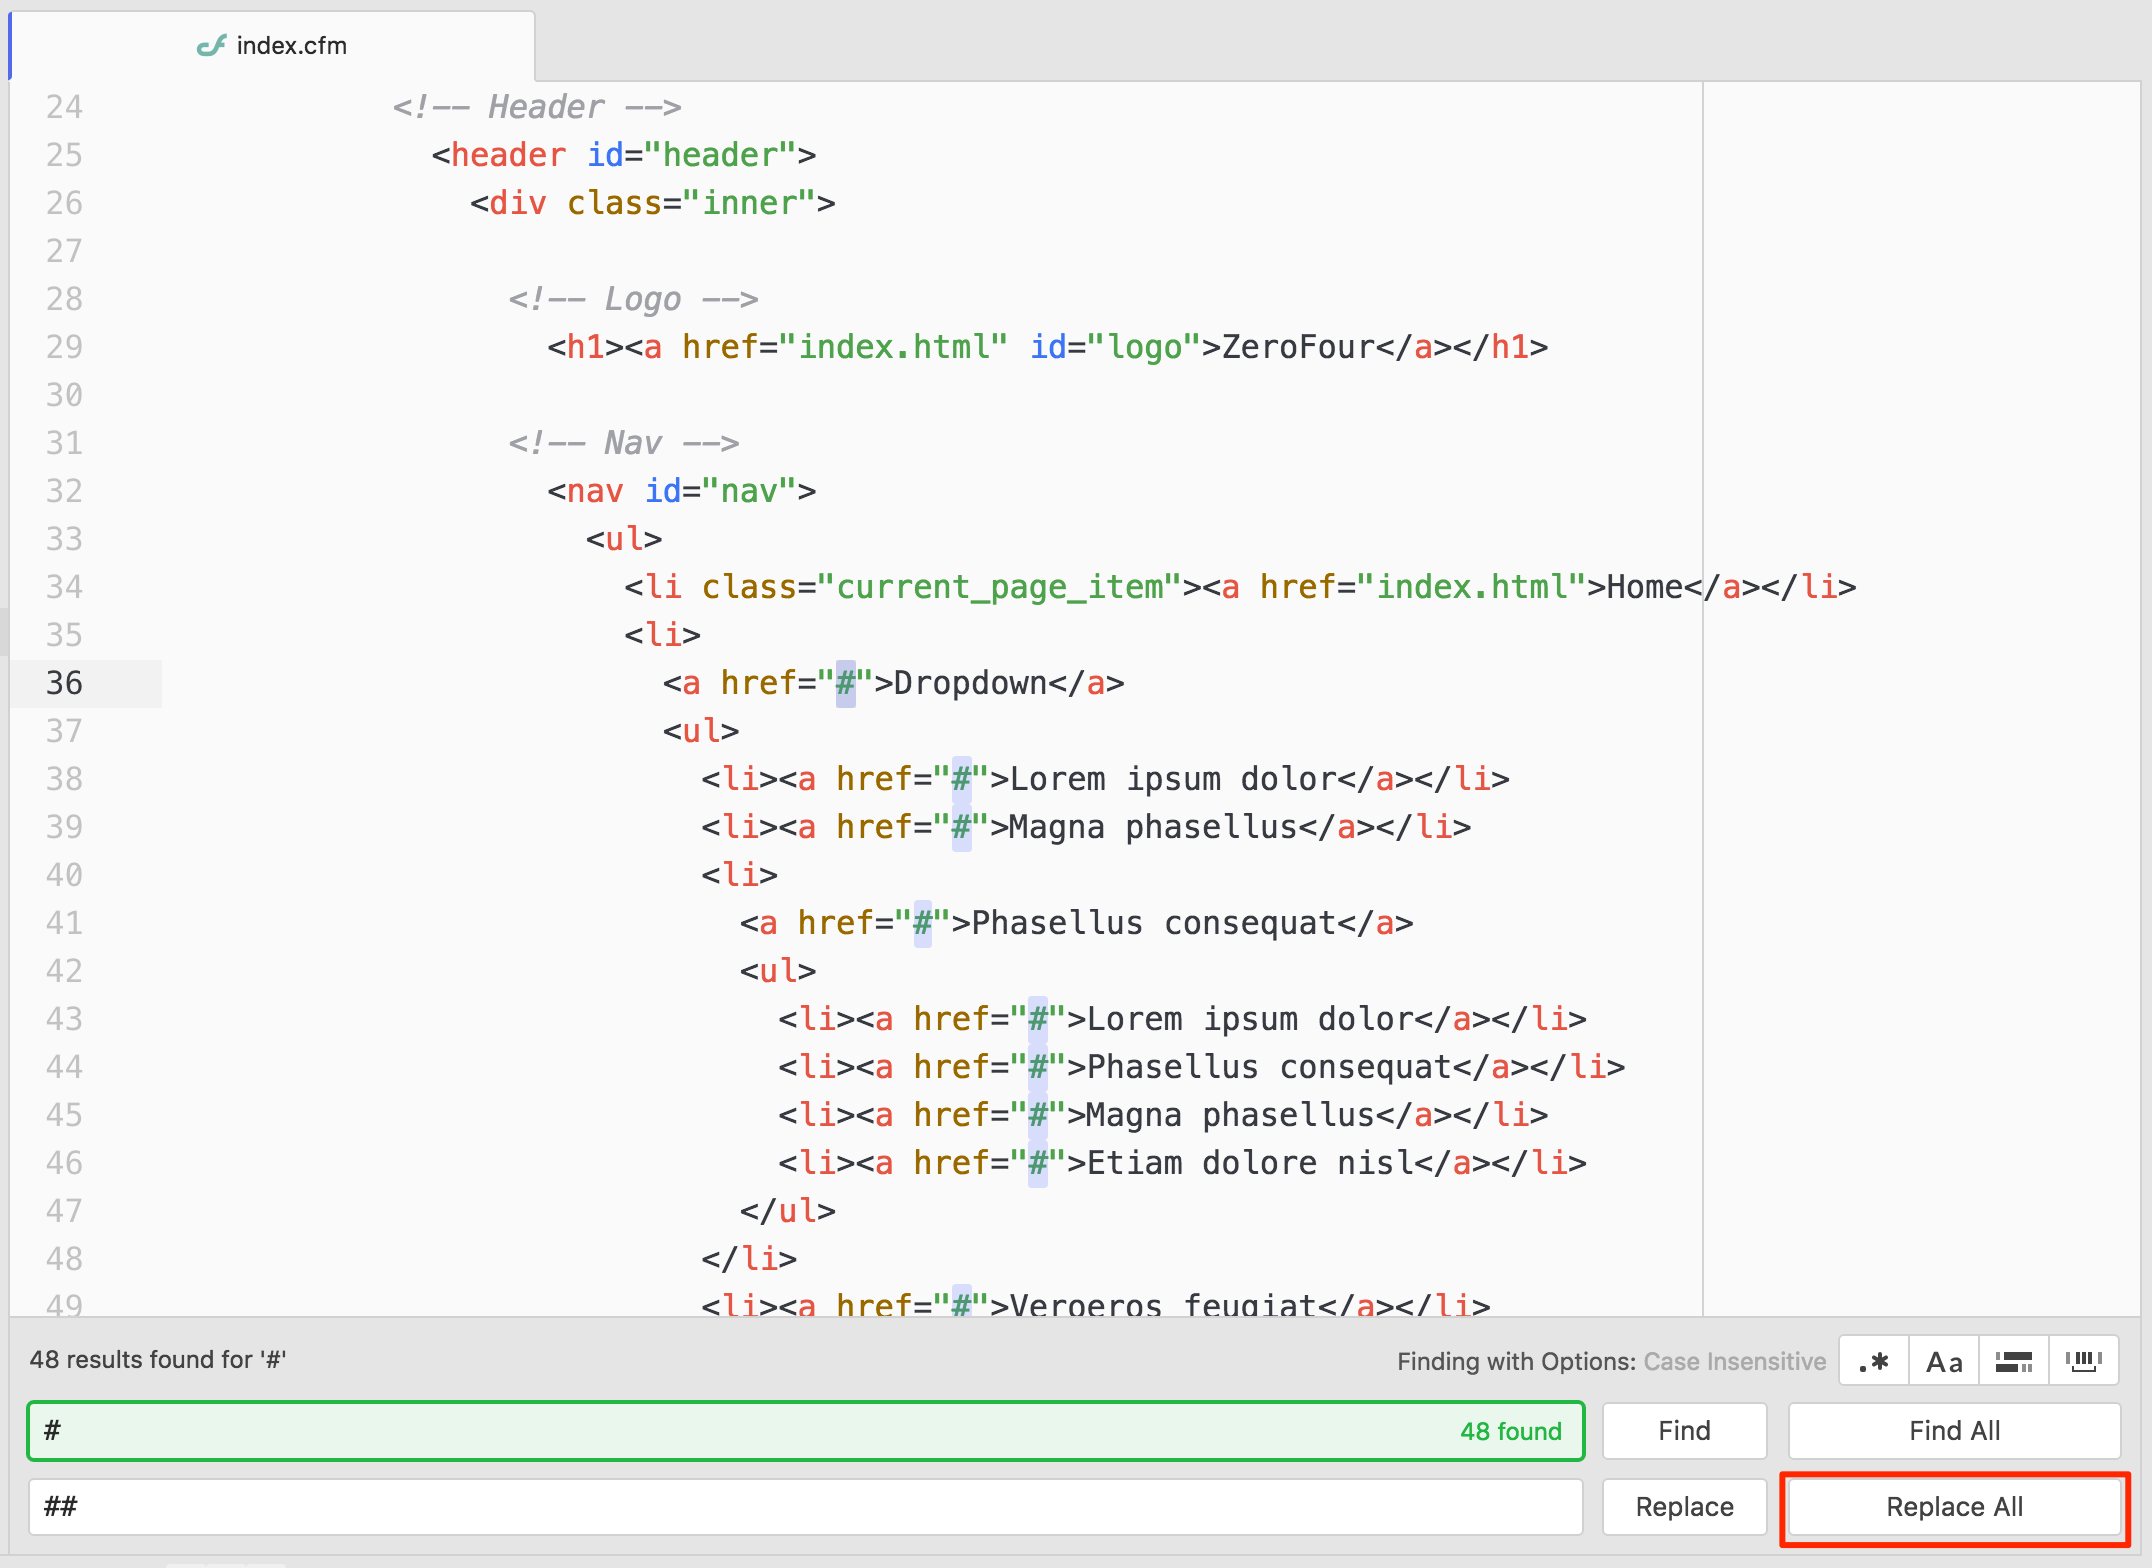
6. Replace # With ##
Hashtag/number sign (#) characters have special meaning in CFML. So, if your layout template has any hashtag characters, you will need to escape single hashtags with double hashtags. In short, you need to use ## to represent a single # character. Using a simple "find and replace" feature of most code editors tends to work well.
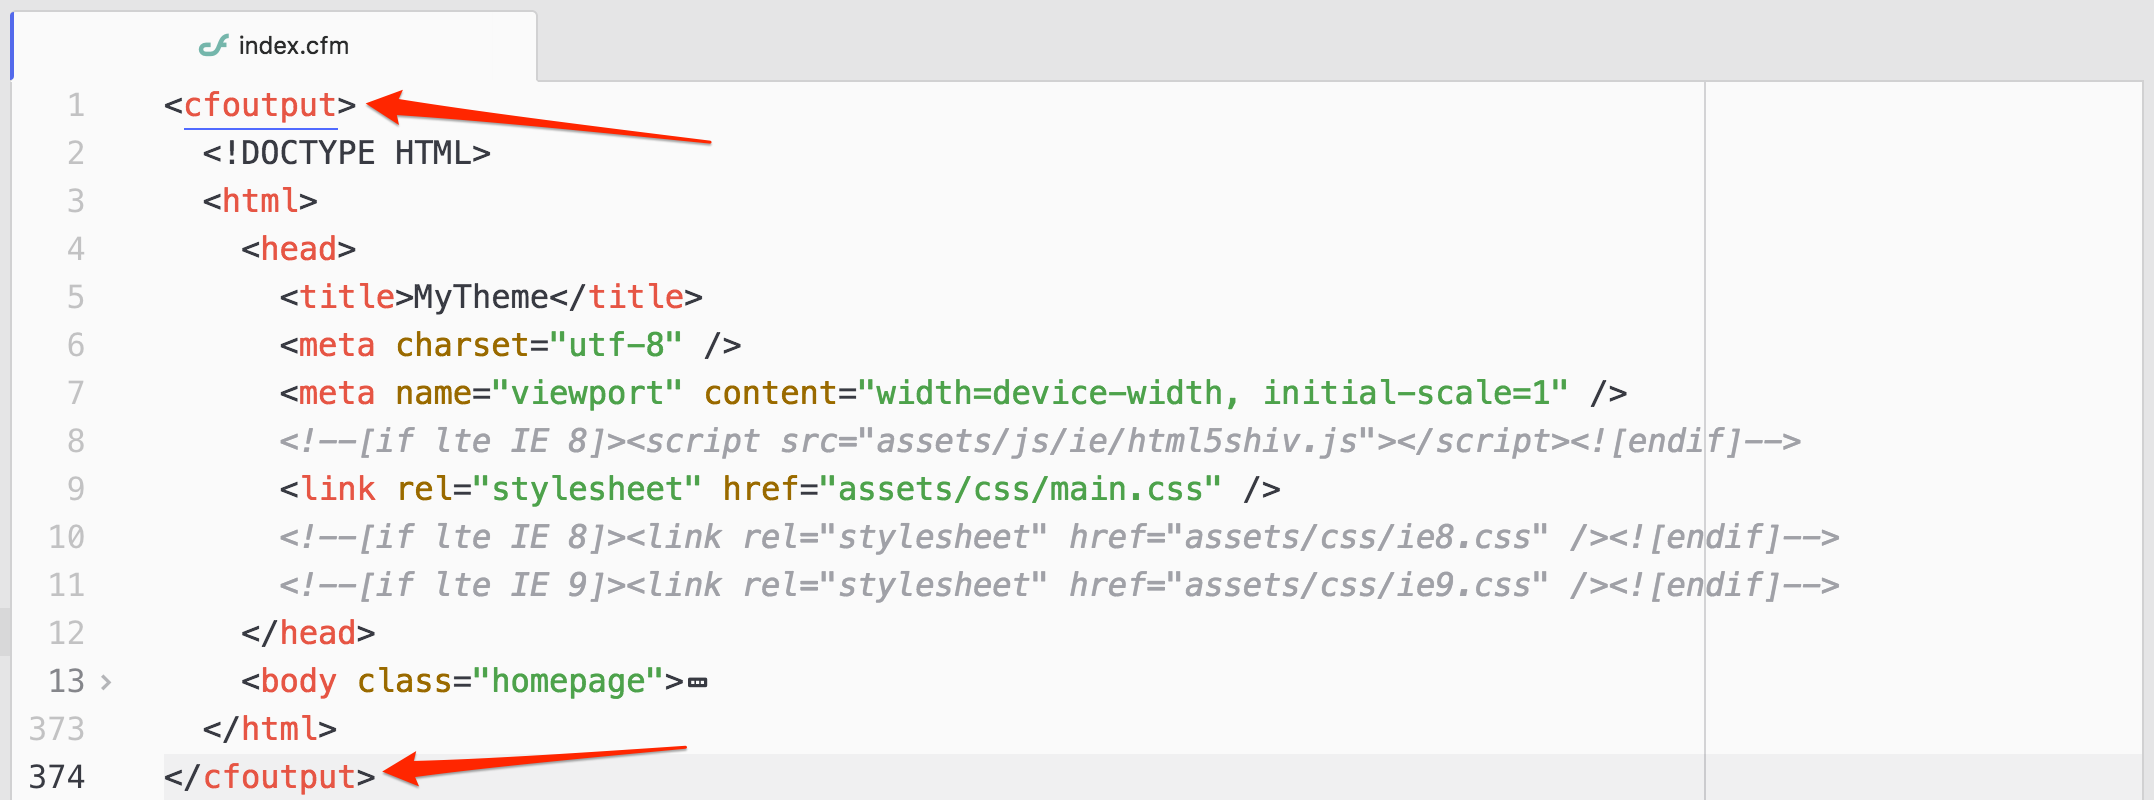
7. Wrap All Output With <cfoutput></cfoutput> Tags
In CFML, <cfoutput> tags displays output that can contain the results of processing CFML variables and functions. You're going to need these tags in your layout templates, because soon, you're going to be adding some template variables and code snippets, to replace your static text.
To learn more about <cfoutput> tags, visit https://helpx.adobe.com/coldfusion/cfml-reference/coldfusion-tags/tags-m-o/cfoutput.html.
Summary
Here's a quick overview of the process we've covered for creating theme layout templates so far:
- Move your theme to the "themes" directory
- Create a "templates" directory (and move your layout templates inside of it)
- Rename ".html" files to ".cfm"
- Create a "default.cfm" layout template
- Use commonly used layout template names
- Replace # with ##
- Wrap all output with <cfoutput></cfoutput> tags
Soon, we'll go through and replace static text with dynamic template variables and code snippets.