How to Deploy/Install a Site Bundle
Mura site bundles are essentially pre-packaged Mura websites. The bundle file includes content, along with the site's assets and theme files. A bundle file is typically named as MuraBundle_{SiteName}_YYYY_MM_DD_HH.zip. As you can probably already decipher, the date and time the bundle was exported is usually attached to the bundle name. This makes it helpful when you're working with bundles that have been created as backups for a particular site.
While you can upload a bundle via the user interface, as you'll see below, when deploying/installing a site bundle, we highly recommend uploading the bundled .zip file to the server. One of the primary reasons for this is because the process will go much smoother and easier for you in the long run since you can eliminate the need to upload a large file via your browser.
Note: Depending on the size of your site, as well as the size of your assets, site bundle files can get quite large, rather quickly. If your bundles are in the 2Gb+ range, we highly encourage you to use more traditional backup and deployment strategies.
Follow the steps below to deploy/install a Mura site bundle.
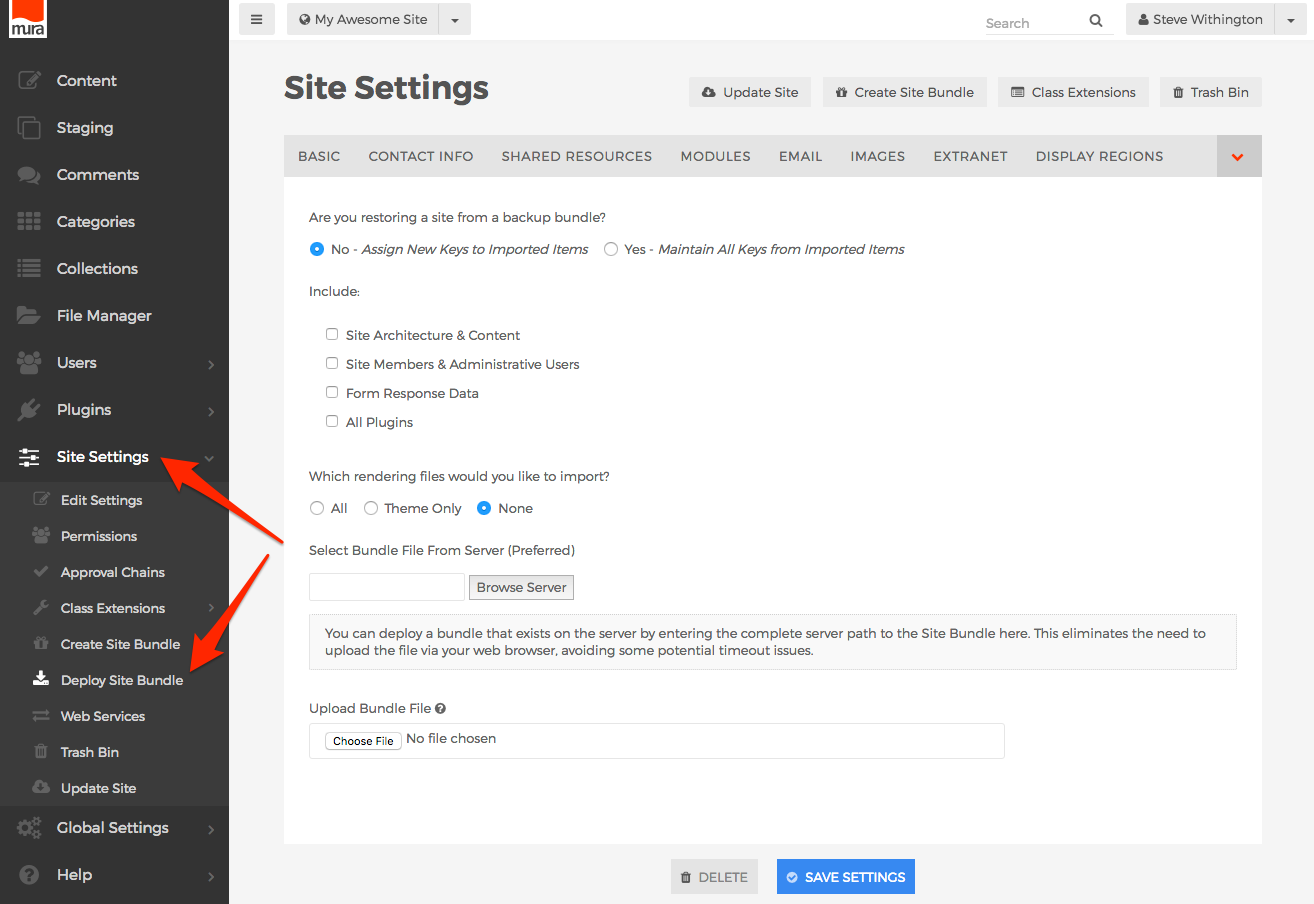
- From the back-end administration area of Mura, select Site Settings from the main navigation, then click Deploy Site Bundle.
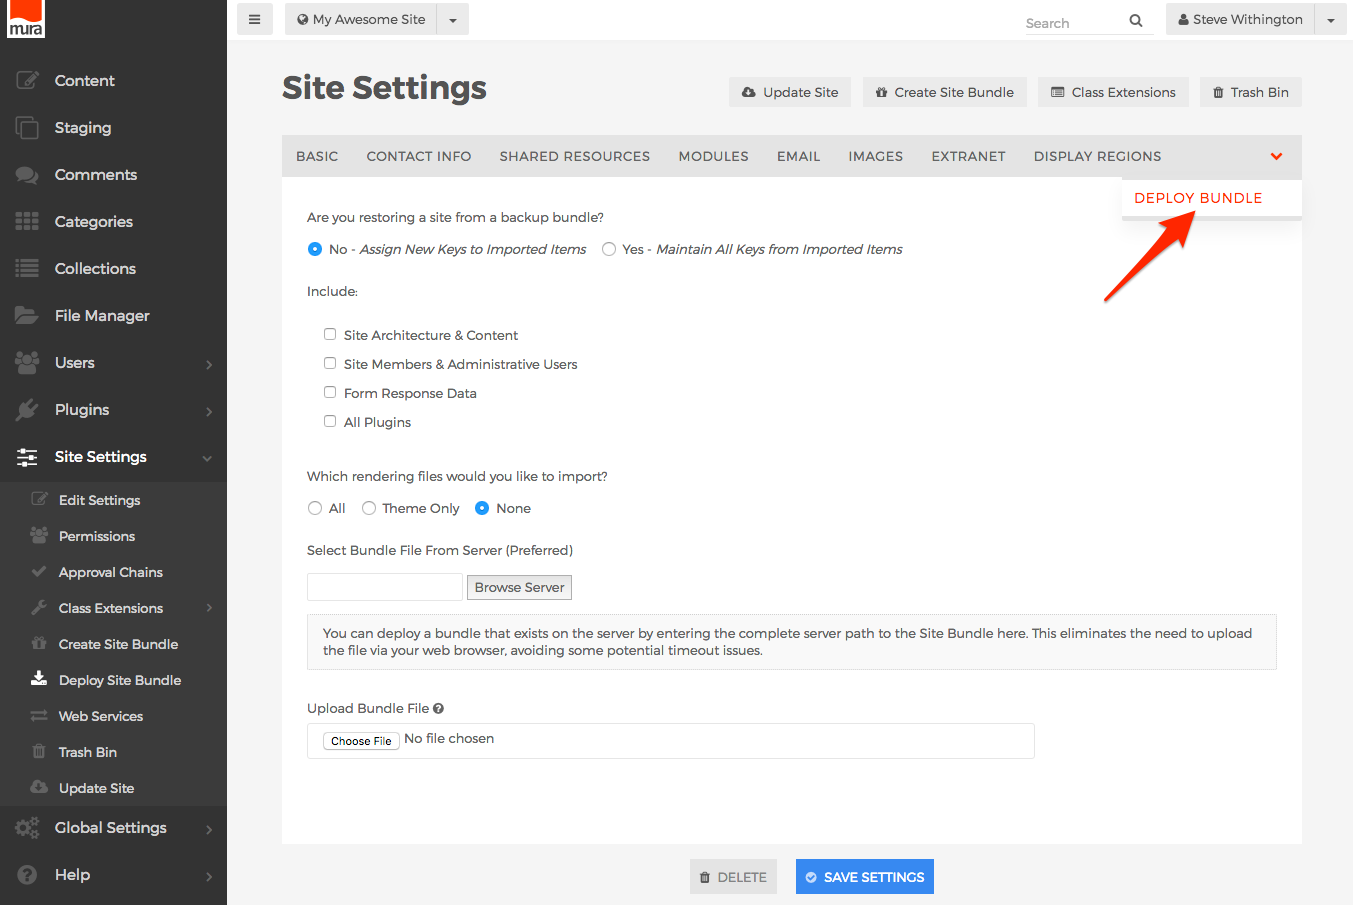
- You should see the Site Settings screen, and the Deploy Bundle tab should be pre-selected for you.
- Review the form options below to assist you in making your desired selections.
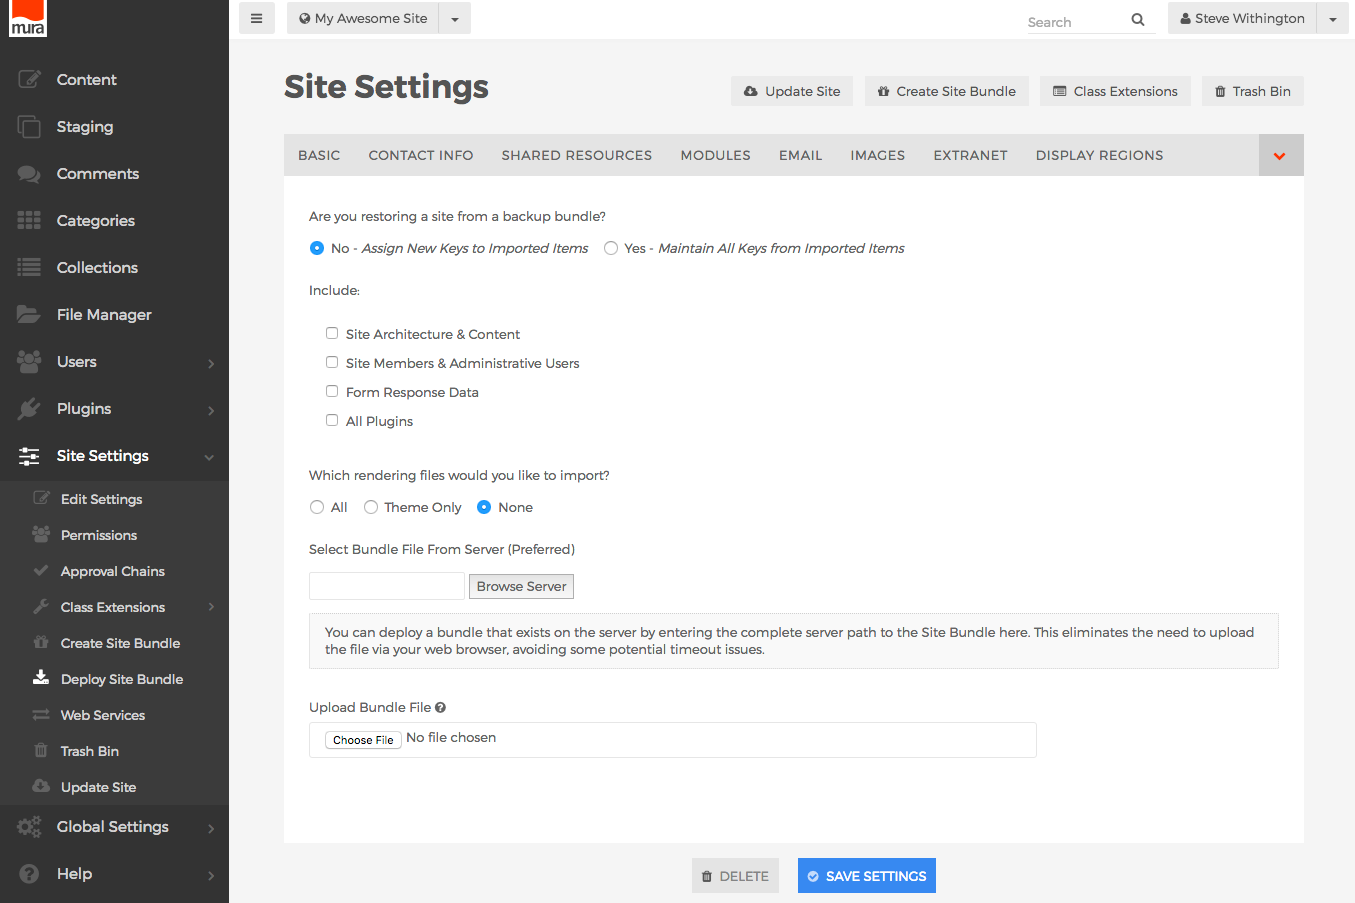
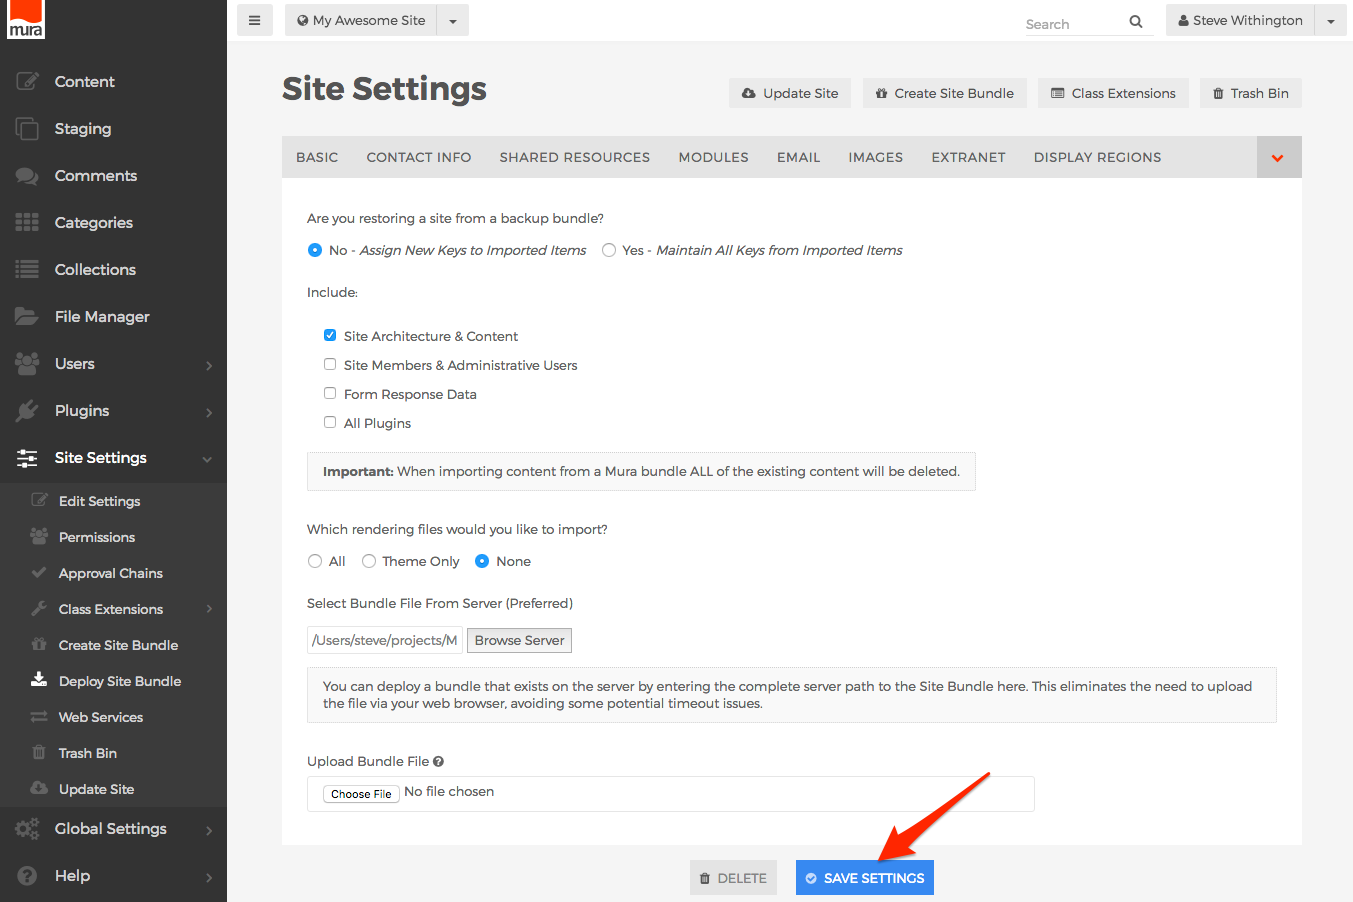
- Are you restoring a site from a backup bundle?
- No - Assign New Keys to Imported Items
- This is the default option. Unless you are actually restoring a site from a backup bundle, you should use this option.
- Yes - Maintain All Keys from Imported Items
- If, and only if, you are restoring a site from a backup bundle, select this option. However, you MUST be deploying the bundle to the same site. Do NOT attempt to deploy the bundle file with this option to a new site under the same instance of Mura. The main reason is because you would be attempting to overwrite existing records in the database which exist for another site, causing serious issues to occur.
- No - Assign New Keys to Imported Items
- Include
- Site Architecture & Content
- Select this option to include the content. This is a very common selection, unless you're only attempting to install the theme files. Also be aware that if you select this option, all existing content for the site will be deleted, and replaced with the new content from the bundle.
- Site Members & Administrative Users
- Select this option to import groups and users included in the bundle.
- Form Response Data
- Select this option to import any form submissions and content ratings from site visitors.
- All Plugins
- If the bundle is dependent upon plugins to function properly, you may wish to select this option.
- Site Architecture & Content
- Which rendering files would you like to import?
- All
- Selecting this option would include all "site" files, as saved in the bundle.
- Theme Only
- Selecting this option would leave your "site" files alone, and only import the theme files. This is independent of any selection you made for importing content. If you select this option, the theme will be imported, and the site's theme assignment will be updated as well.
- None
- Select this option if you don't wish to import any "site" files, or theme files.
- All
- Select Bundle File From Server (Preferred)
- This is the recommended option. First, you must FTP the bundle file to a location under the Mura webroot. For example,
../wwwroot/temp/. Then, click the Browse Server button, and navigate to the location where the file resides, and select it.
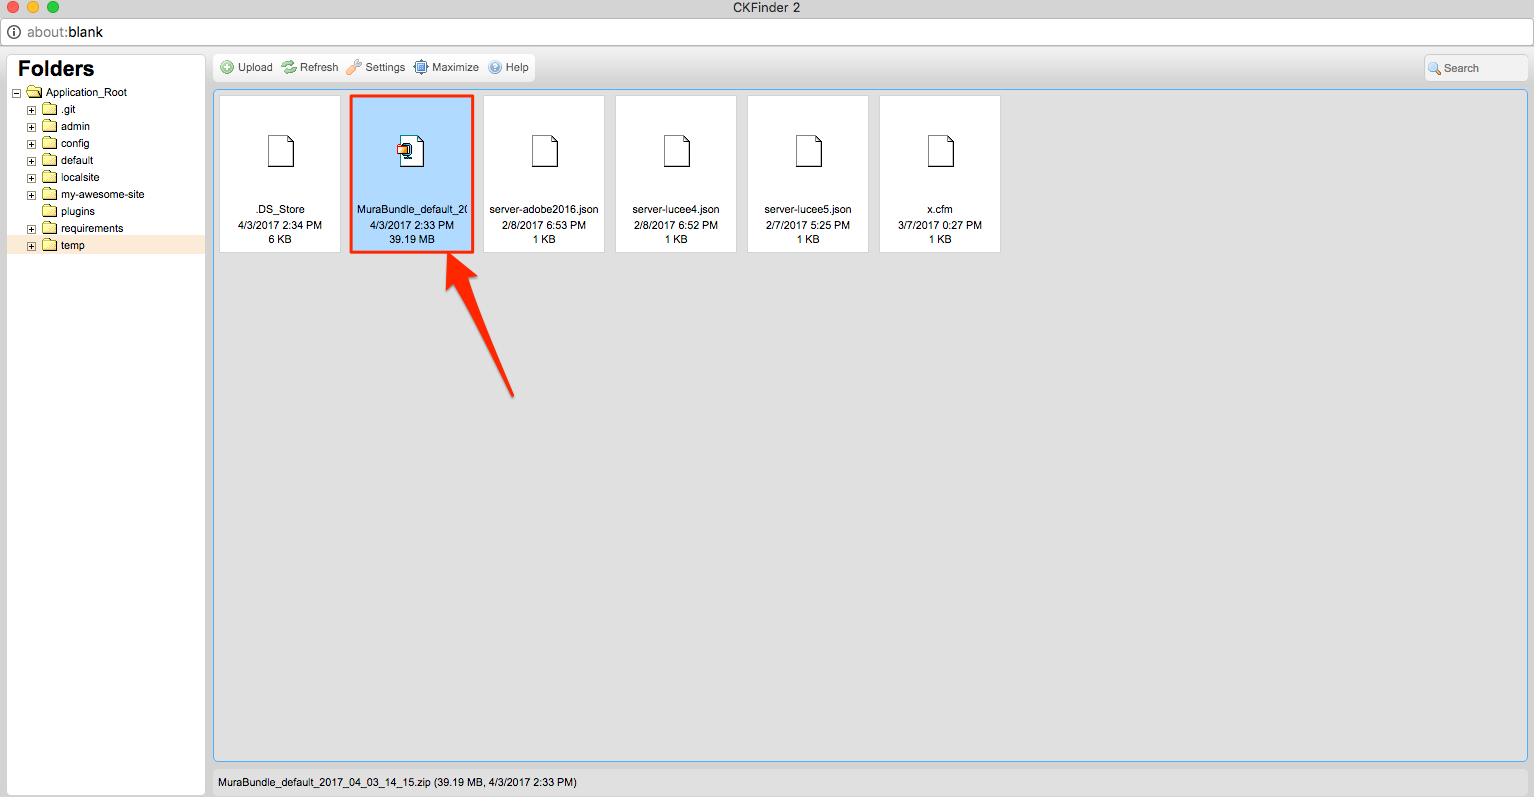
- This is the recommended option. First, you must FTP the bundle file to a location under the Mura webroot. For example,
- Upload Bundle File
- For very small bundle files, this option may work without any issues. However, many browsers and web servers have filesize limits when submitting a form. Many bundles exceed the filesize restriction, so it is recommended to use the first option whenever possible.
- Are you restoring a site from a backup bundle?
- After you've made your desired selections, and you're ready to deploy/import the bundle, click the Save Settings button.
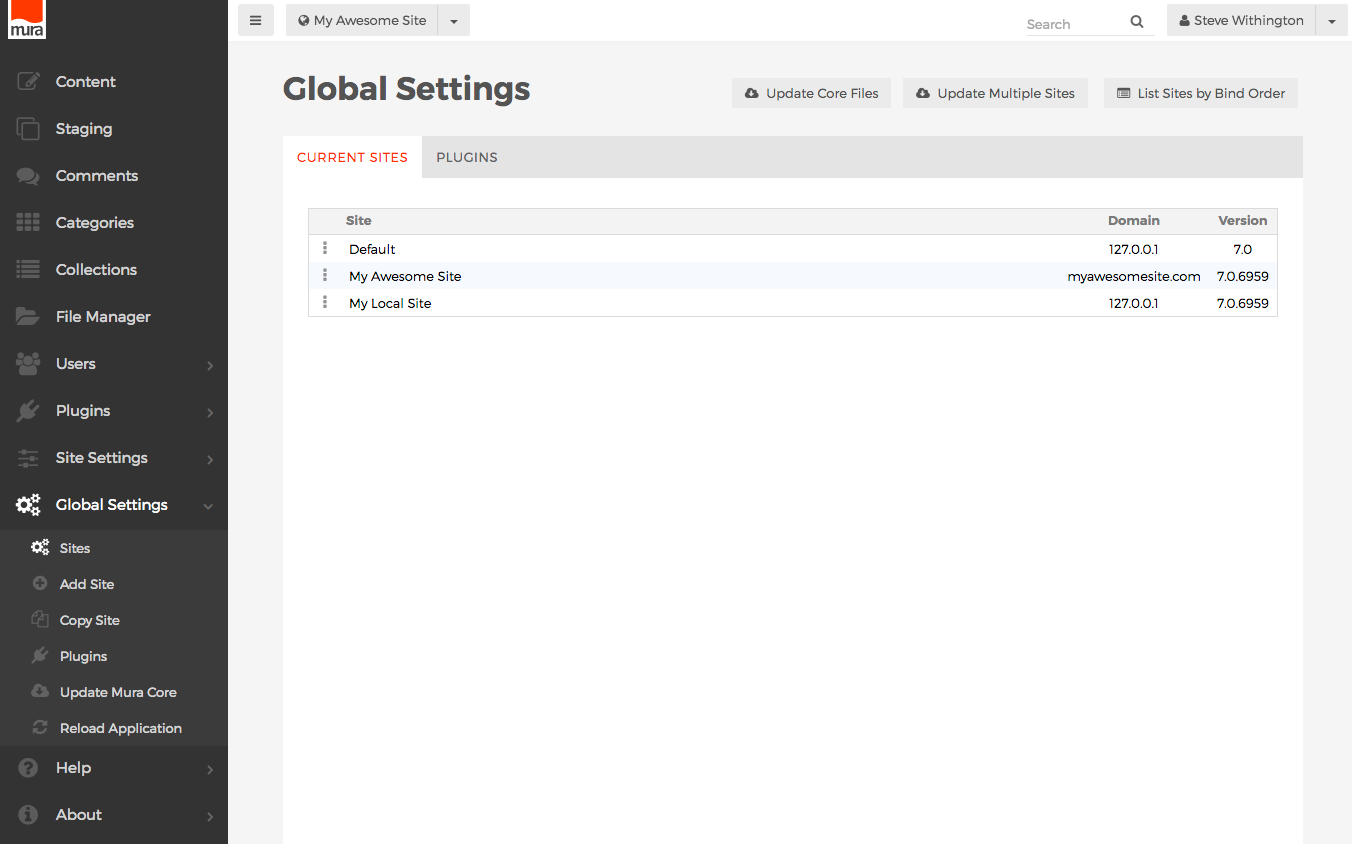
- After your bundle has been imported, you will be taken back to the Global Settings screen.