Member Groups
Member Groups do not have access to the back-end administration area of Mura. The primary use of Member Groups is to provide segmented access to specific areas of your site.
In addition to restricting access to specific areas of your site to certain Member Groups, you can also grant editing privileges to one or more Member Groups. This would allow those users the ability to only edit content from the front-end, public facing side of your site.
How to Access Member Groups
- From the back-end administration area of Mura, select Users from the main navigation, then Groups, and click the Member Groups tab.
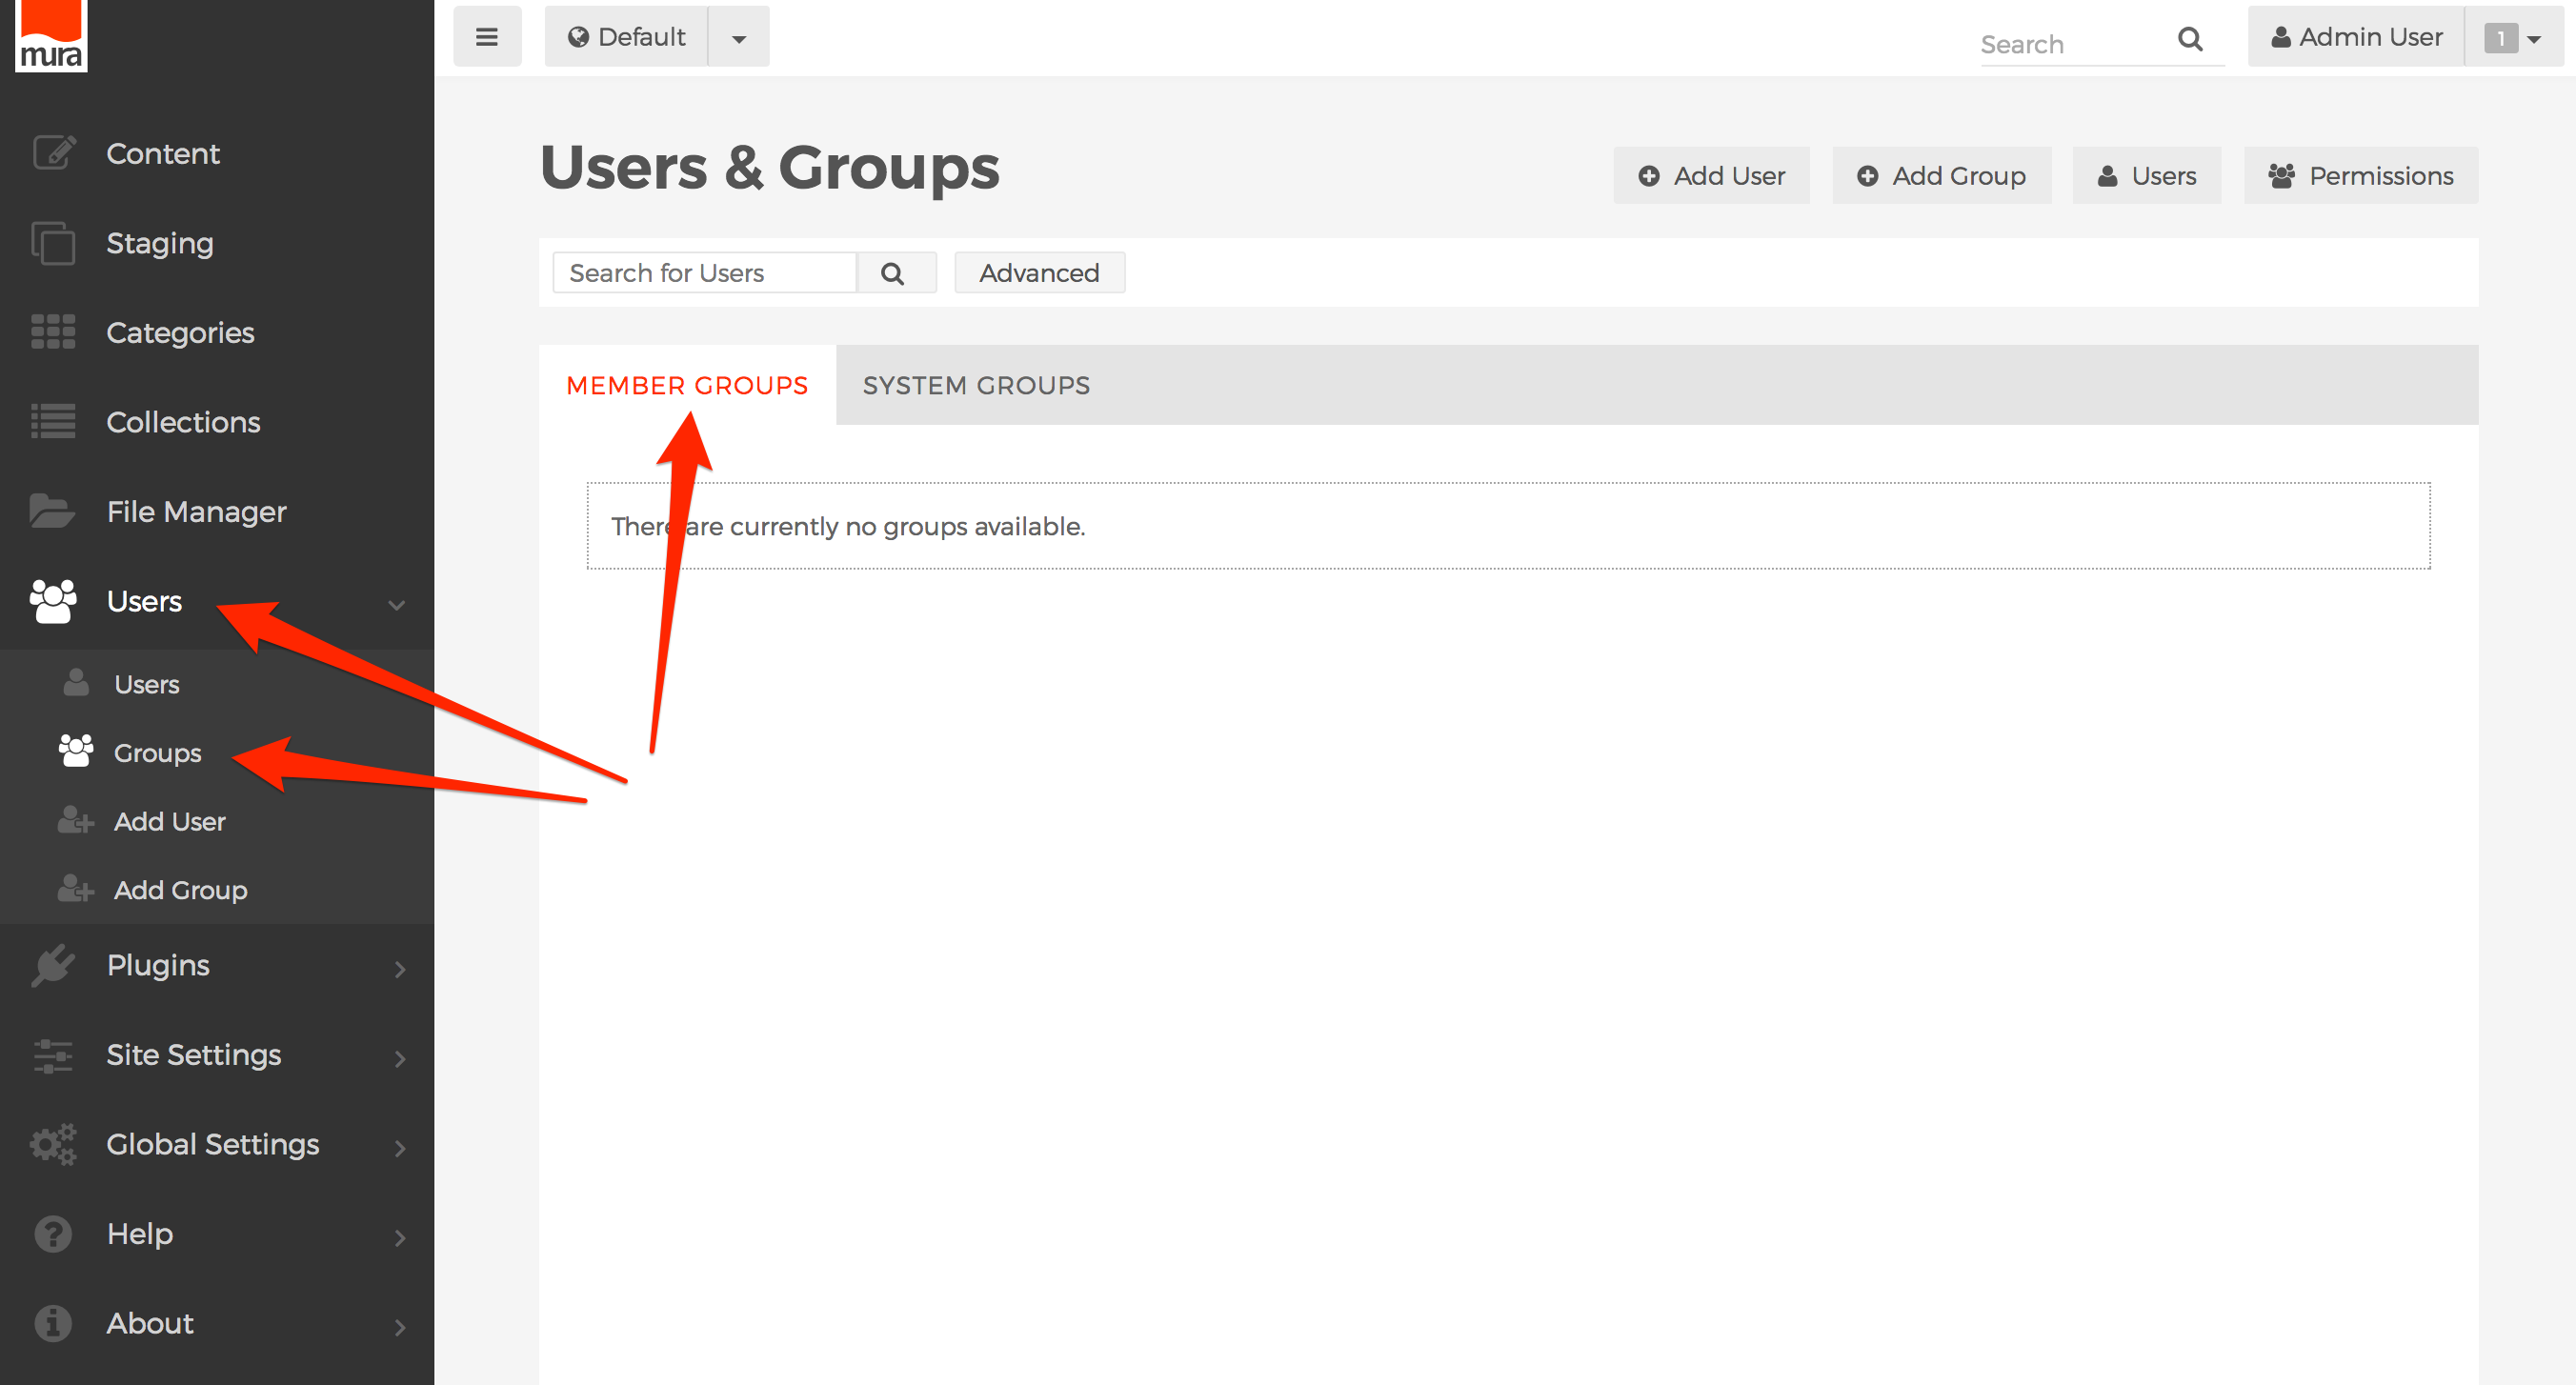
- There are no Member Groups created for you by default.
How to Create/Manage a Member Group
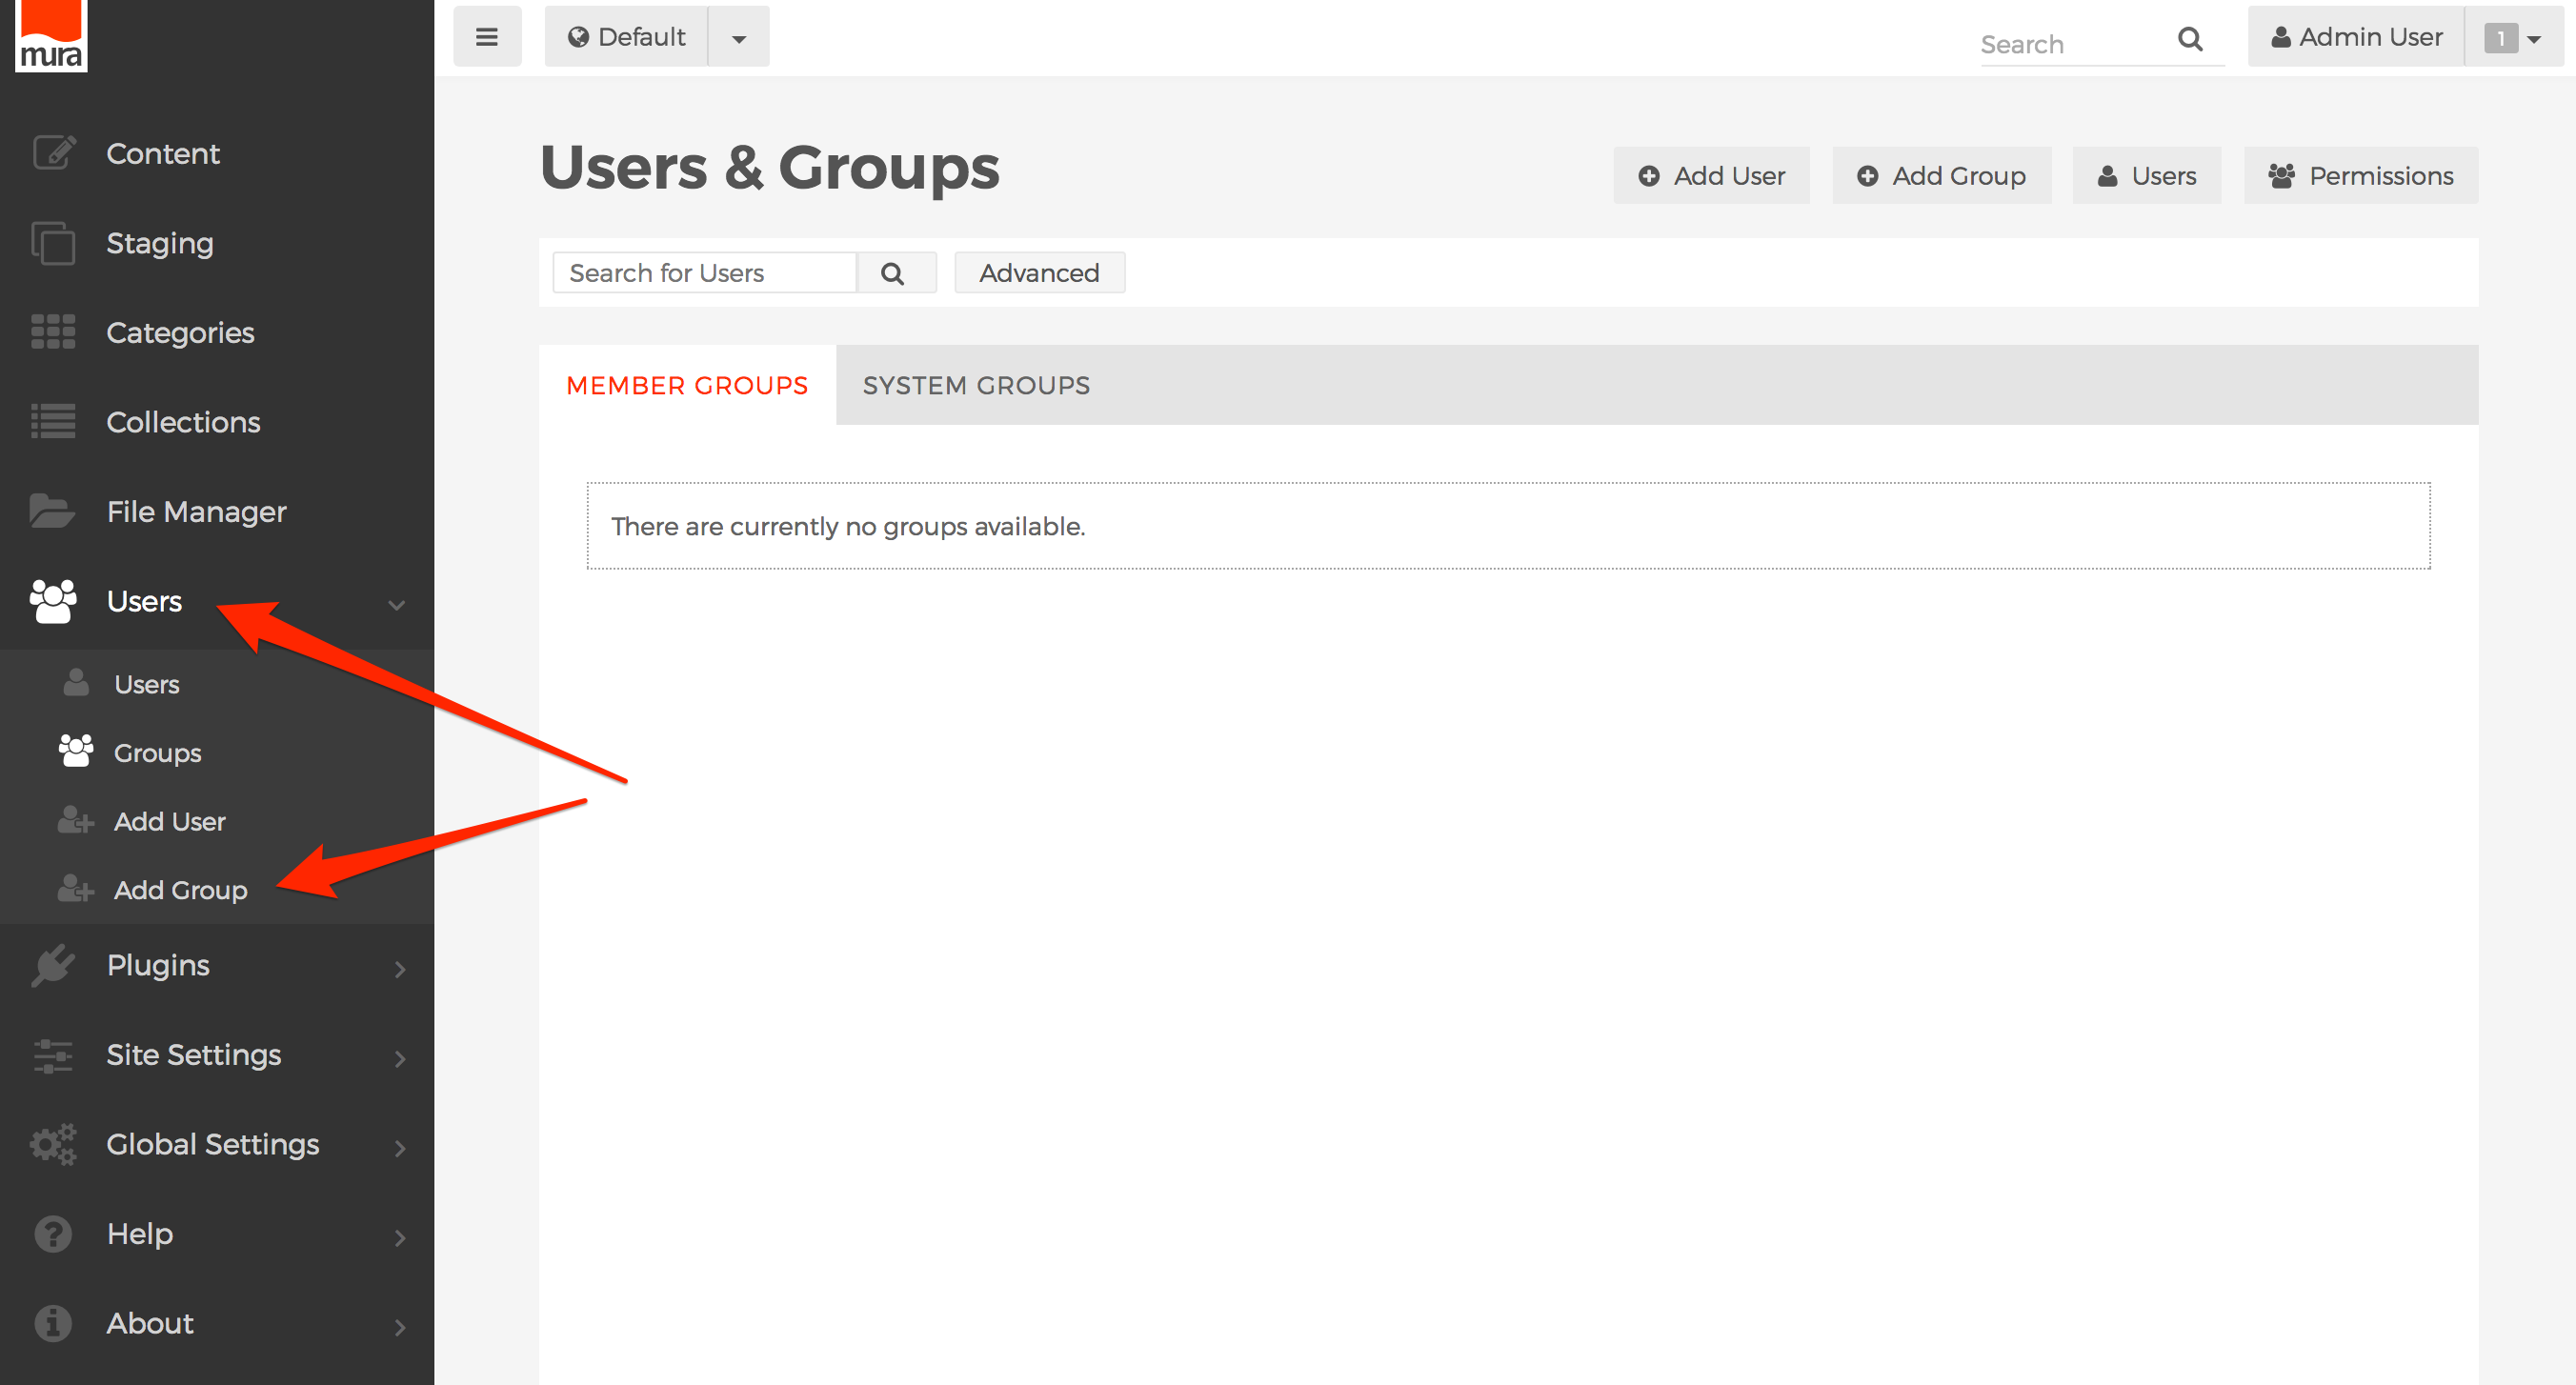
- From the back-end administration area of Mura, select Users from the main navigation, then click Add Group.
- Complete the information on the Group Maintenance Form:
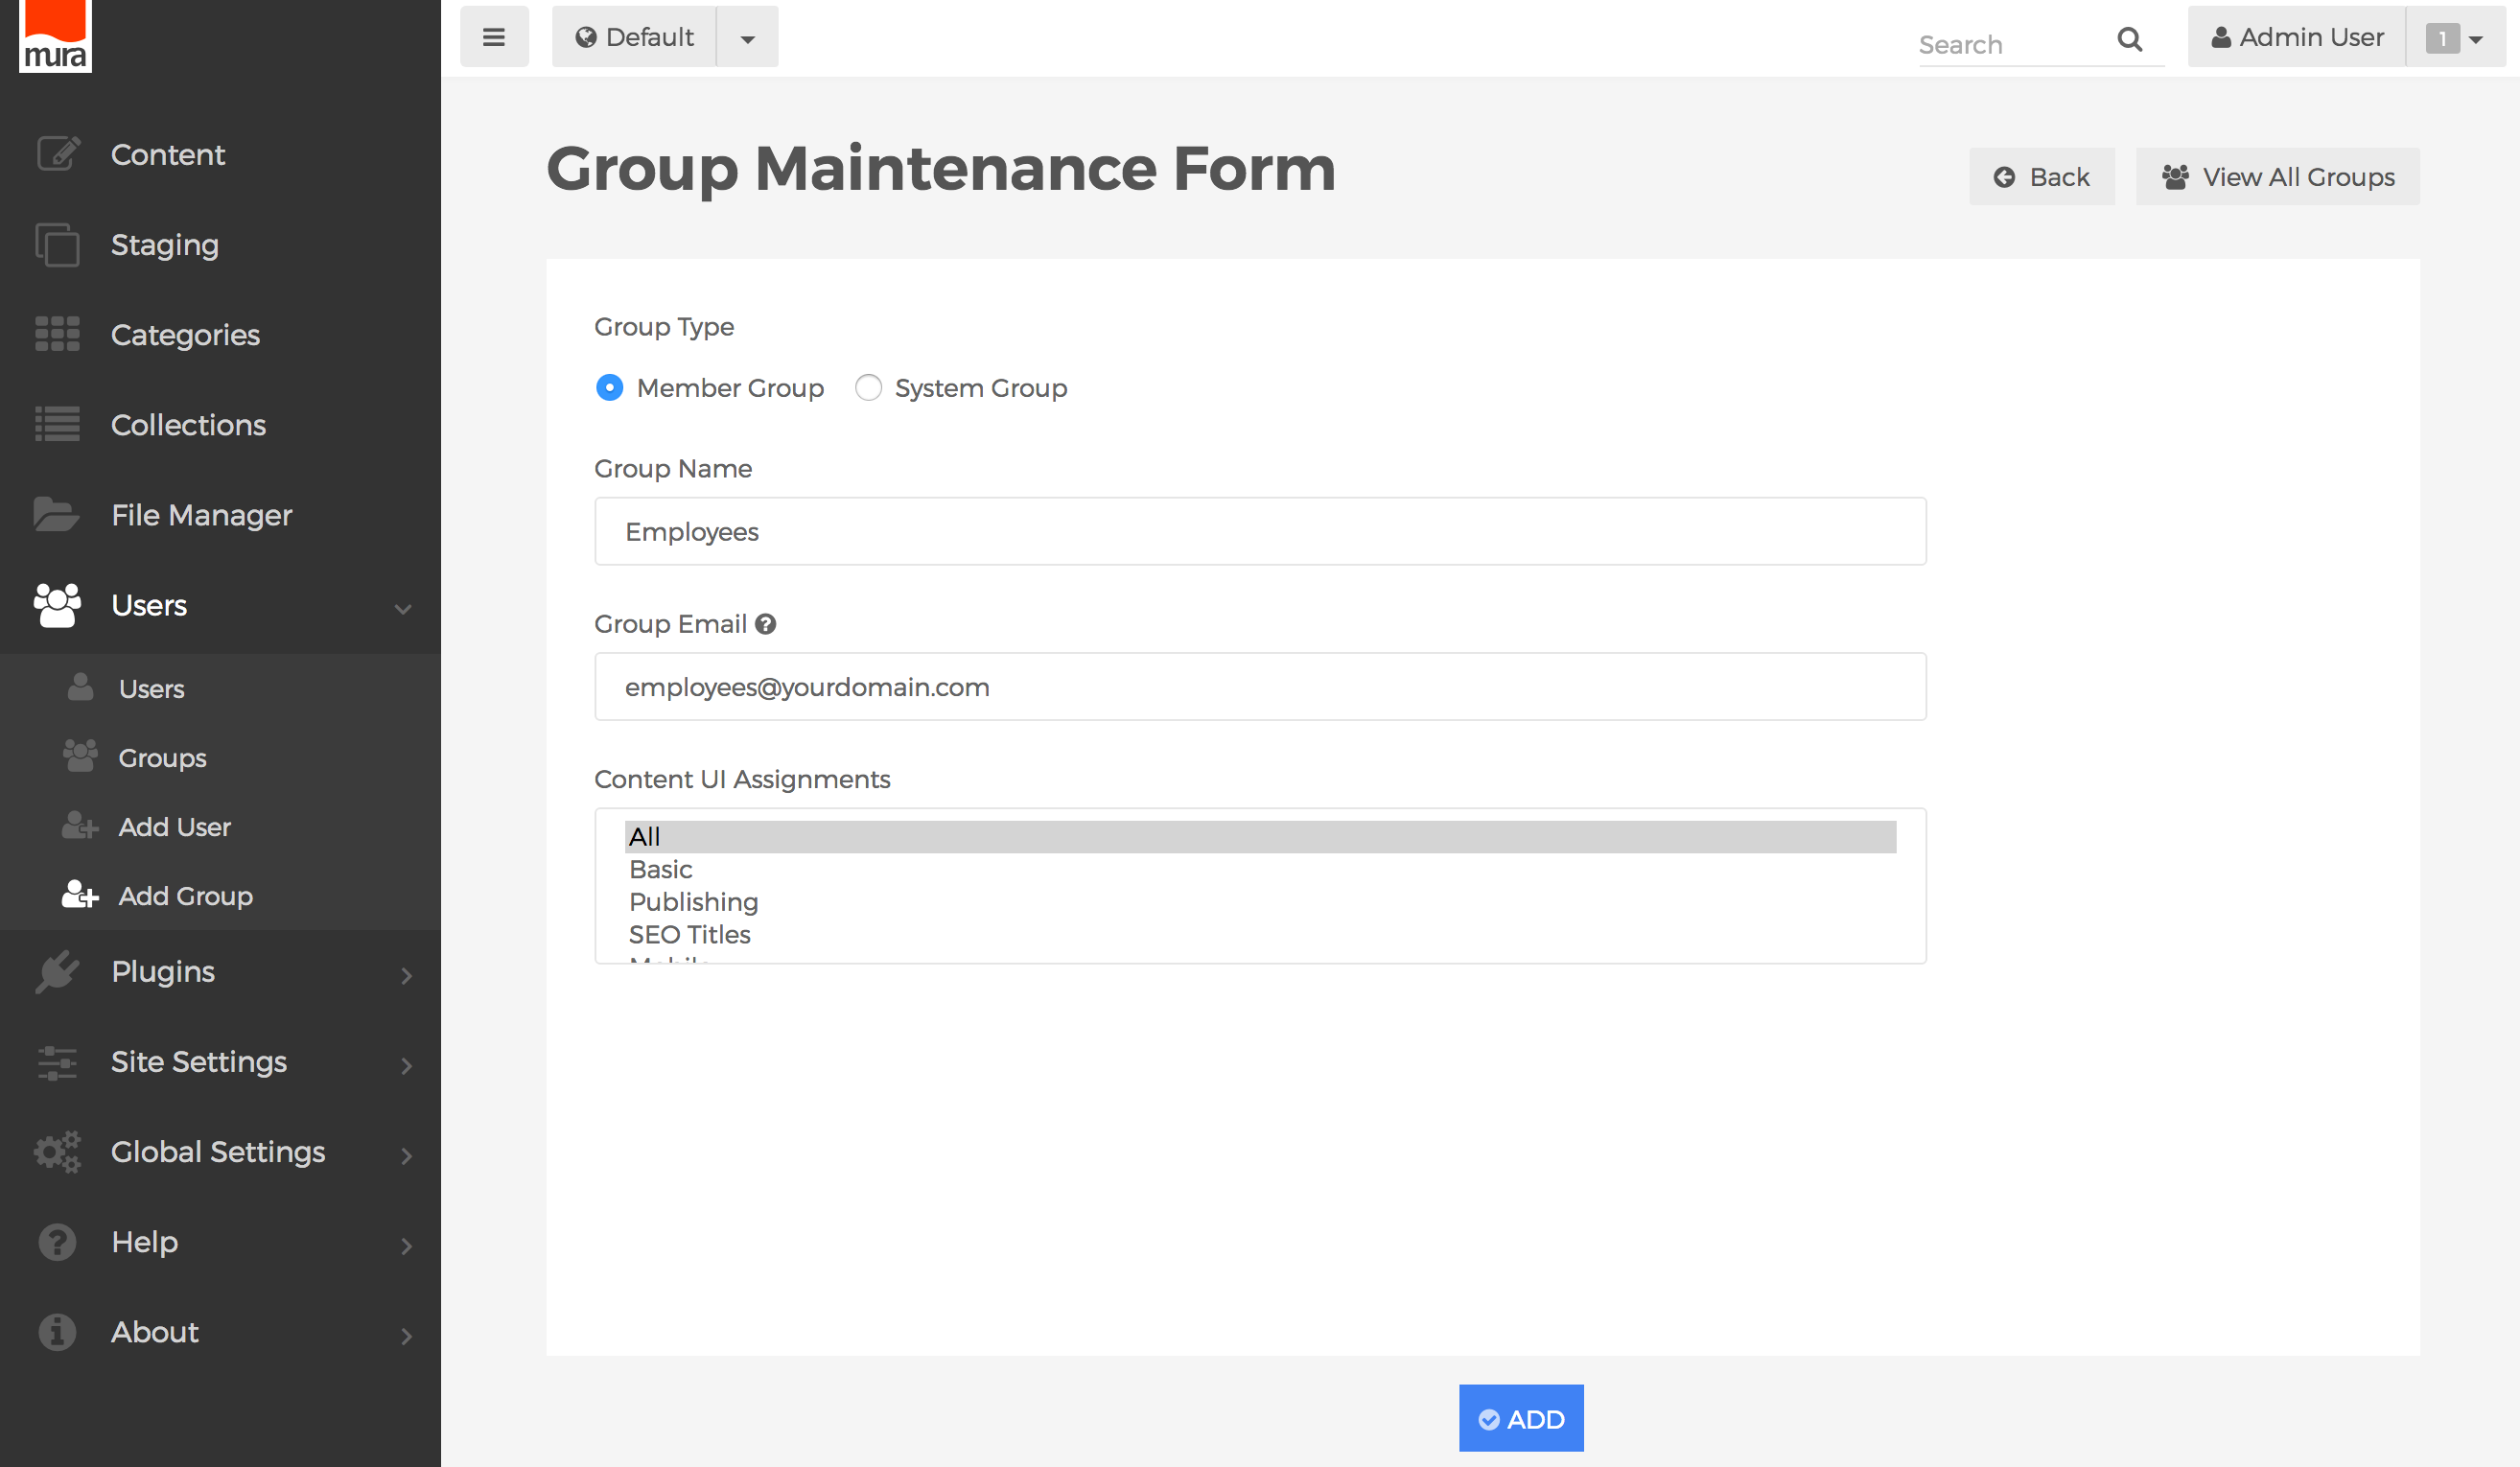
- Group Type
- Select Member Group
- Group Name
- Enter a name for the group. For example, "Employees" or "Board Members".
- Group Email
- If your organization has an email address that includes all users of the group, you may enter it here. For example, "employees@yourdomain.com".
- Content UI Assignments
- You may optionally restrict which tab(s) the group would have access to, if you are going to allow the group editing permissions. To select more than one tab assignment, <CTRL> + Click on a PC, or <Command> + Click on a Mac.
- Group Type
- Click the Add or Update button when finished to save your changes.
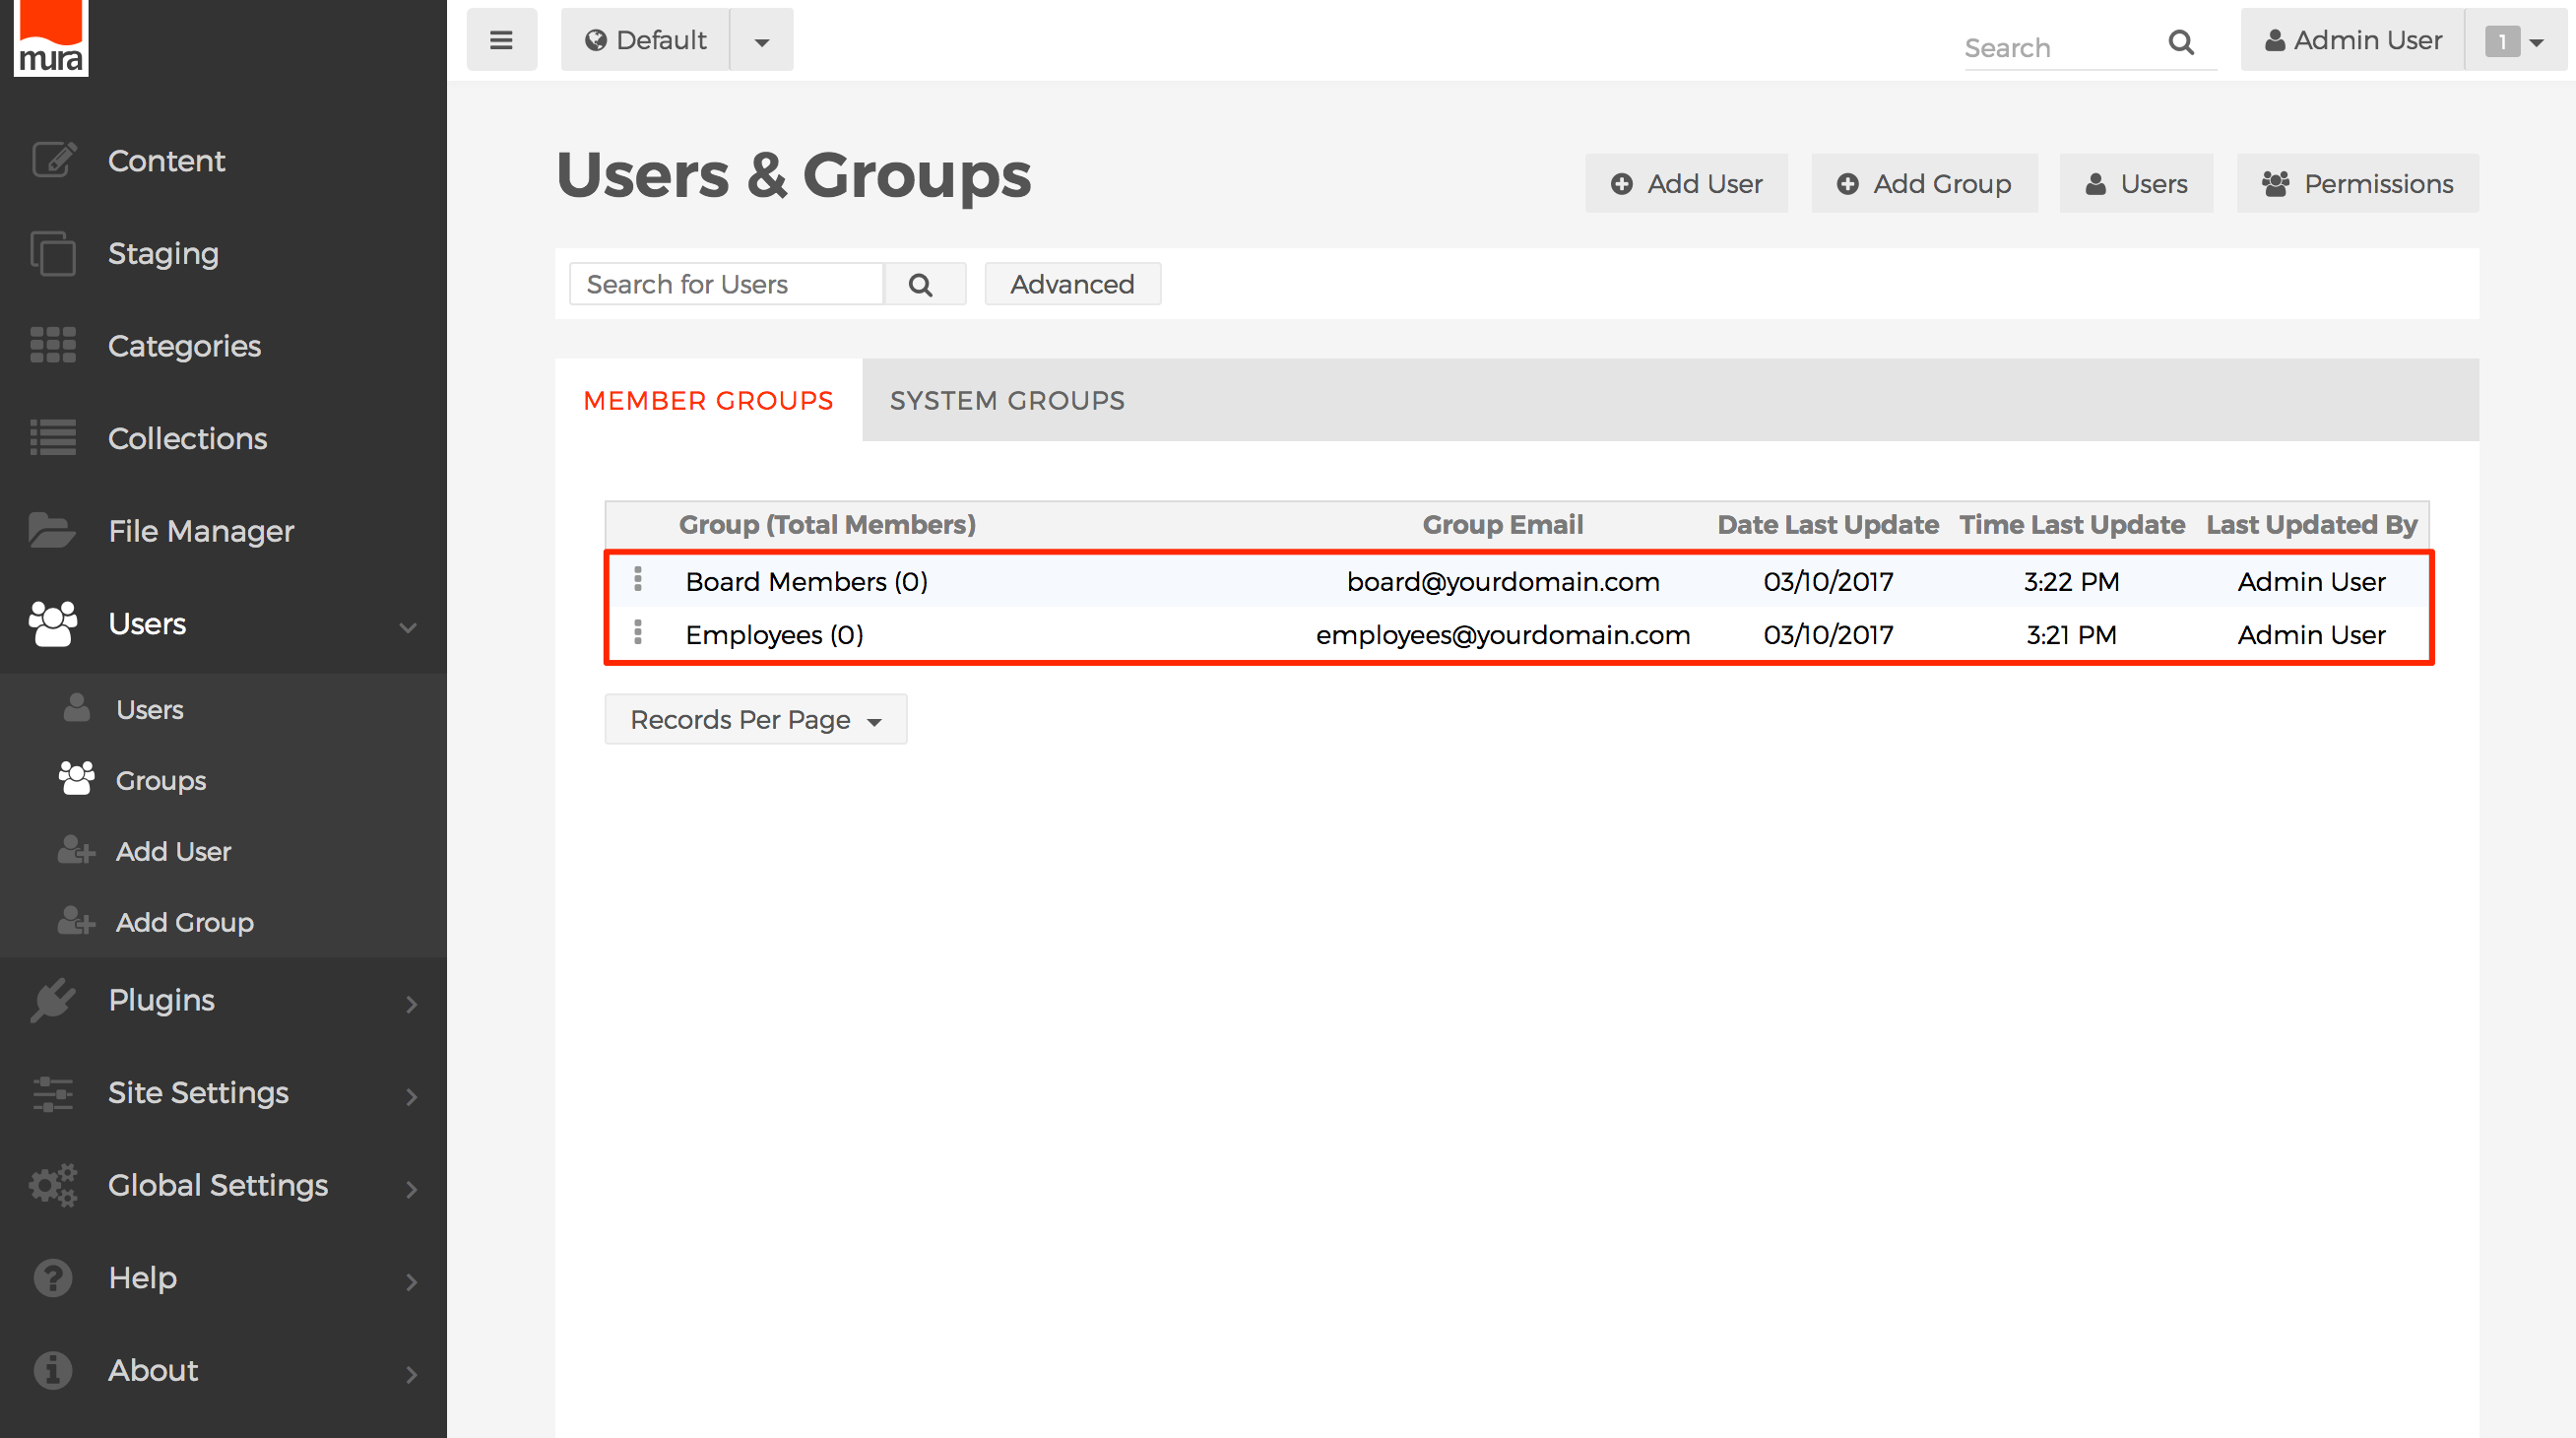
- Your new/updated group should be visible in the listing of Member Groups.
- Repeat these steps for each Member Group you wish to add.
How to Restrict Access to Content
One of the primary uses of Member Groups is to have a way to restrict access to various sections of your site to specific groups. For example, you might have a "Members Only" section of your site, where all users are required to log in. Then, from there, you could have additional sections of the site restricted to very specific groups, such as an "intranet" area for employees, and a "board member" area for board members.
Restricting access to a page, or section of your site, only hides the "body" area of your page. If a user is not logged in, by default, Mura will display the "Summary" field and a login screen. Hence, we do not recommend entering any sensitive information in the "Summary" field, unless you have been instructed to do so due to modifications made to Mura by your development team.
To restrict access to your entire site, a content item, or a specific section of your site, and follow the steps below.
- Navigate to the page or section of your site where you wish to restrict access to, and edit it.
- Select the Publishing tab.
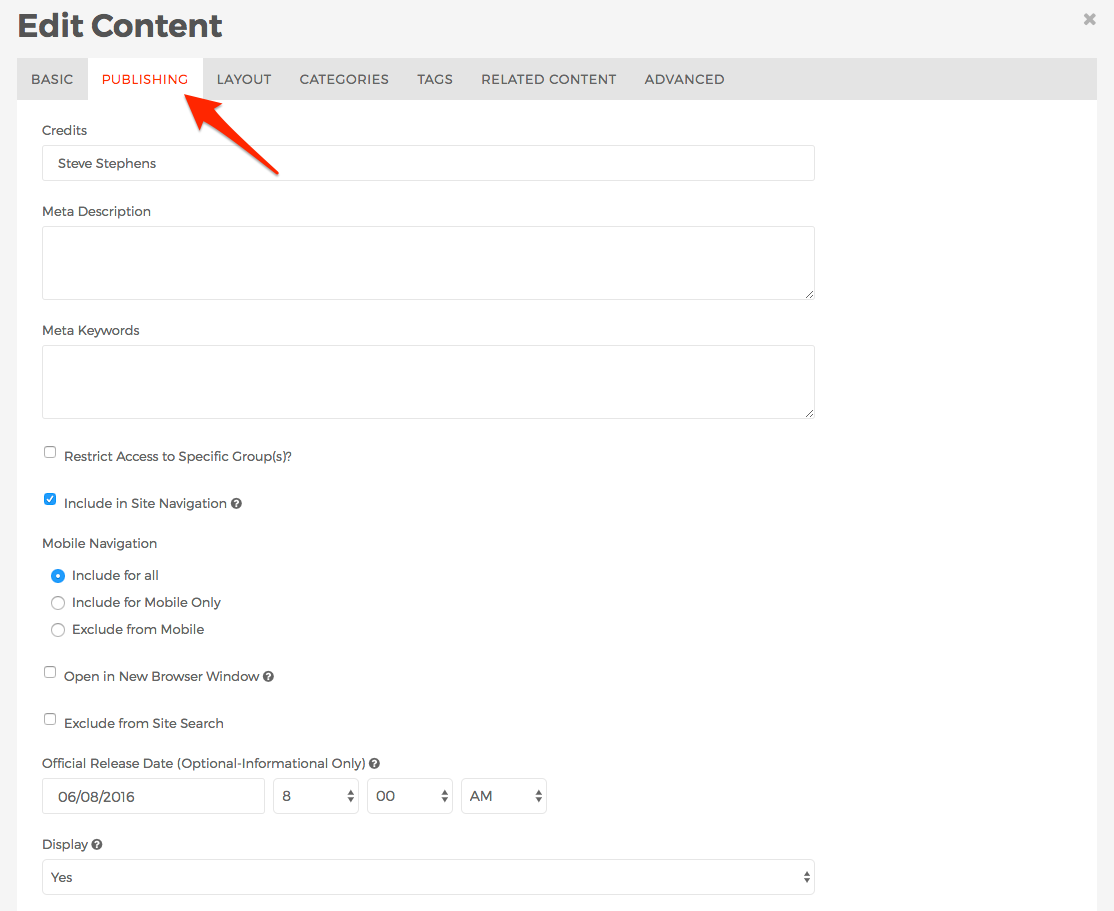
- Scroll to the field labeled "Restrict Access to Specific Group(s)?"
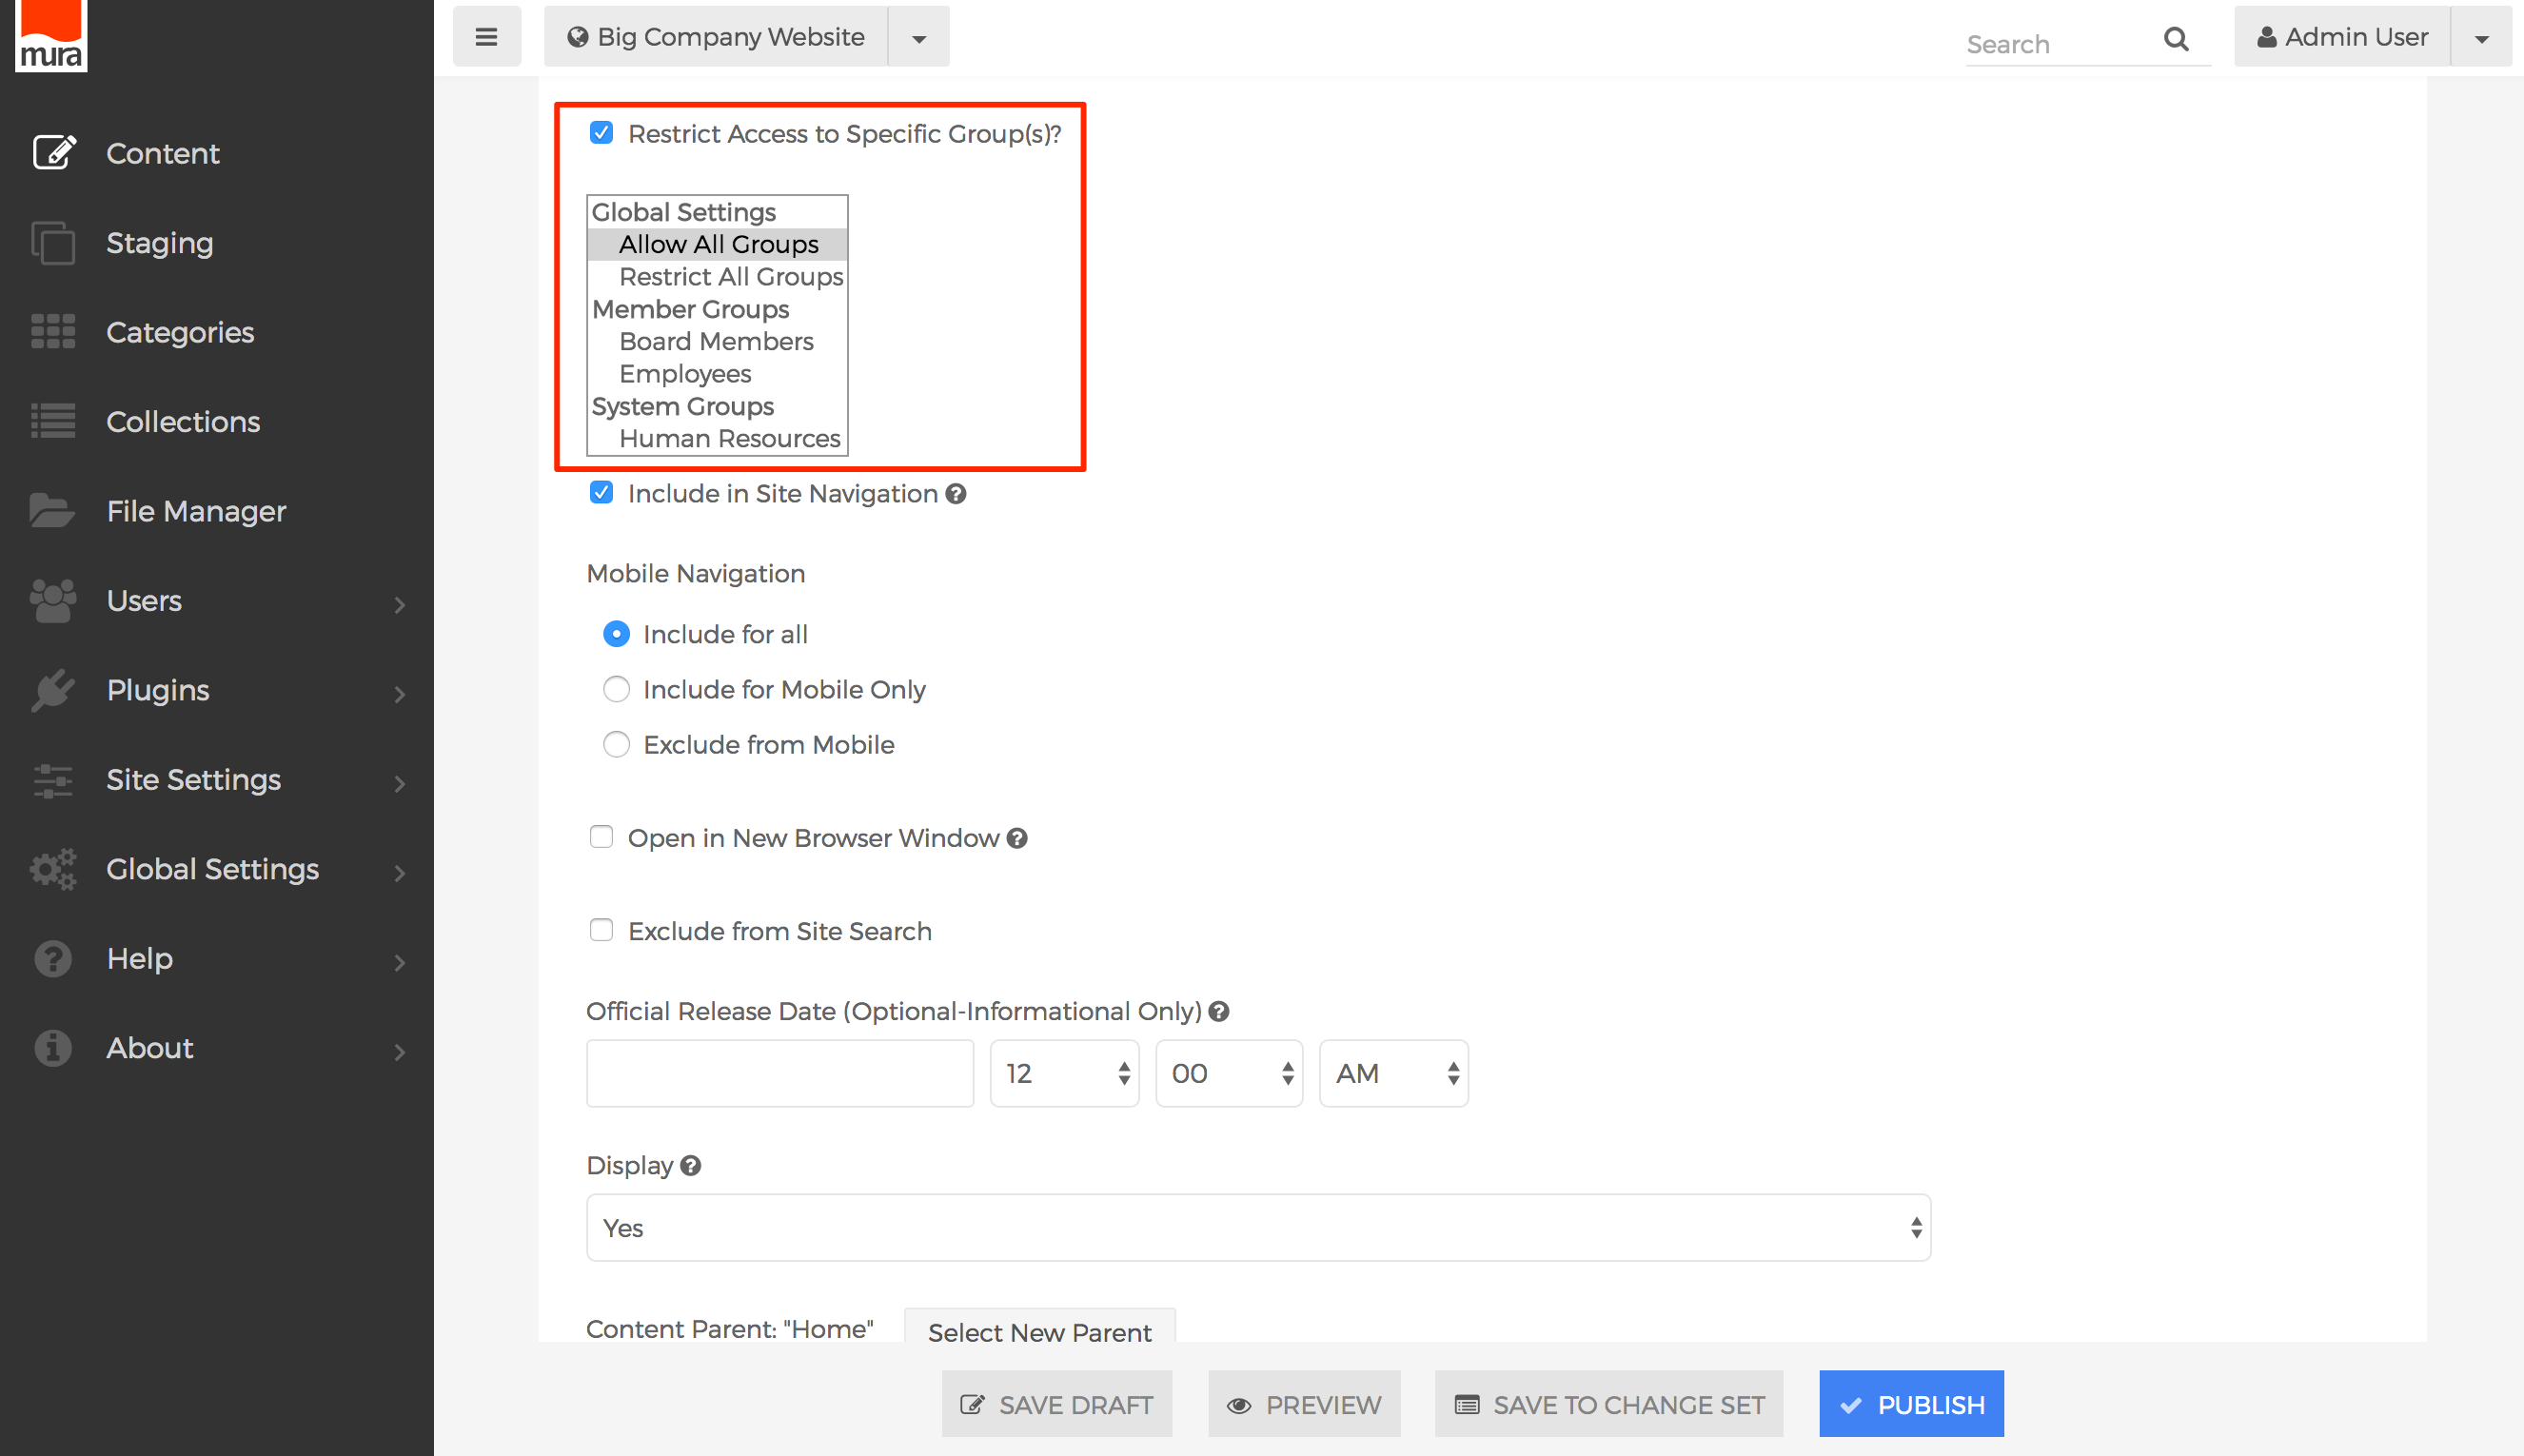 Note: This field will only appear if Extranet (Password Protection) is enabled via the Site Settings > Edit Settings > Modules tab.
 - You may <CTRL> + click (via PC) or <CMD> + click (via Mac) to select more than one group.
Note: A commonly asked question is whether or not it is possible to hide navigational links to "restricted" pages if a user is not logged in. The short answer is no. However, only the top-most link would be visible, and no links to child content would be generated. This is why we typically recommend creating a "Members Only" section of your site, and then enforcing more specific restrictions to content beneath that.